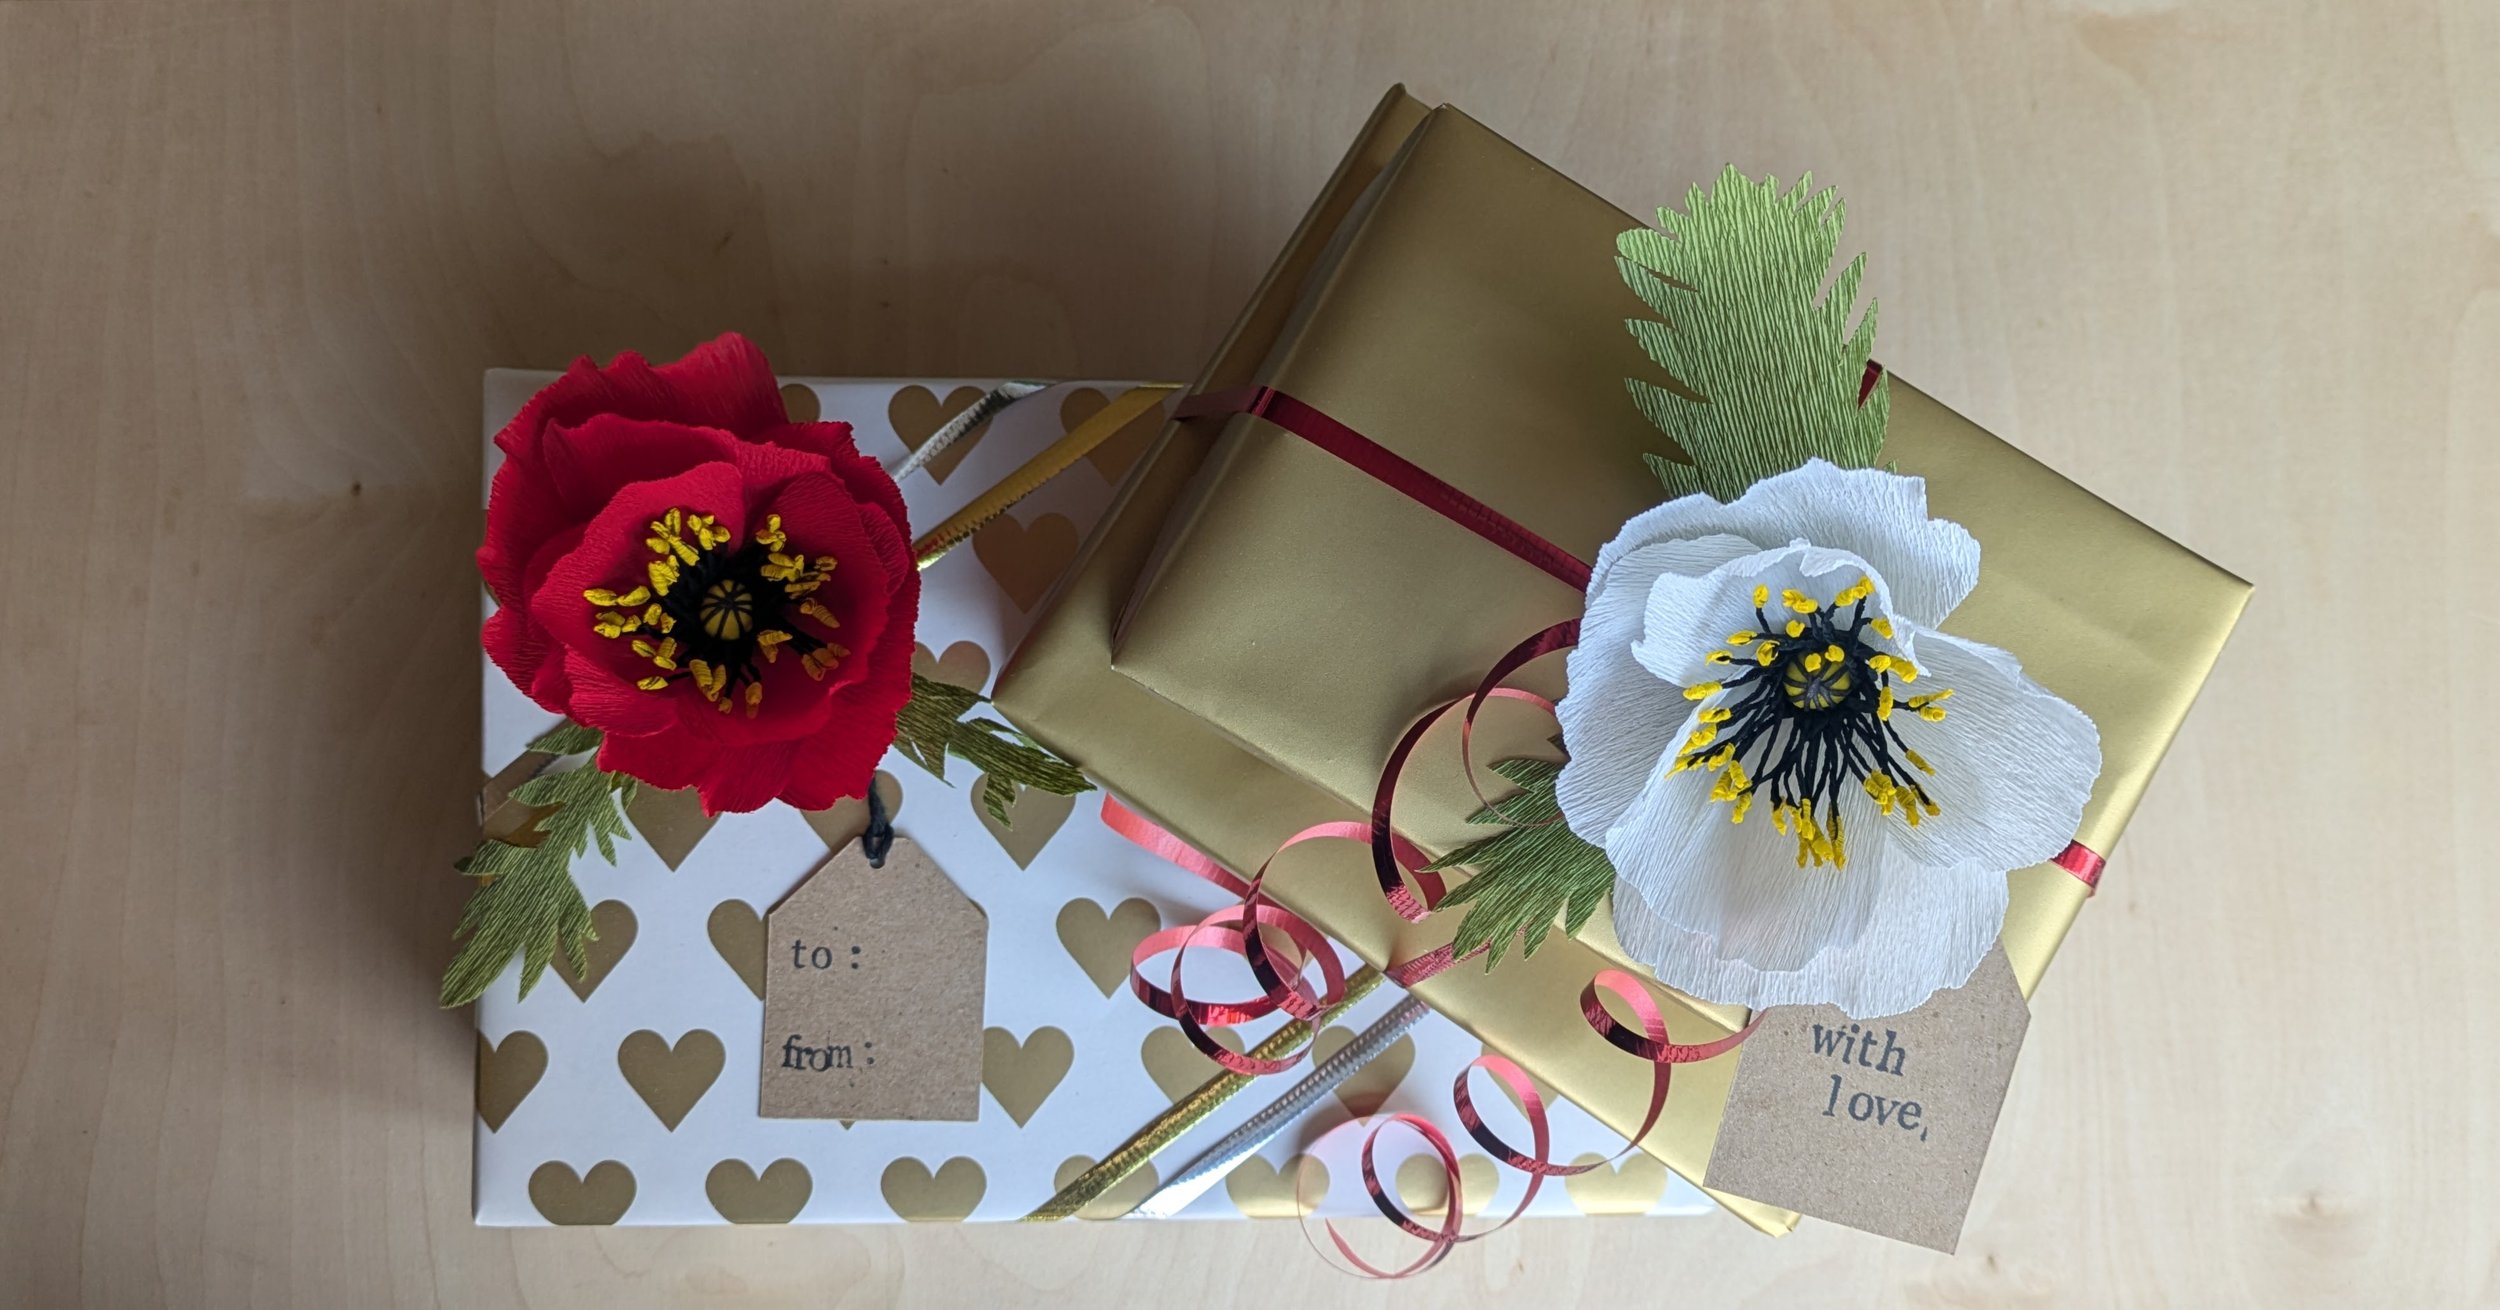
Crepe Paper Poppy Gift Topper Tutorial
Materials
The only tool you’ll need is a pair of scissors.
If you have a pair of needle nose pliers, you may also find those handy.

Step 1: Prepare your tape strip
Find your tape strips. These are double sided and you will be using them throughout your project.
You will use the thin strip and one of the thick strips in their entirety. Cut about half of the second thick strip into squares or small strips. Leave the other half uncut so that you can cut custom-sized pieces as you need them. For now, leave all the tape strips on the parchment paper.
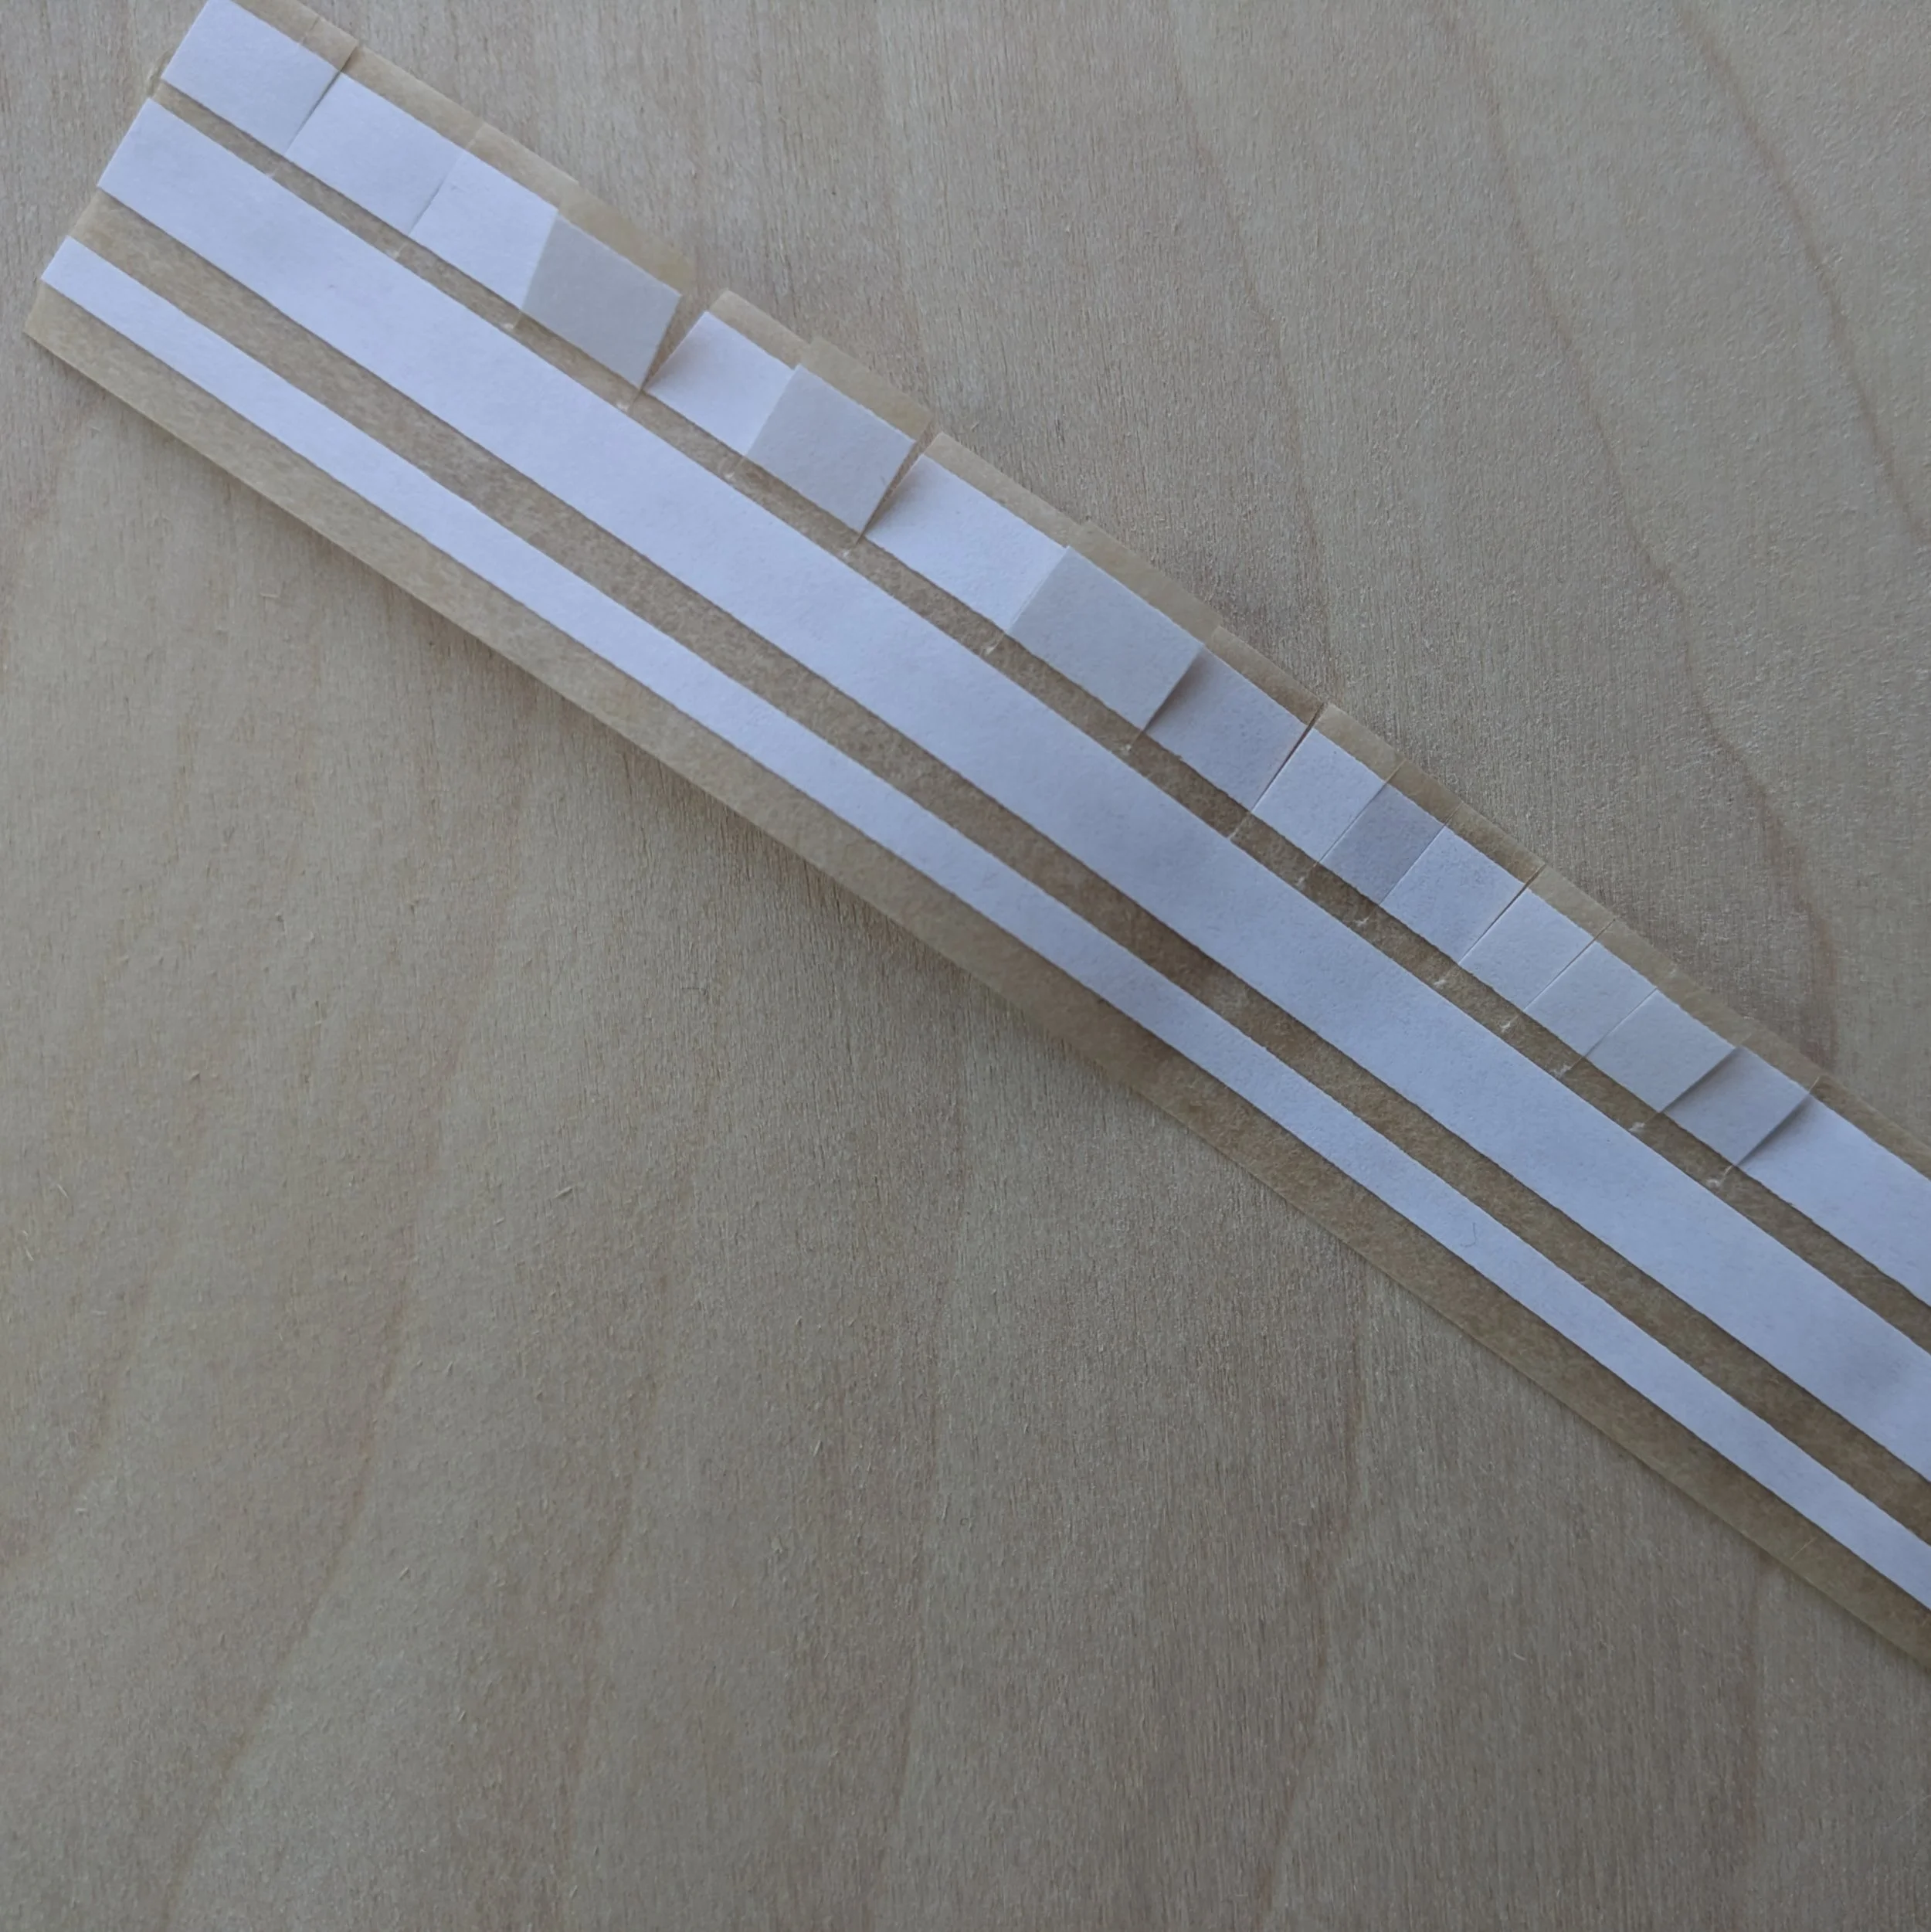
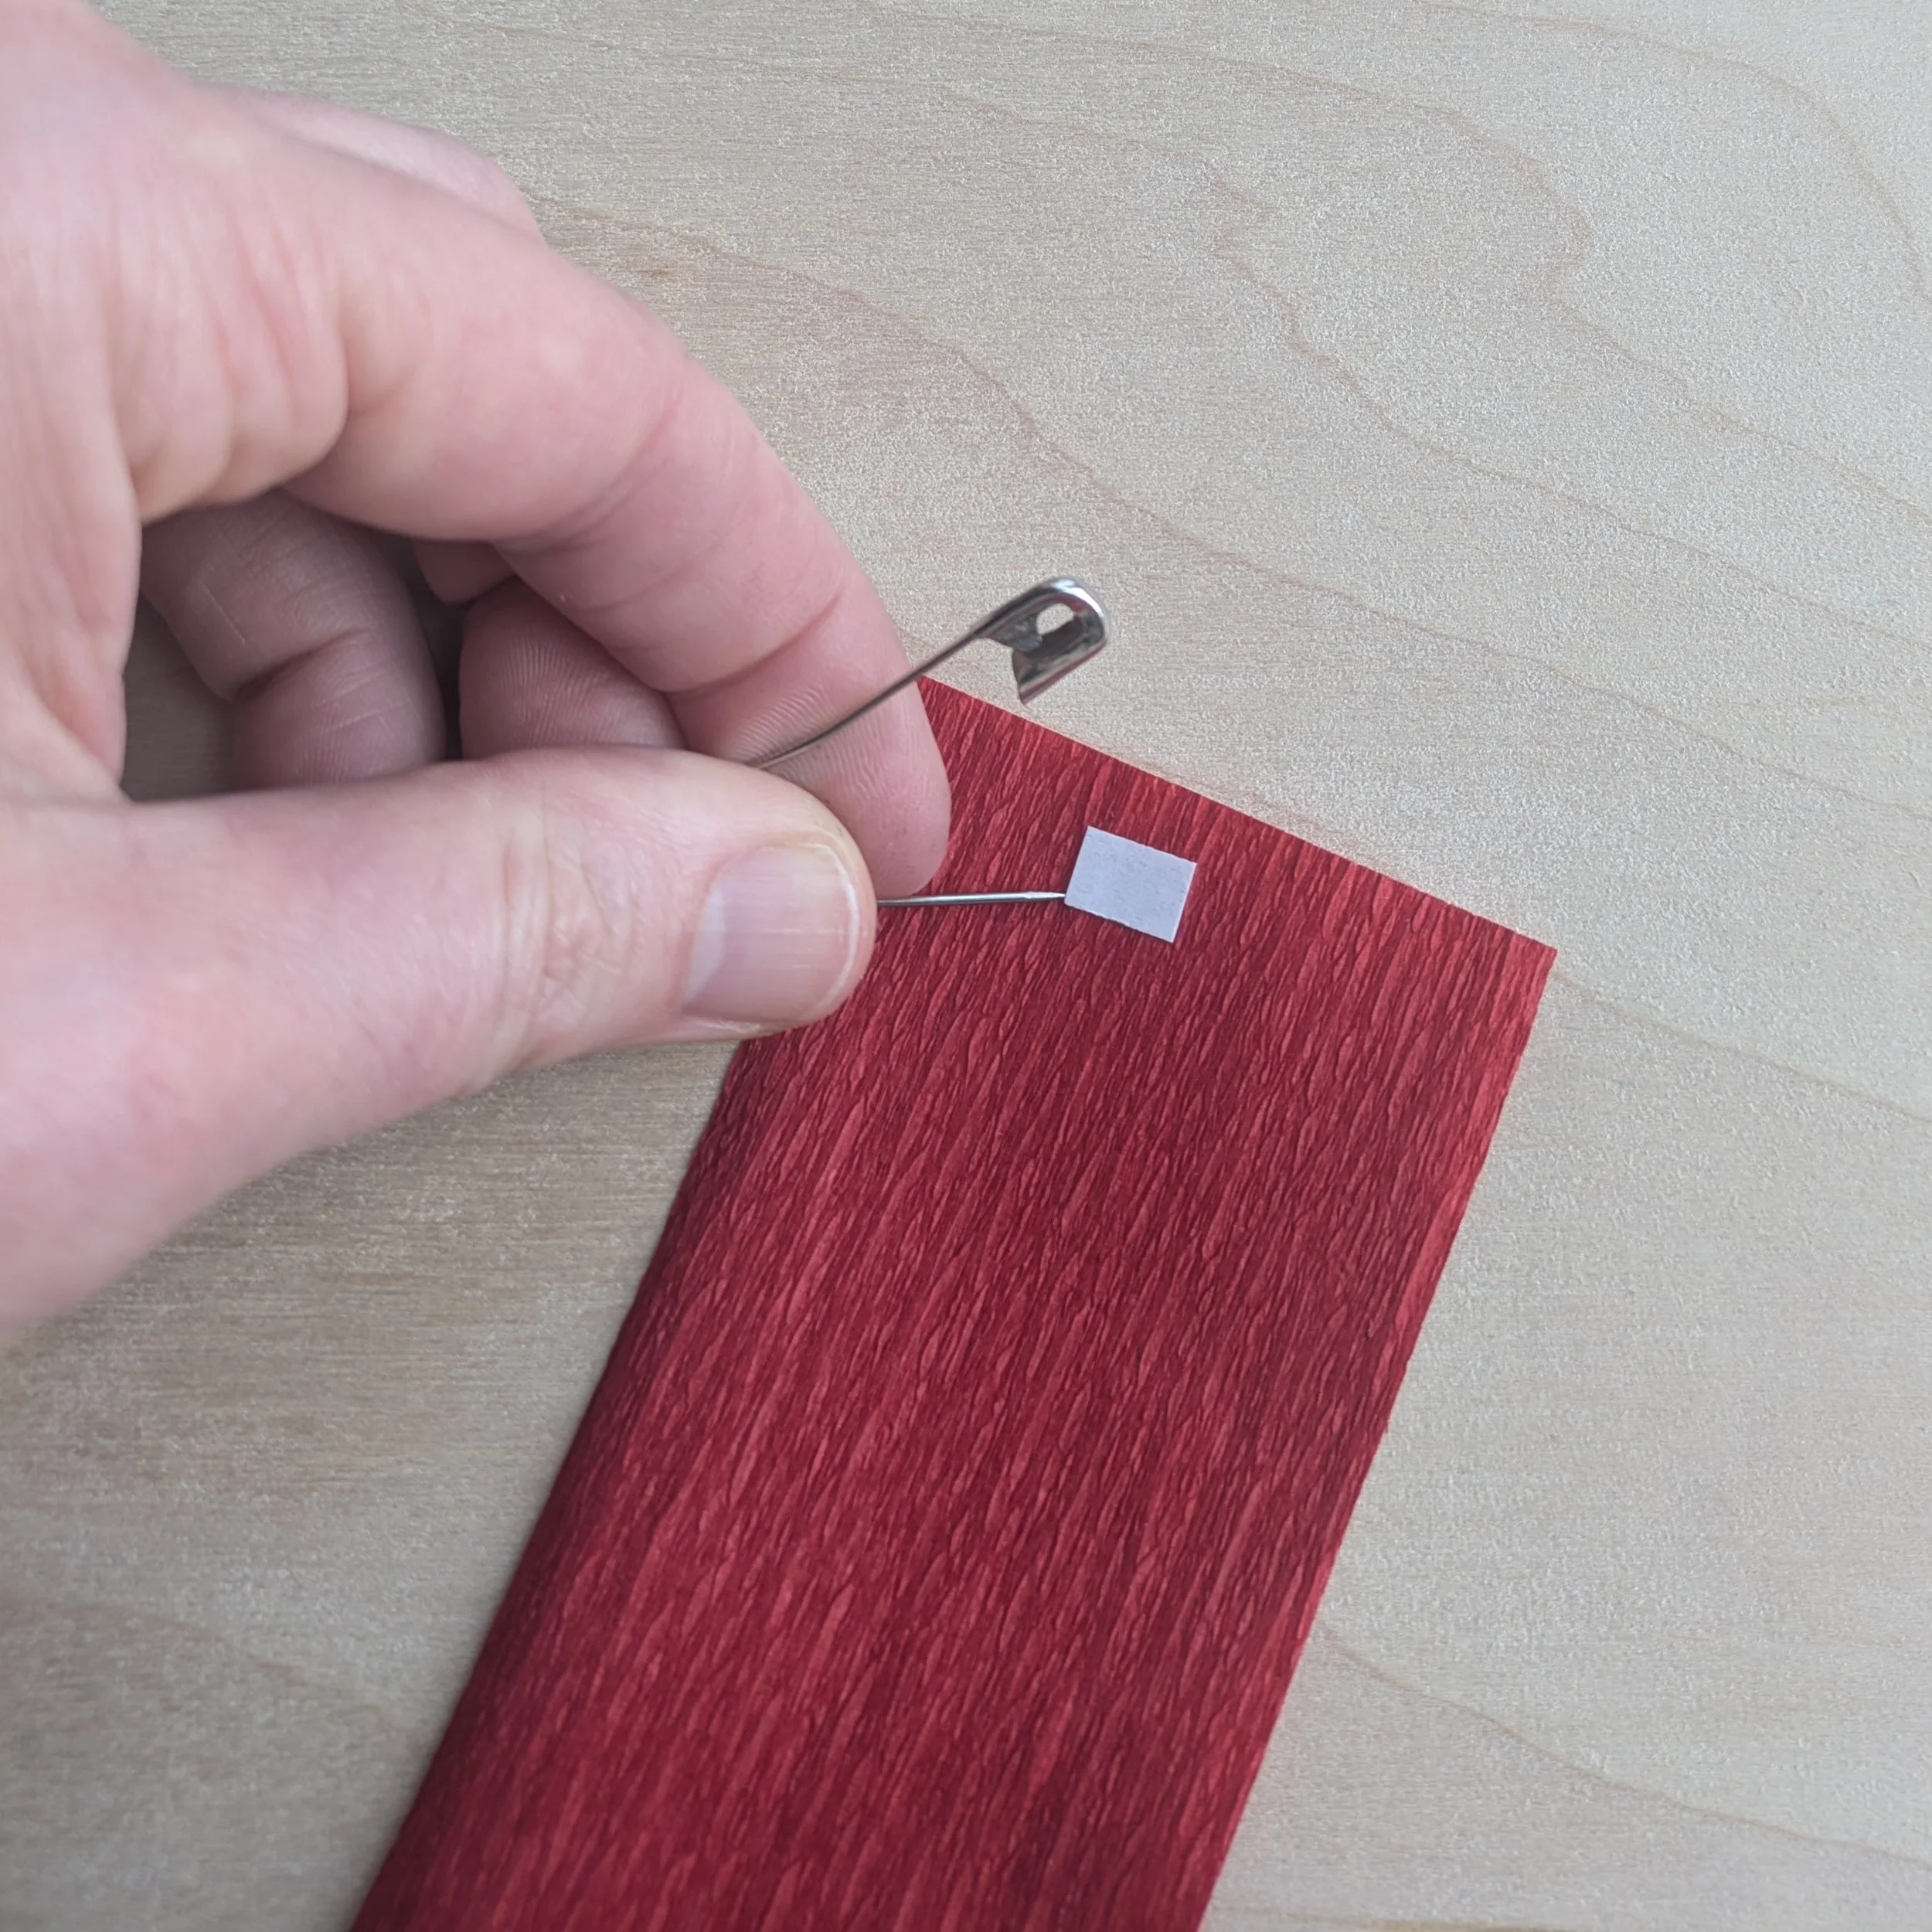
In Step 2, you will use one of these small tape strips for the first time. When you apply the tape strip to your project, it can be difficult to remove the white backing, especially if you have short fingernails. To help help with this, you can use the safety pin included in your kit. When the time comes, you will open the safety pin, slide the sharp tip under the backing, and lift. As you do this, just be careful to not also pull up the tape.
Step 2: Construct the center of your seedpod
Find your fabric strip. Remove one of the small squares of tape you cut in Step 1 and apply it to one end of the fabric strip. Remove the white backing from the tape.
Place the rounded end of your stem wire onto the taped end of your fabric strip.

Slowly spin the wire so that the fabric strip wraps around onto itself. When you get to the end, remove another tape square and apply it to the end end of the fabric strip.
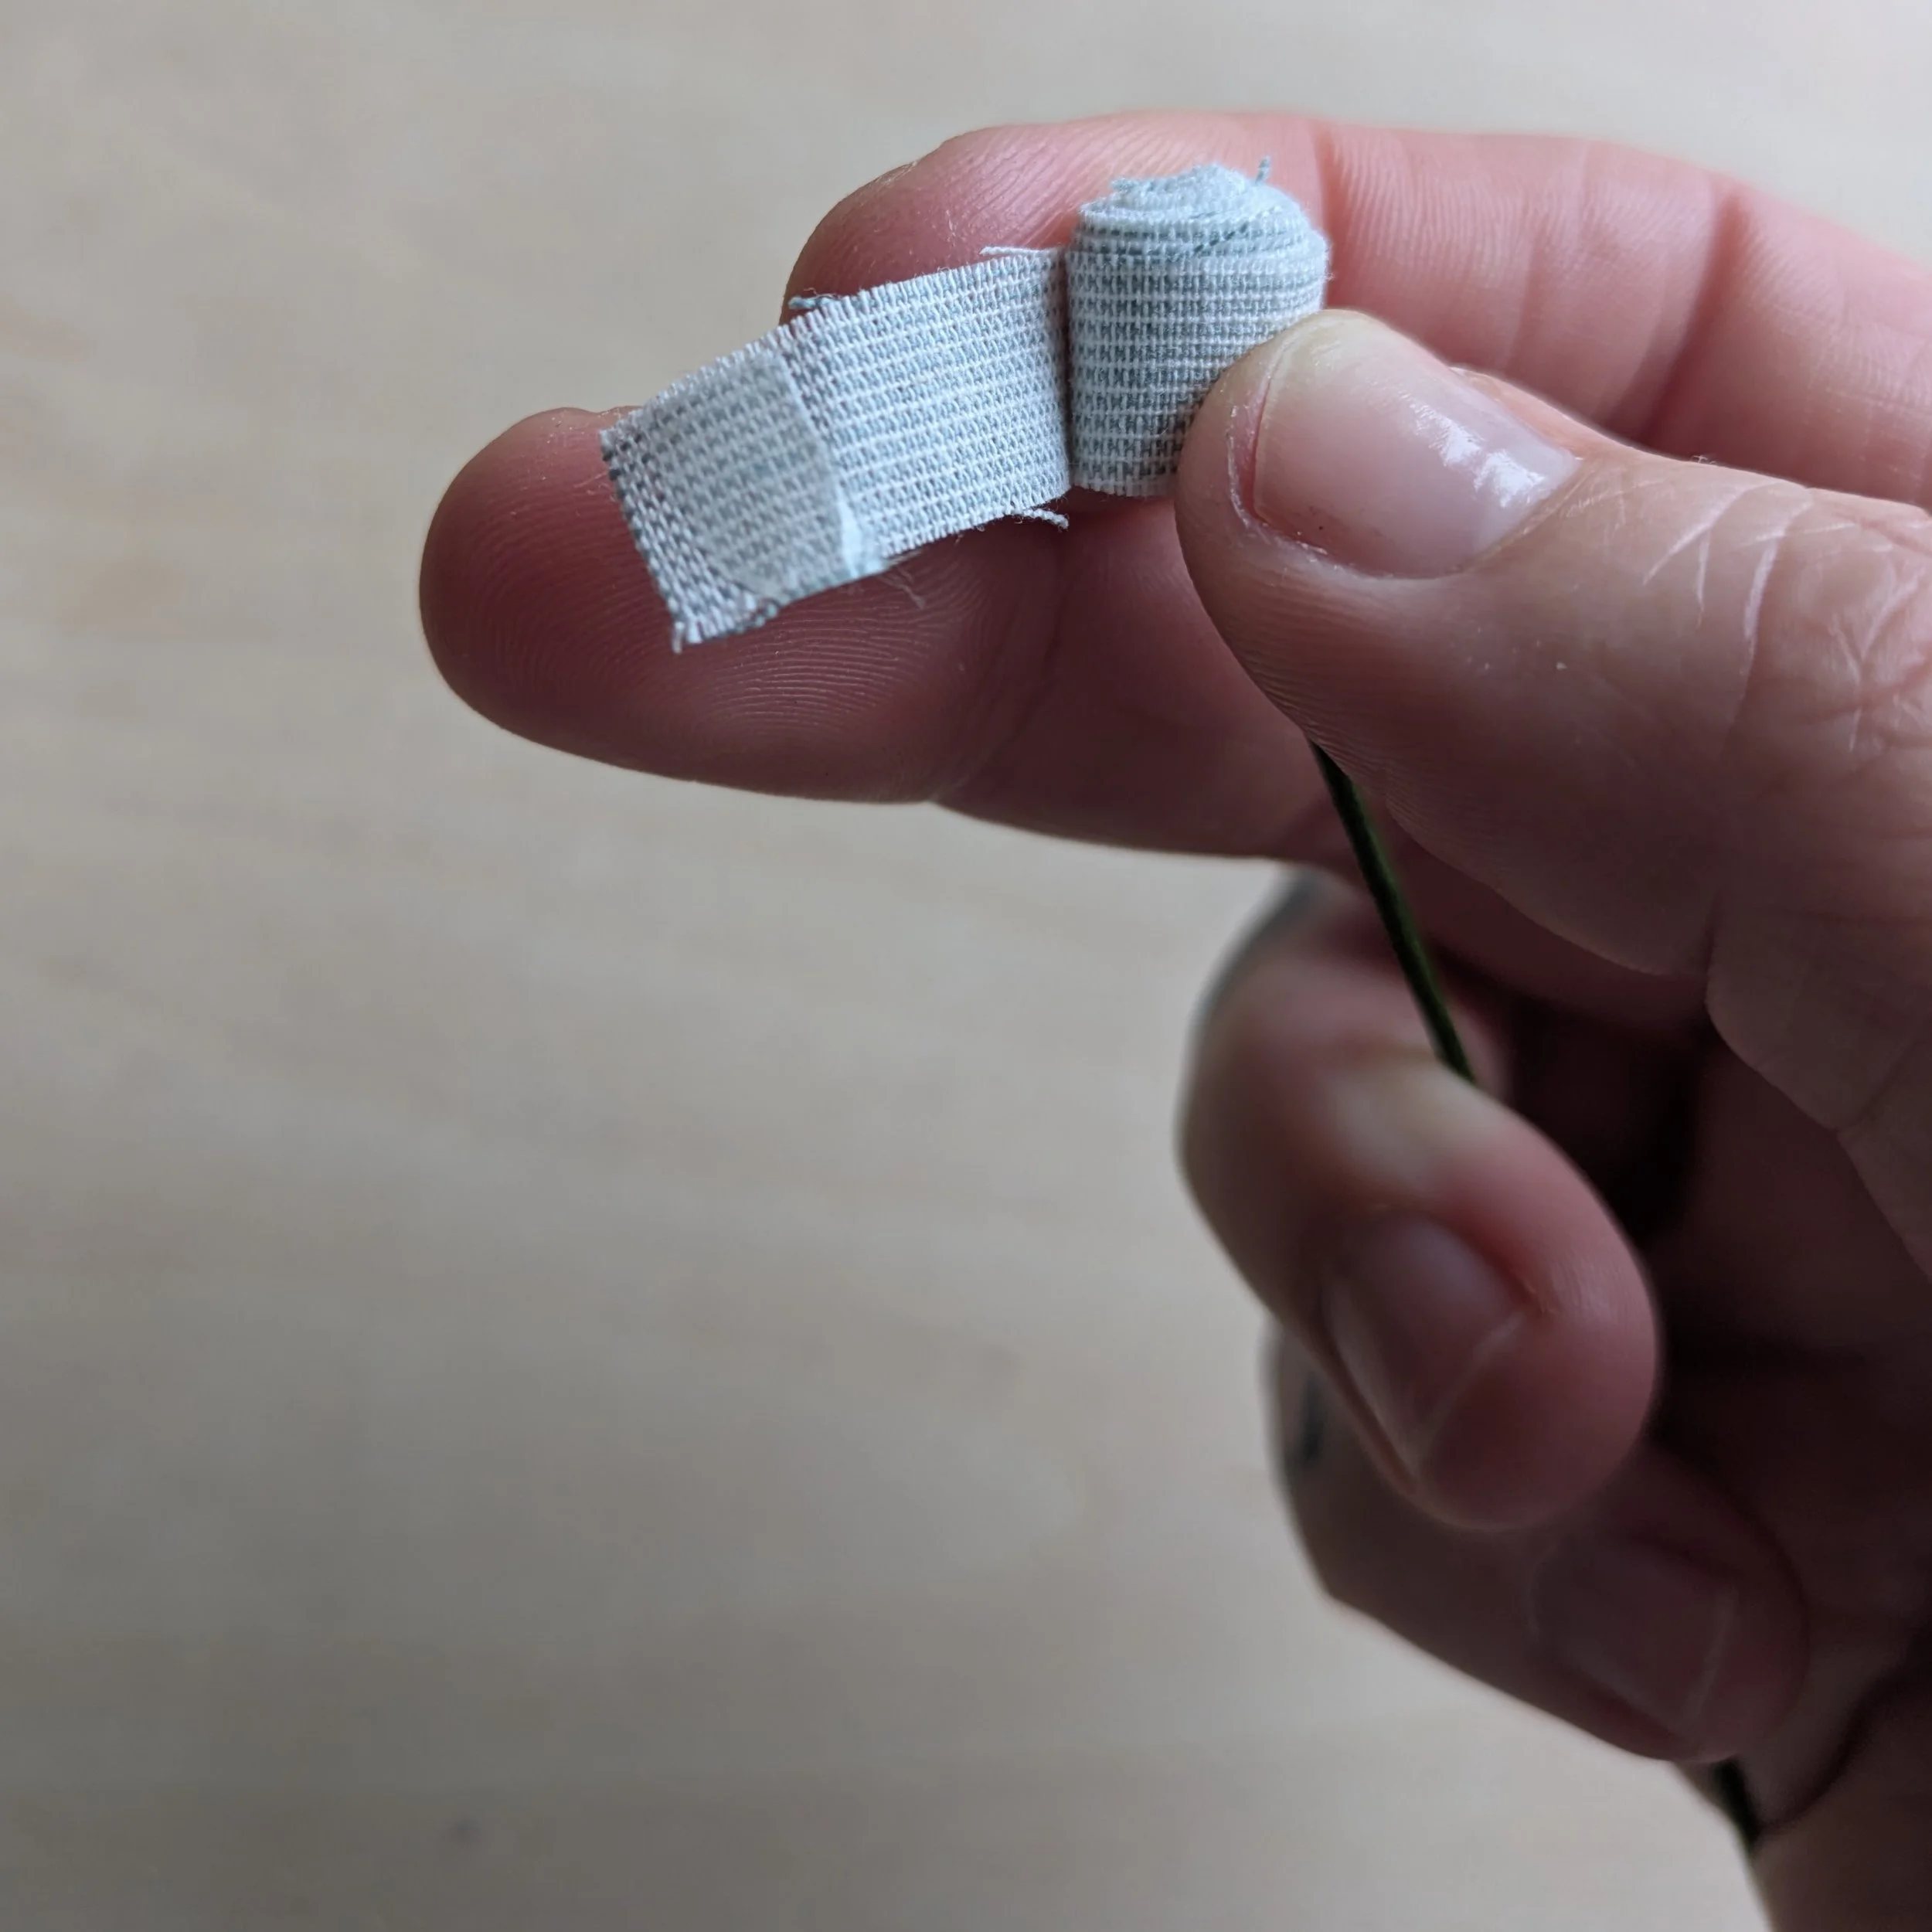
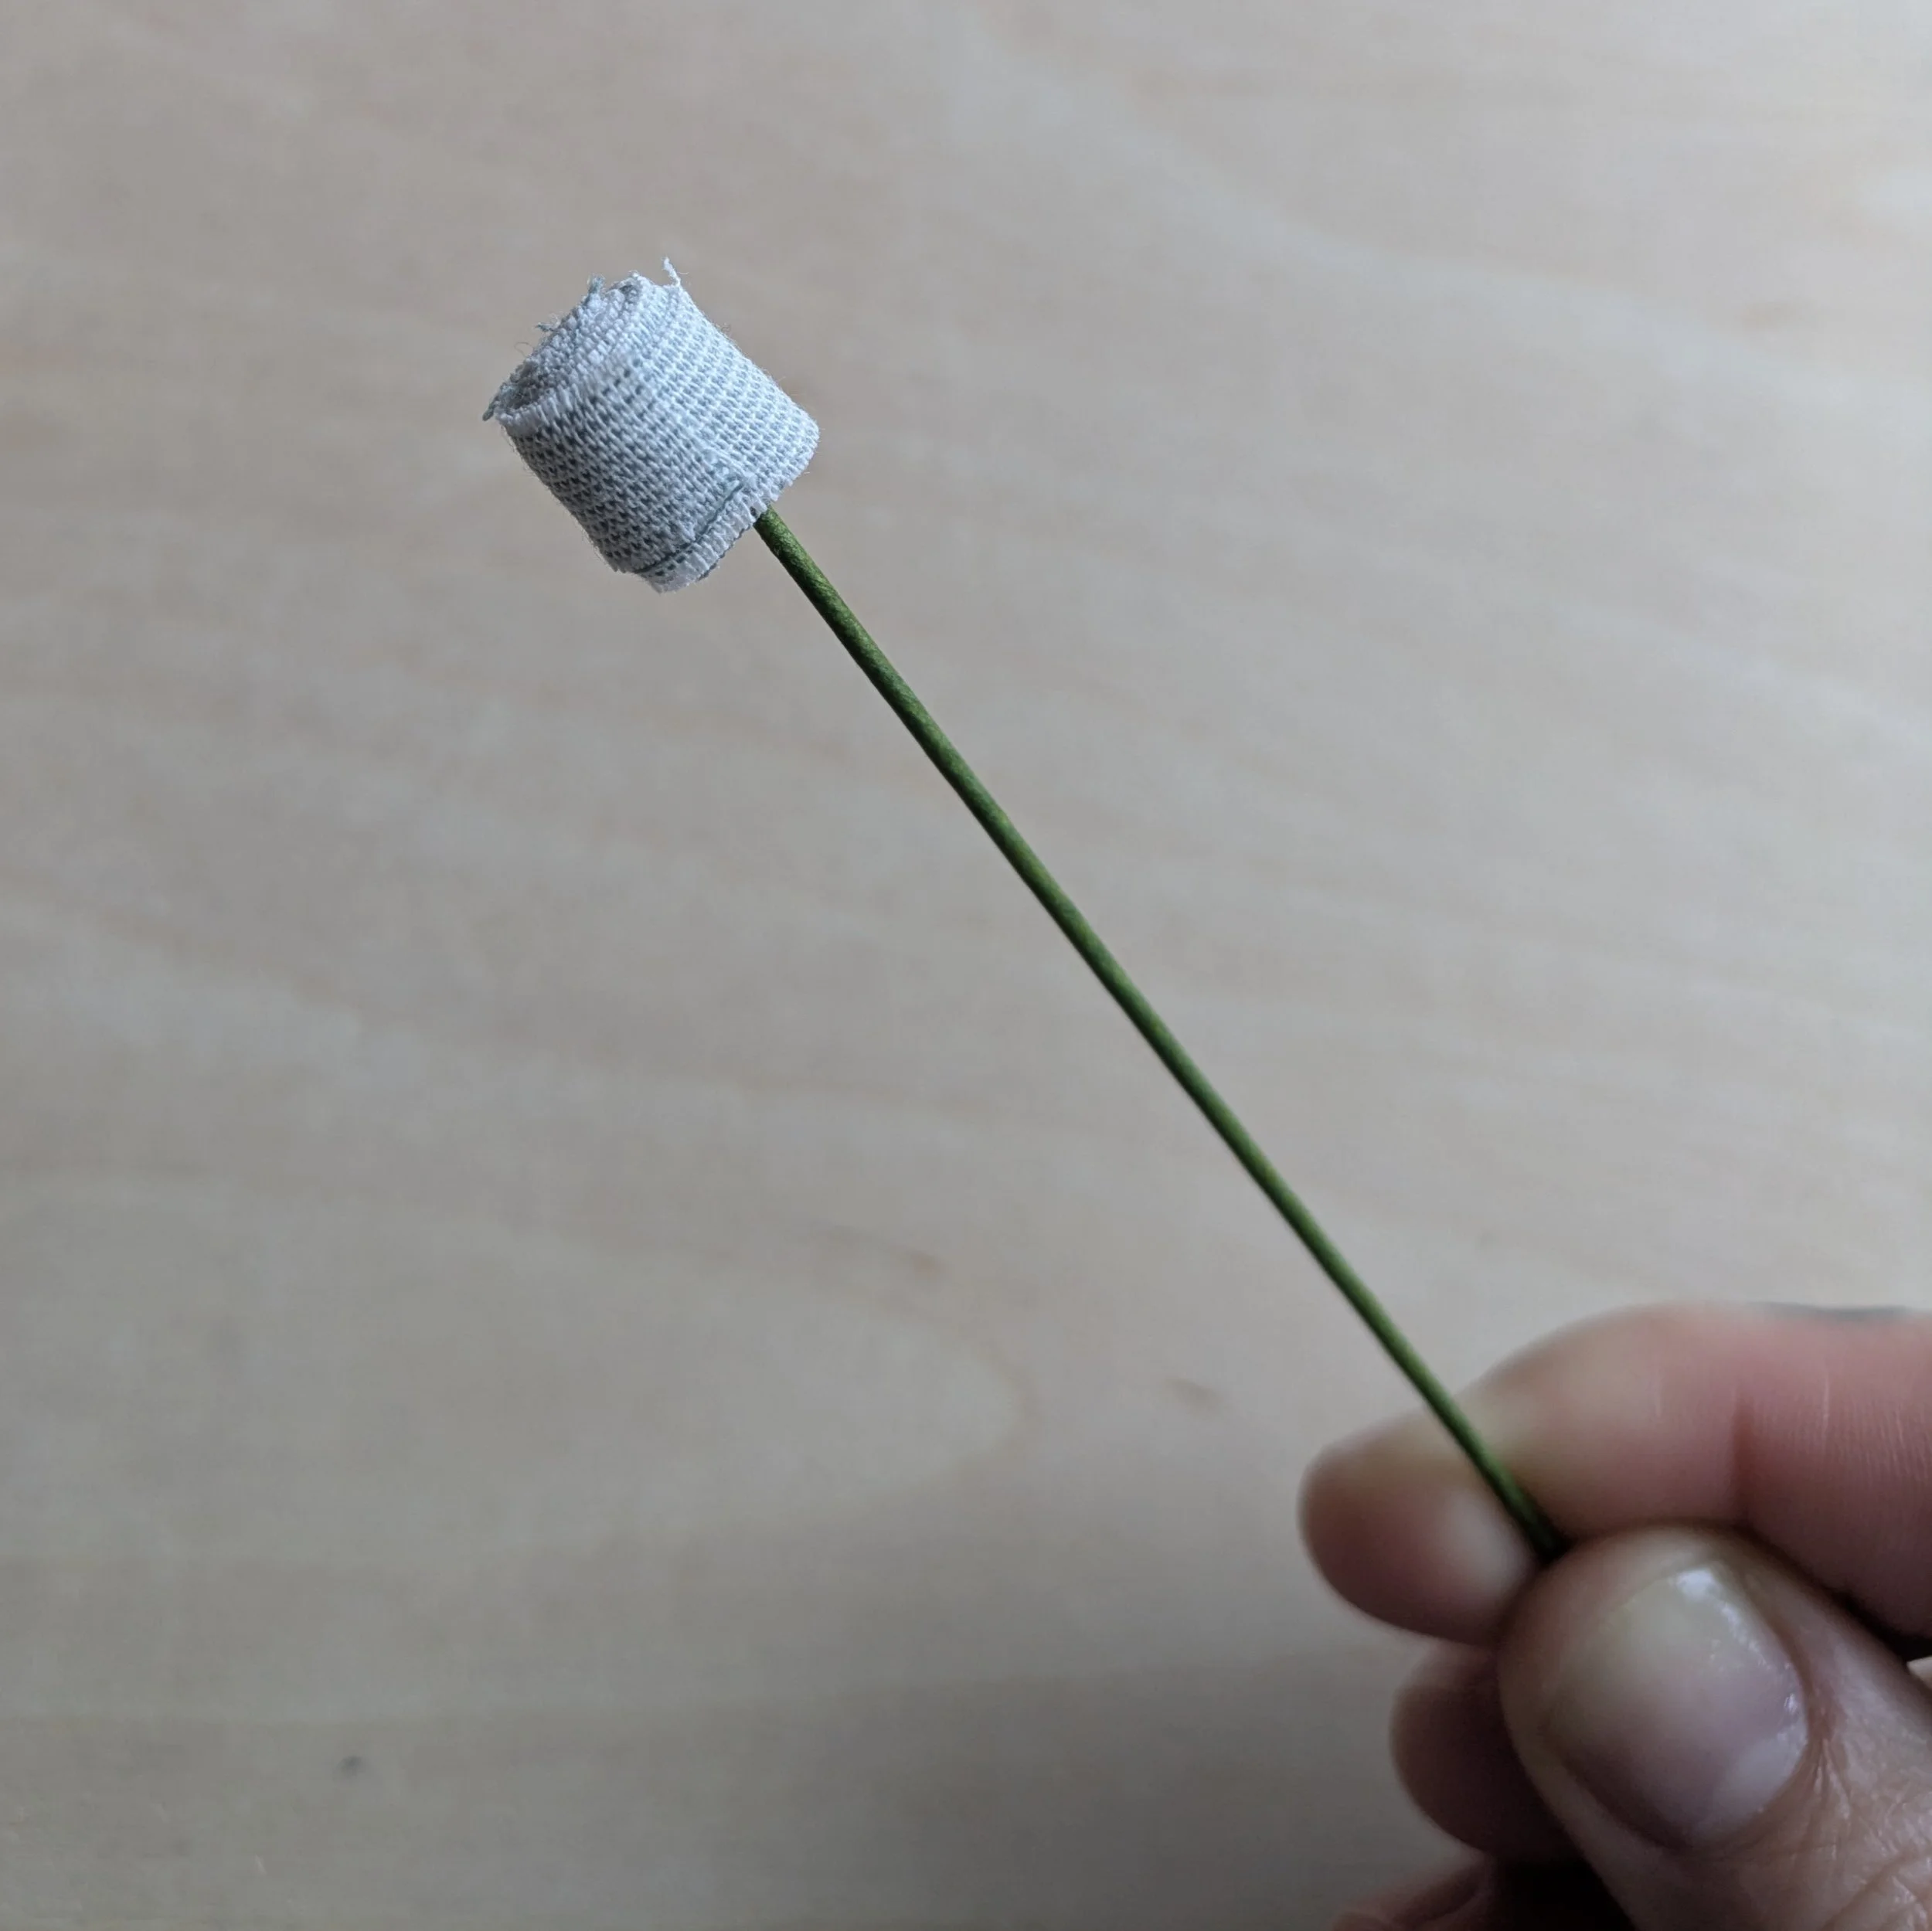
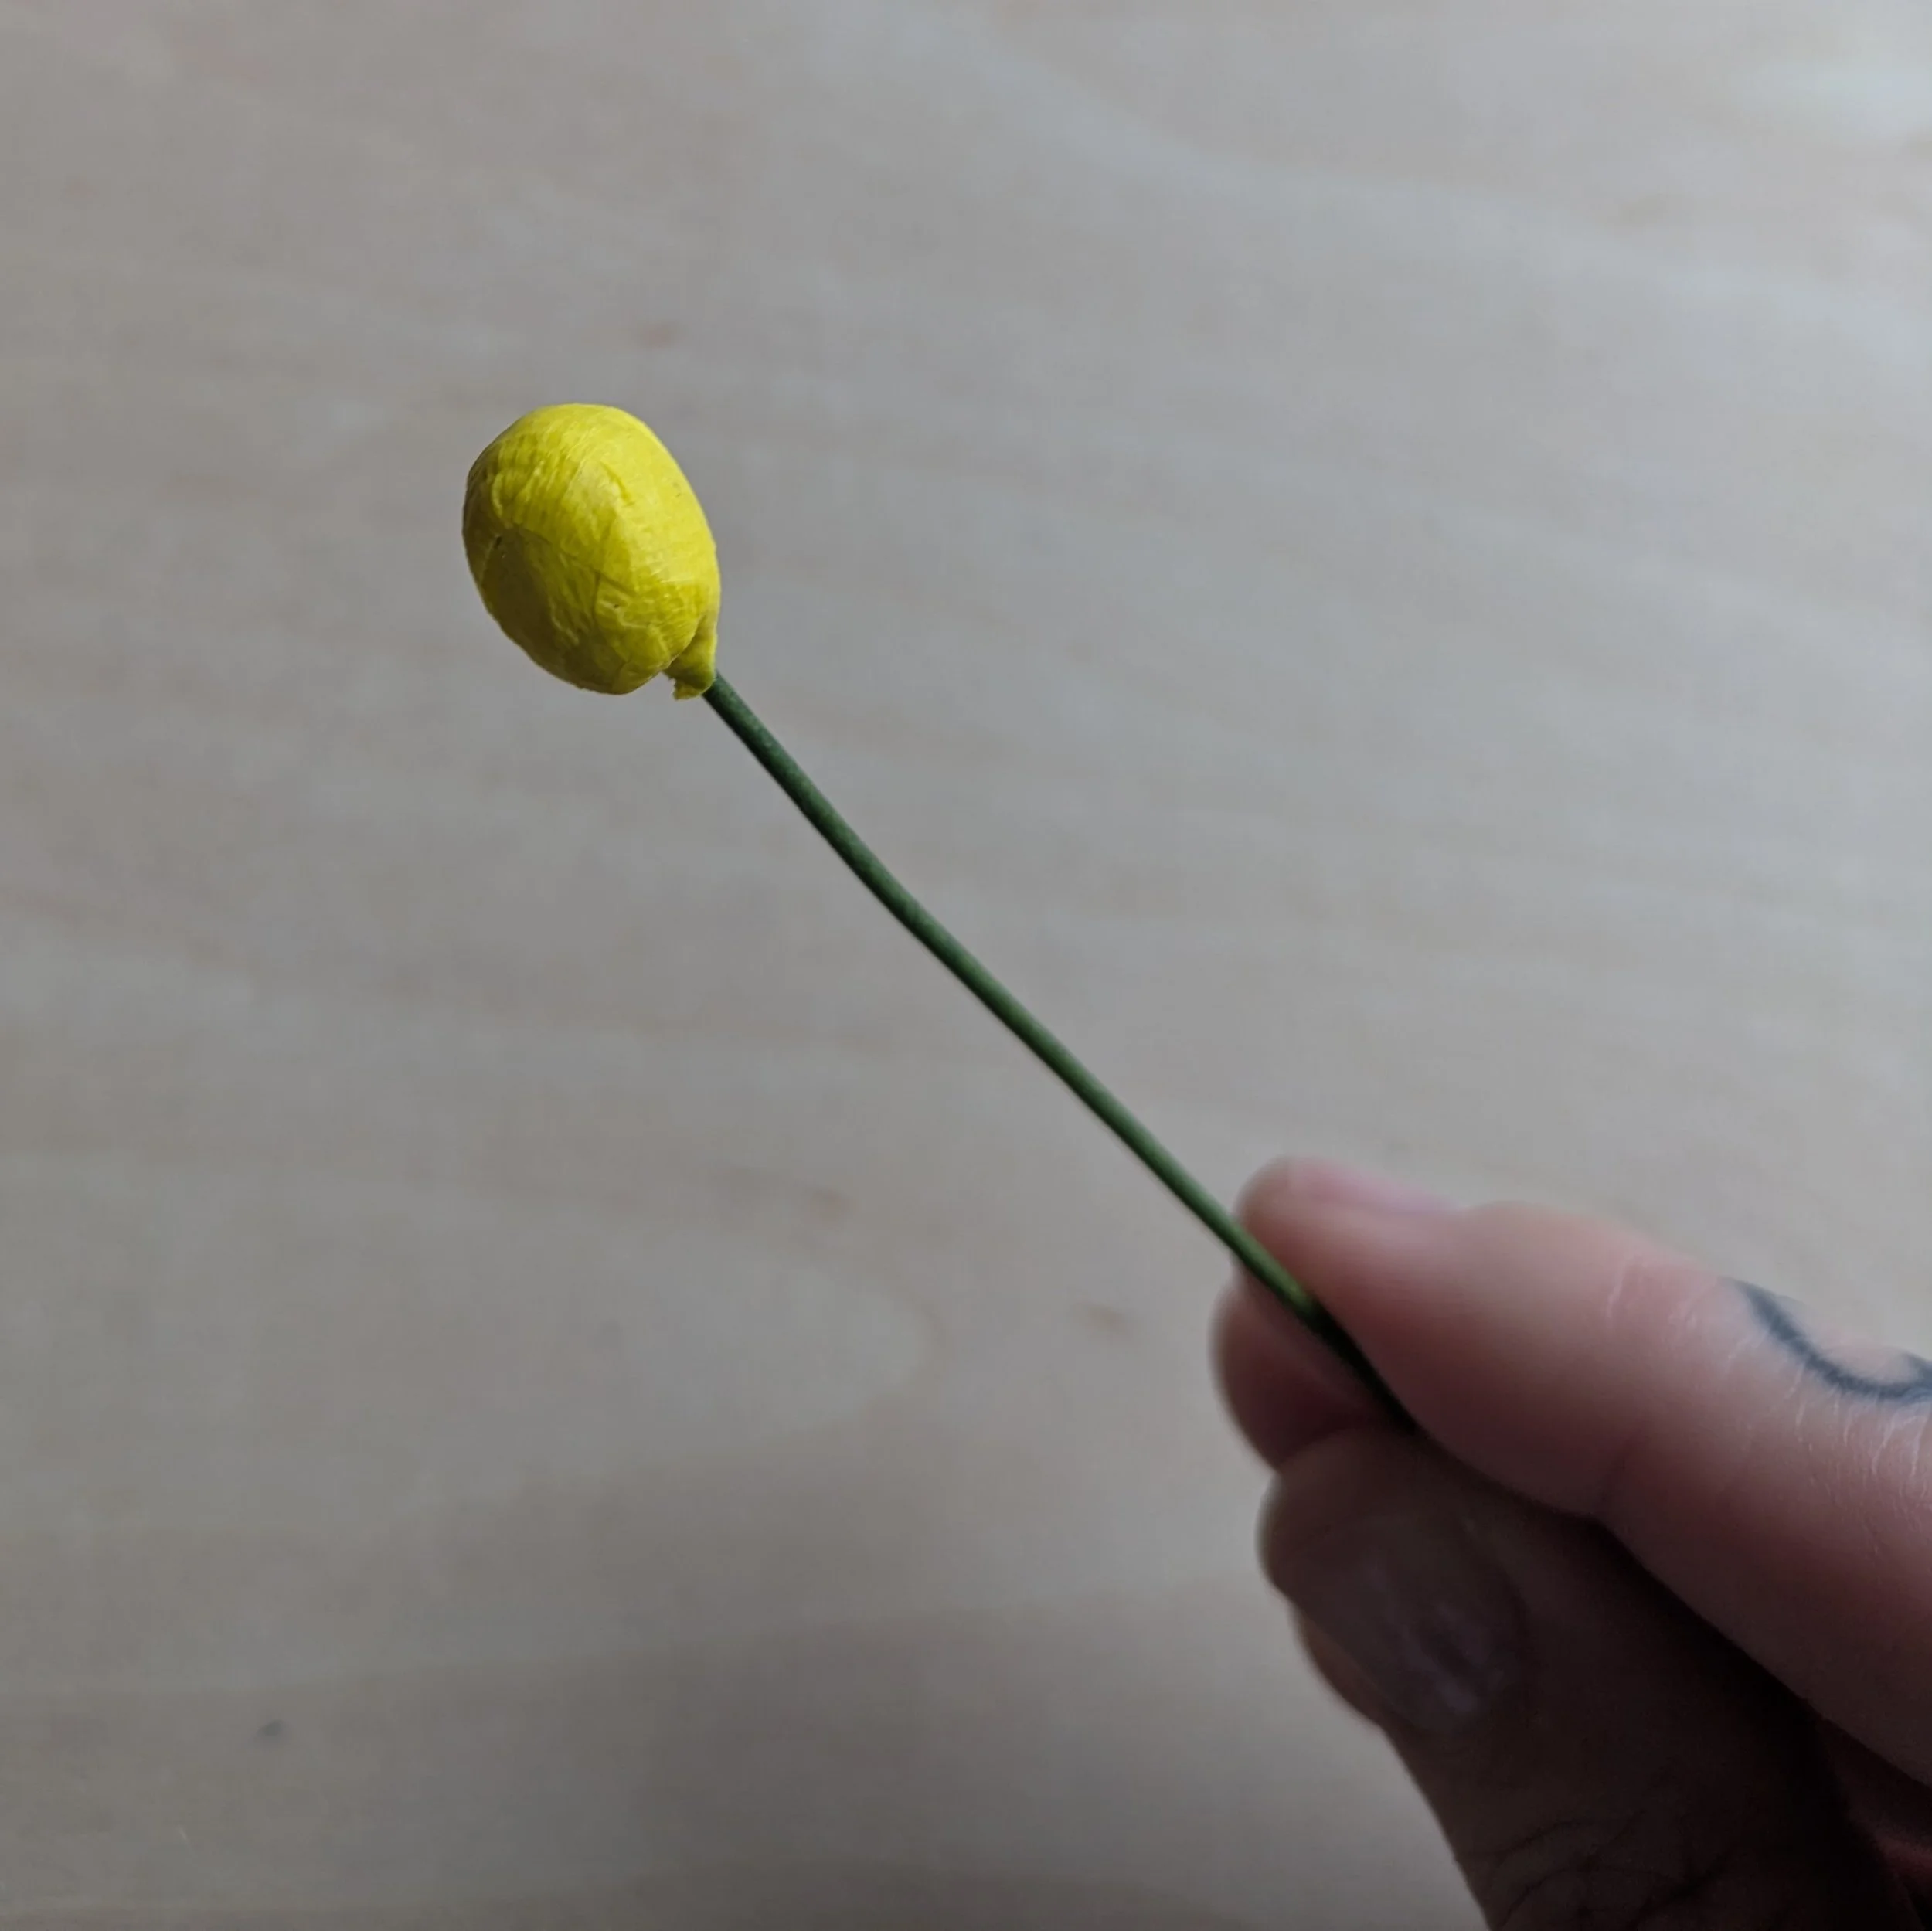
Finish spinning the wire so that the end of the fabric is secured. This will be the center of your seedpod. Cute!
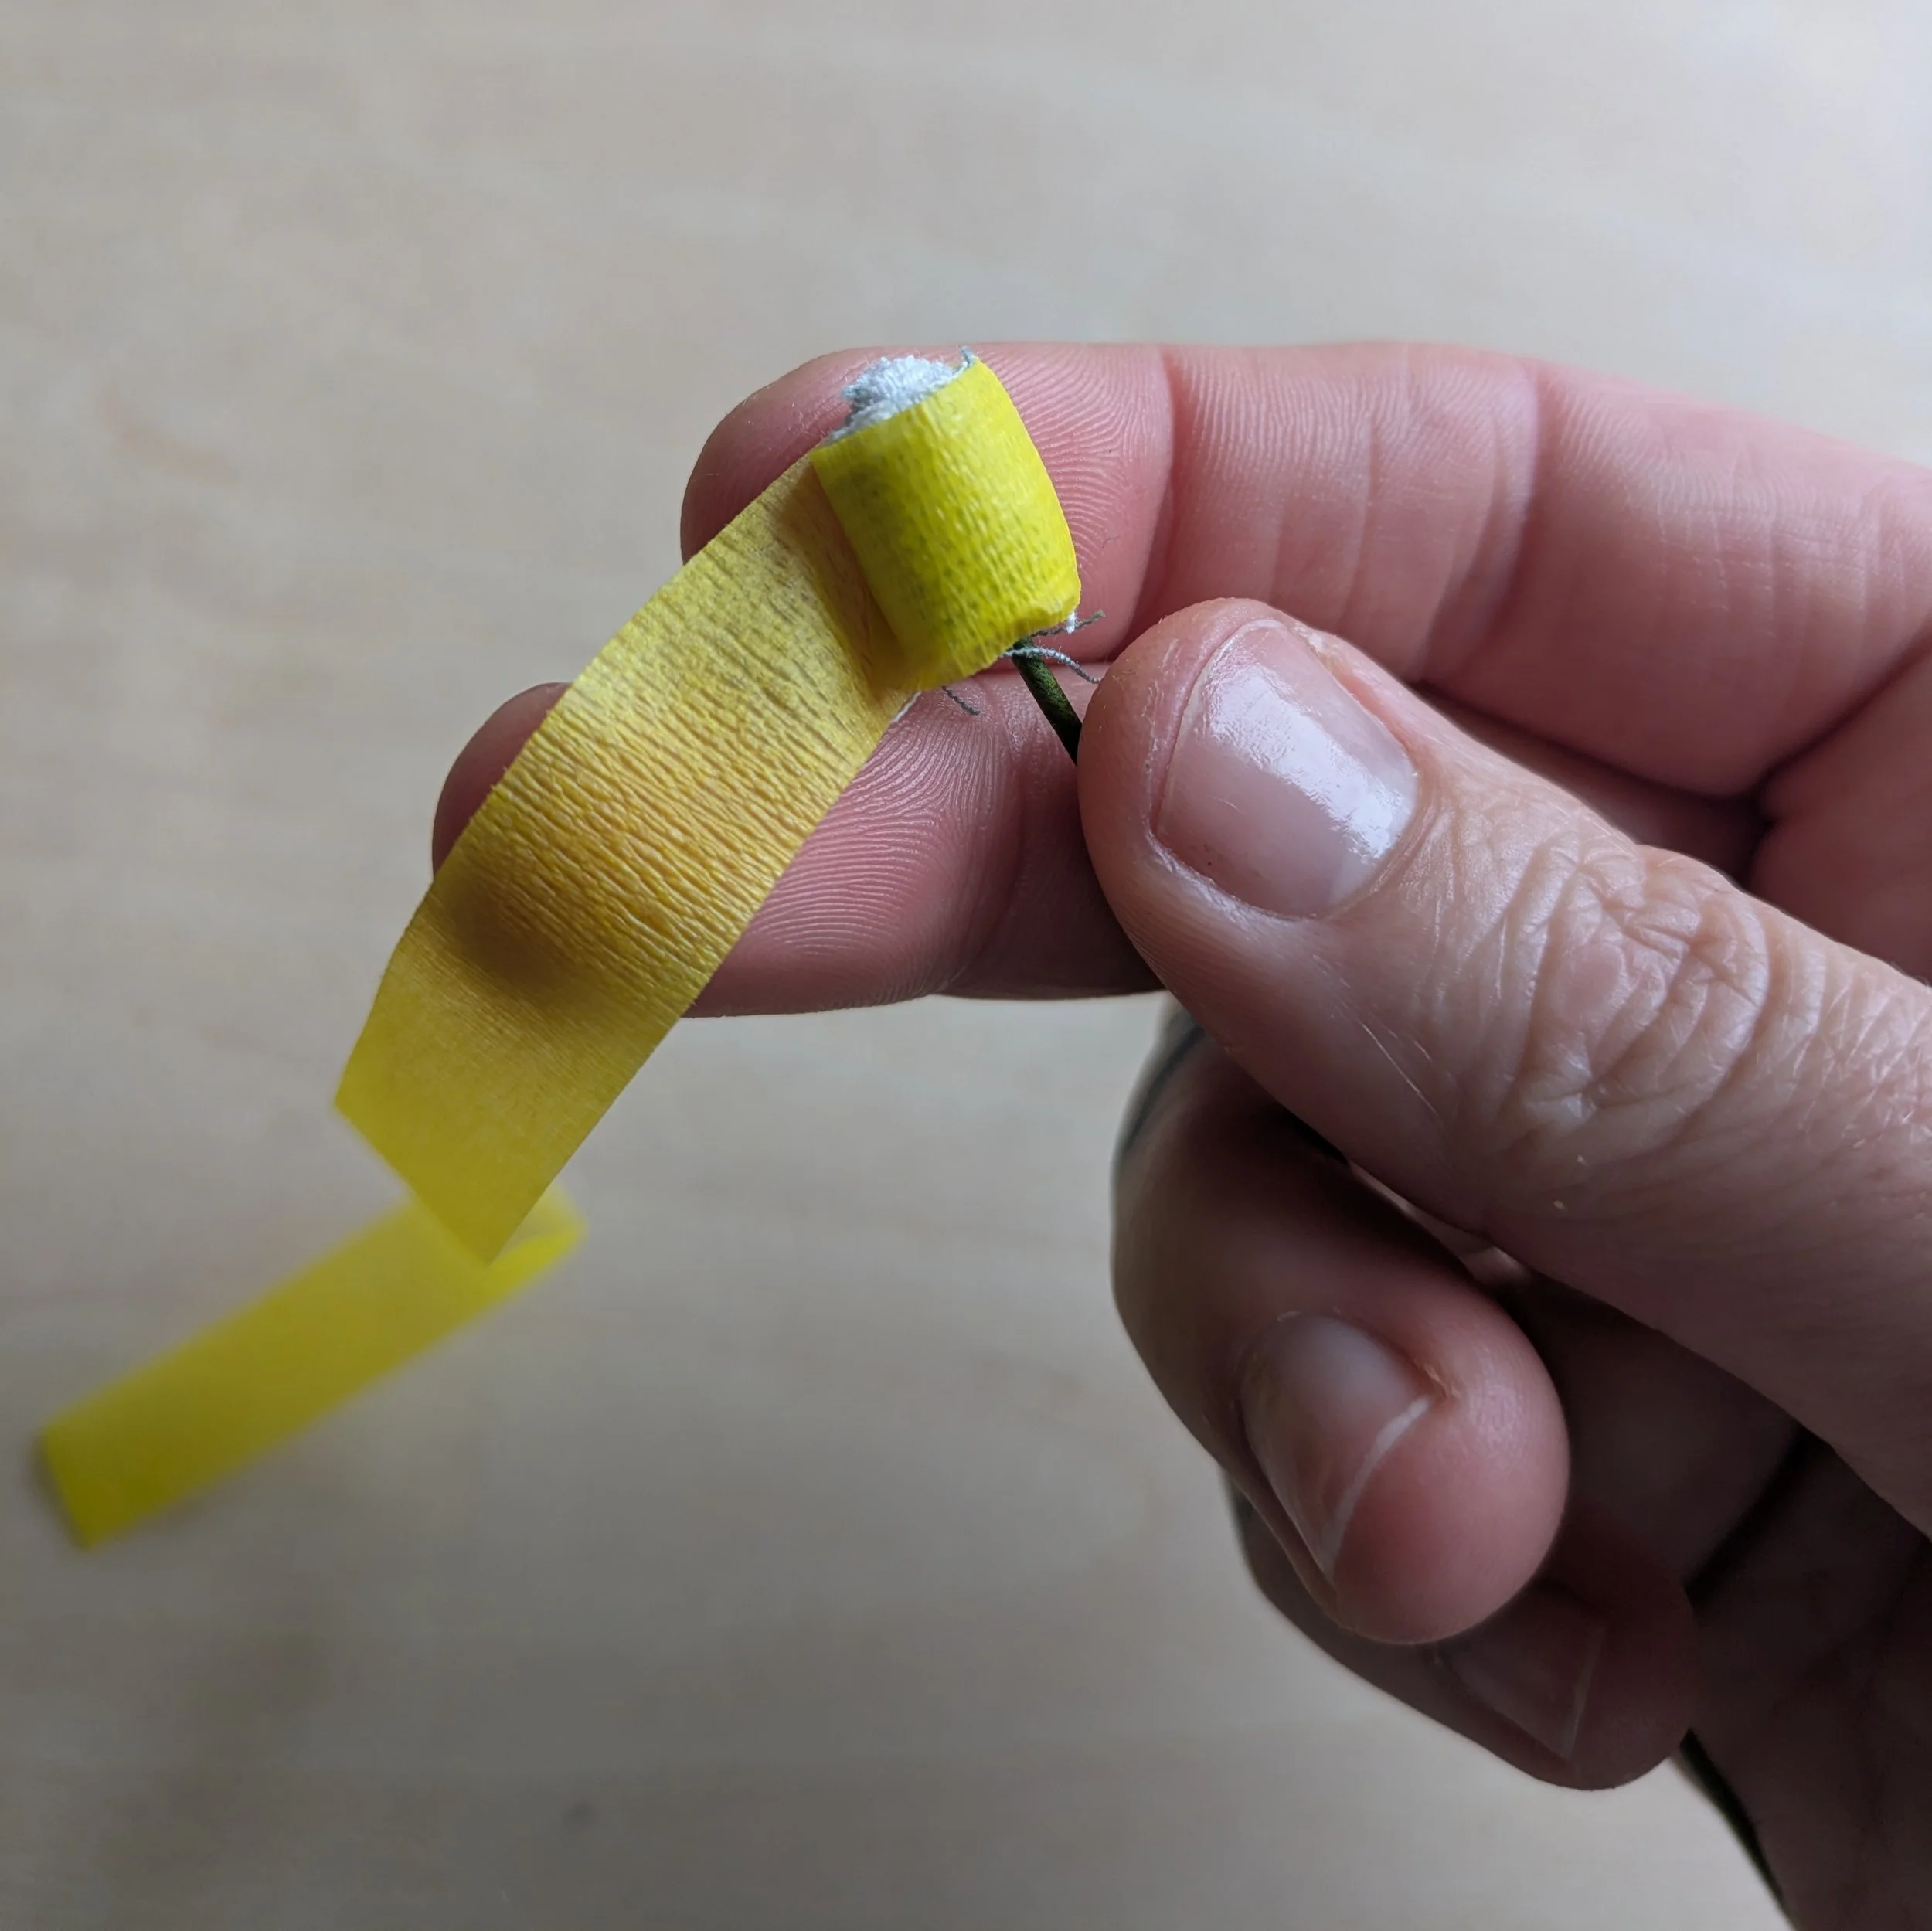
Find your yellow floral tape. Pull one end of the floral tape between your fingers and stretch it just slightly. This will make the tape slightly sticky. Use this built-in adhesion to begin wrapping the tape around the center of your seedpod, pressing gently as your go so that the tape sticks to itself.
Step 3: Finish your seedpod
As you wrap, change the direction of the tape so that you eventually cover the entire fabric strip.
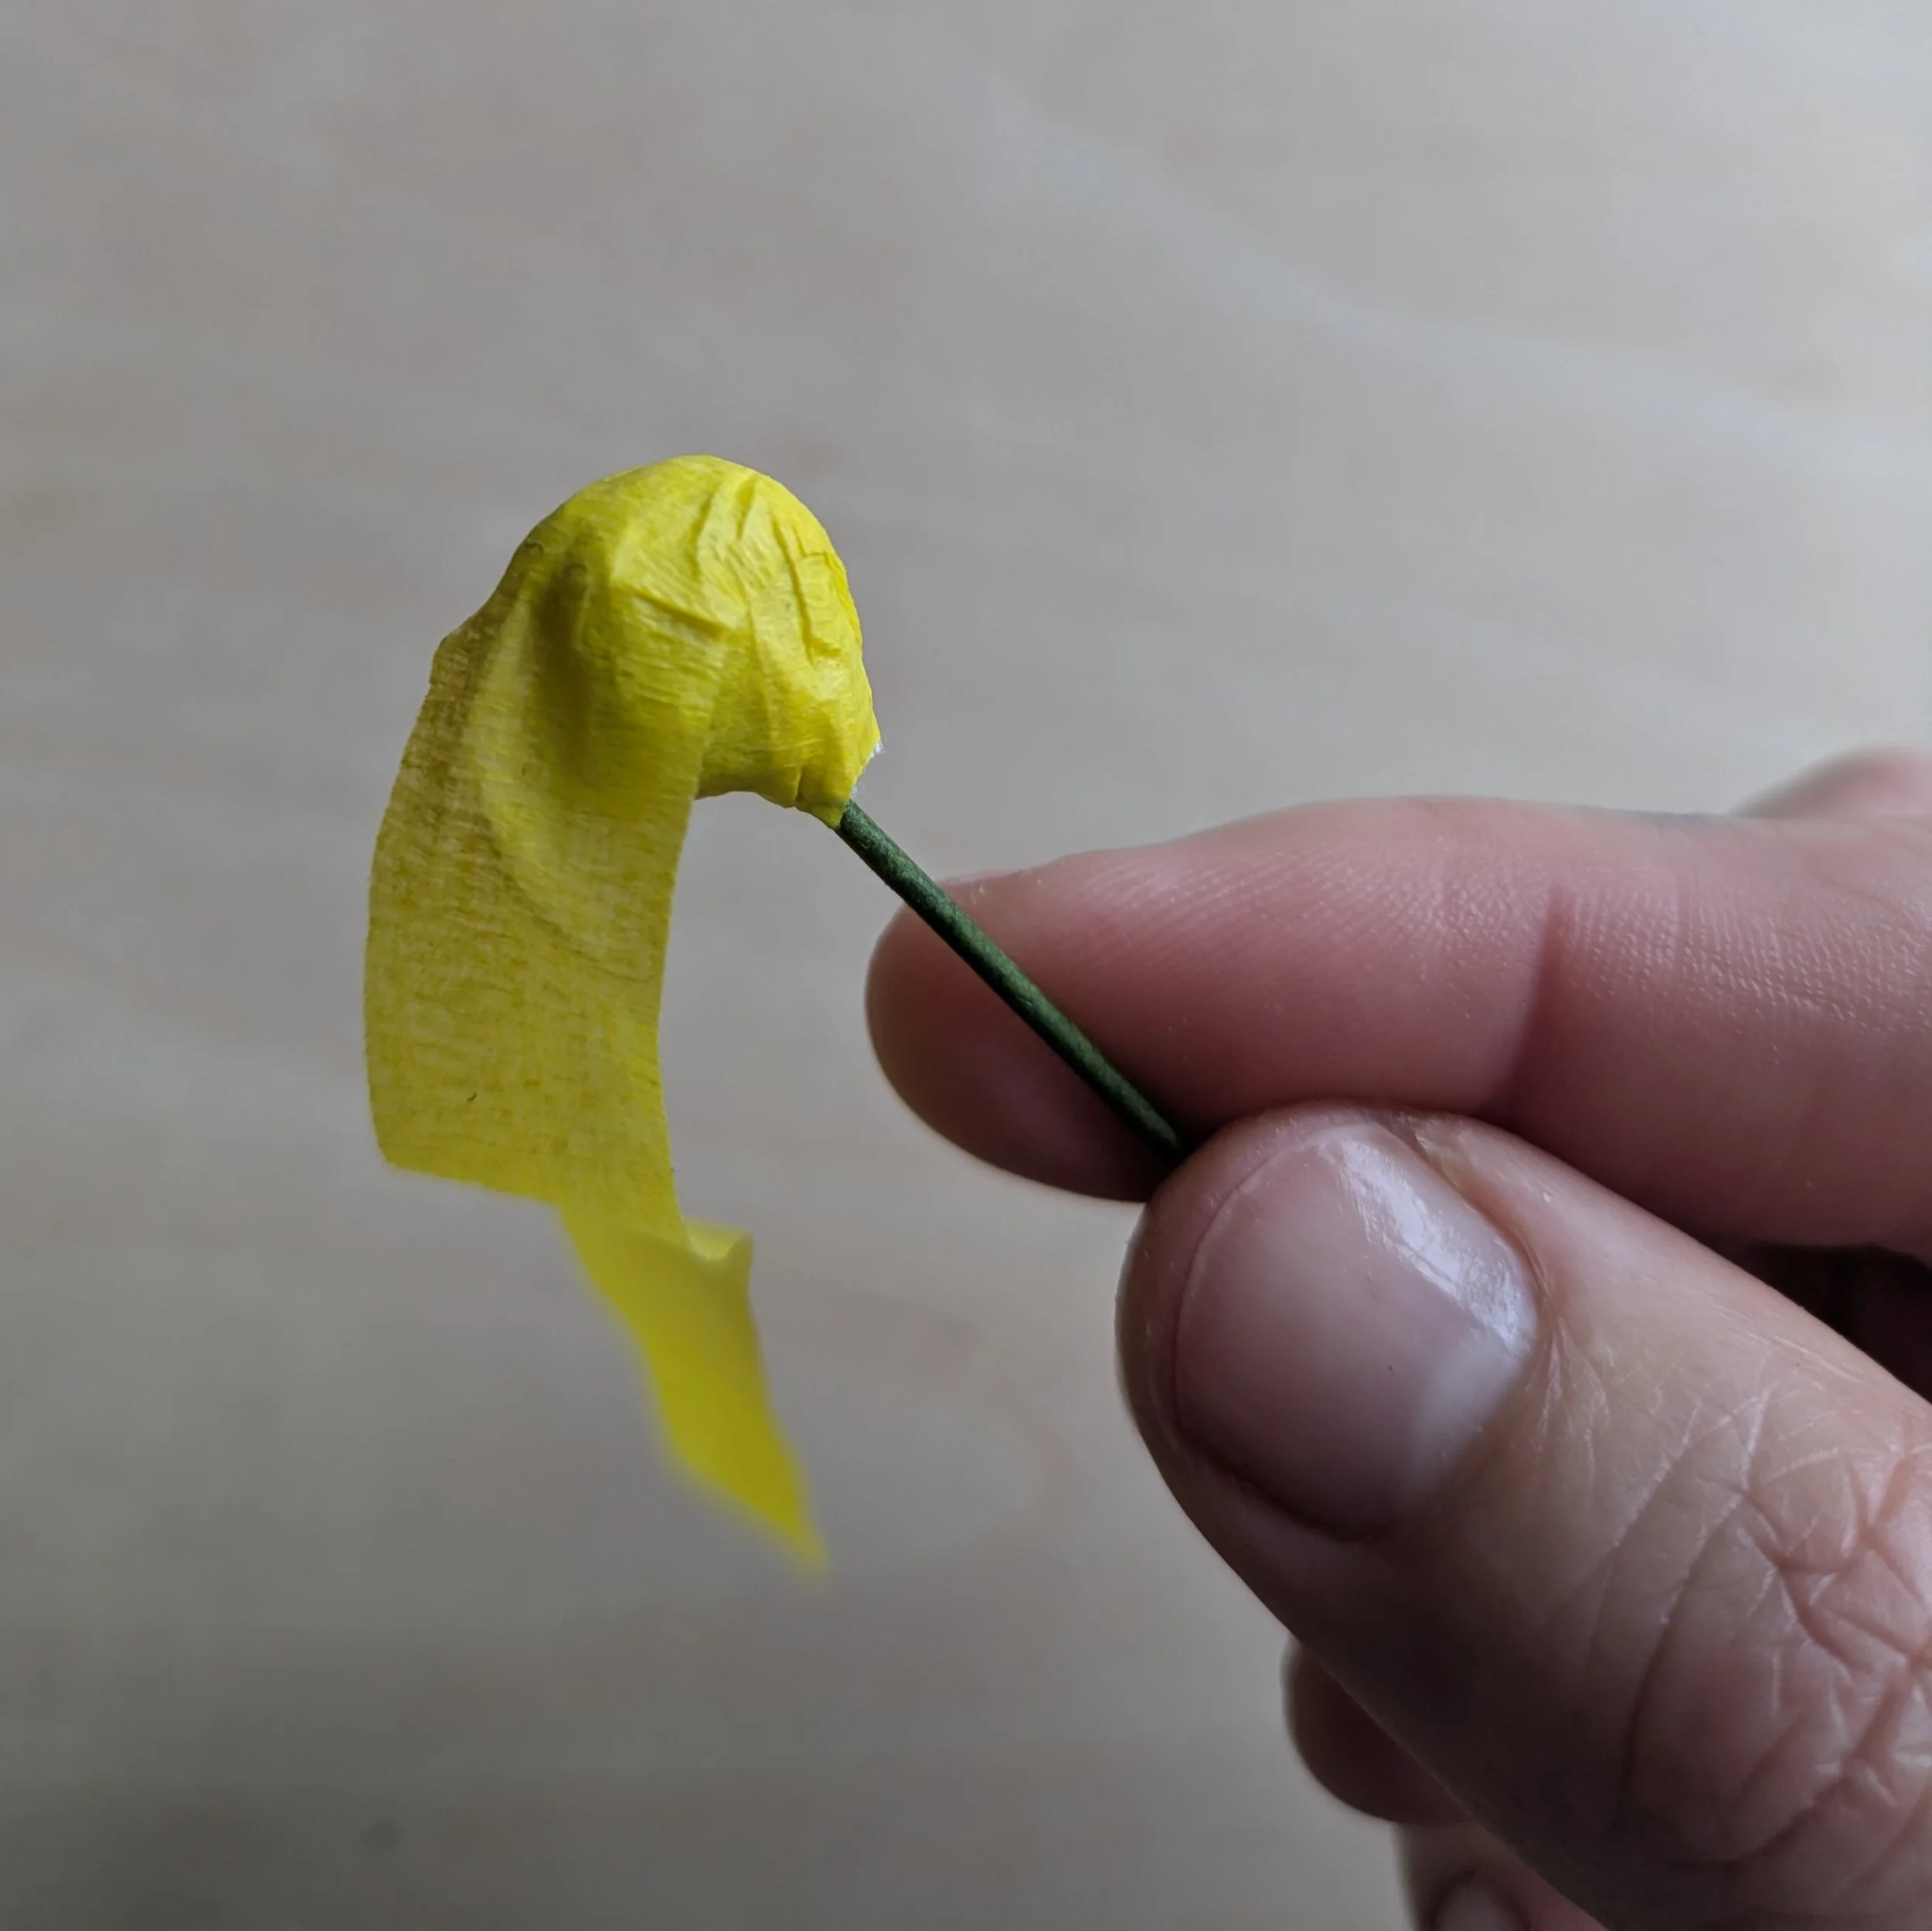
When you reach the end of of the floral tape, just press it down so that it sticks to the pod. As you do this, you can also smooth out the rest of the yellow tape and press the pod into a ball shape.
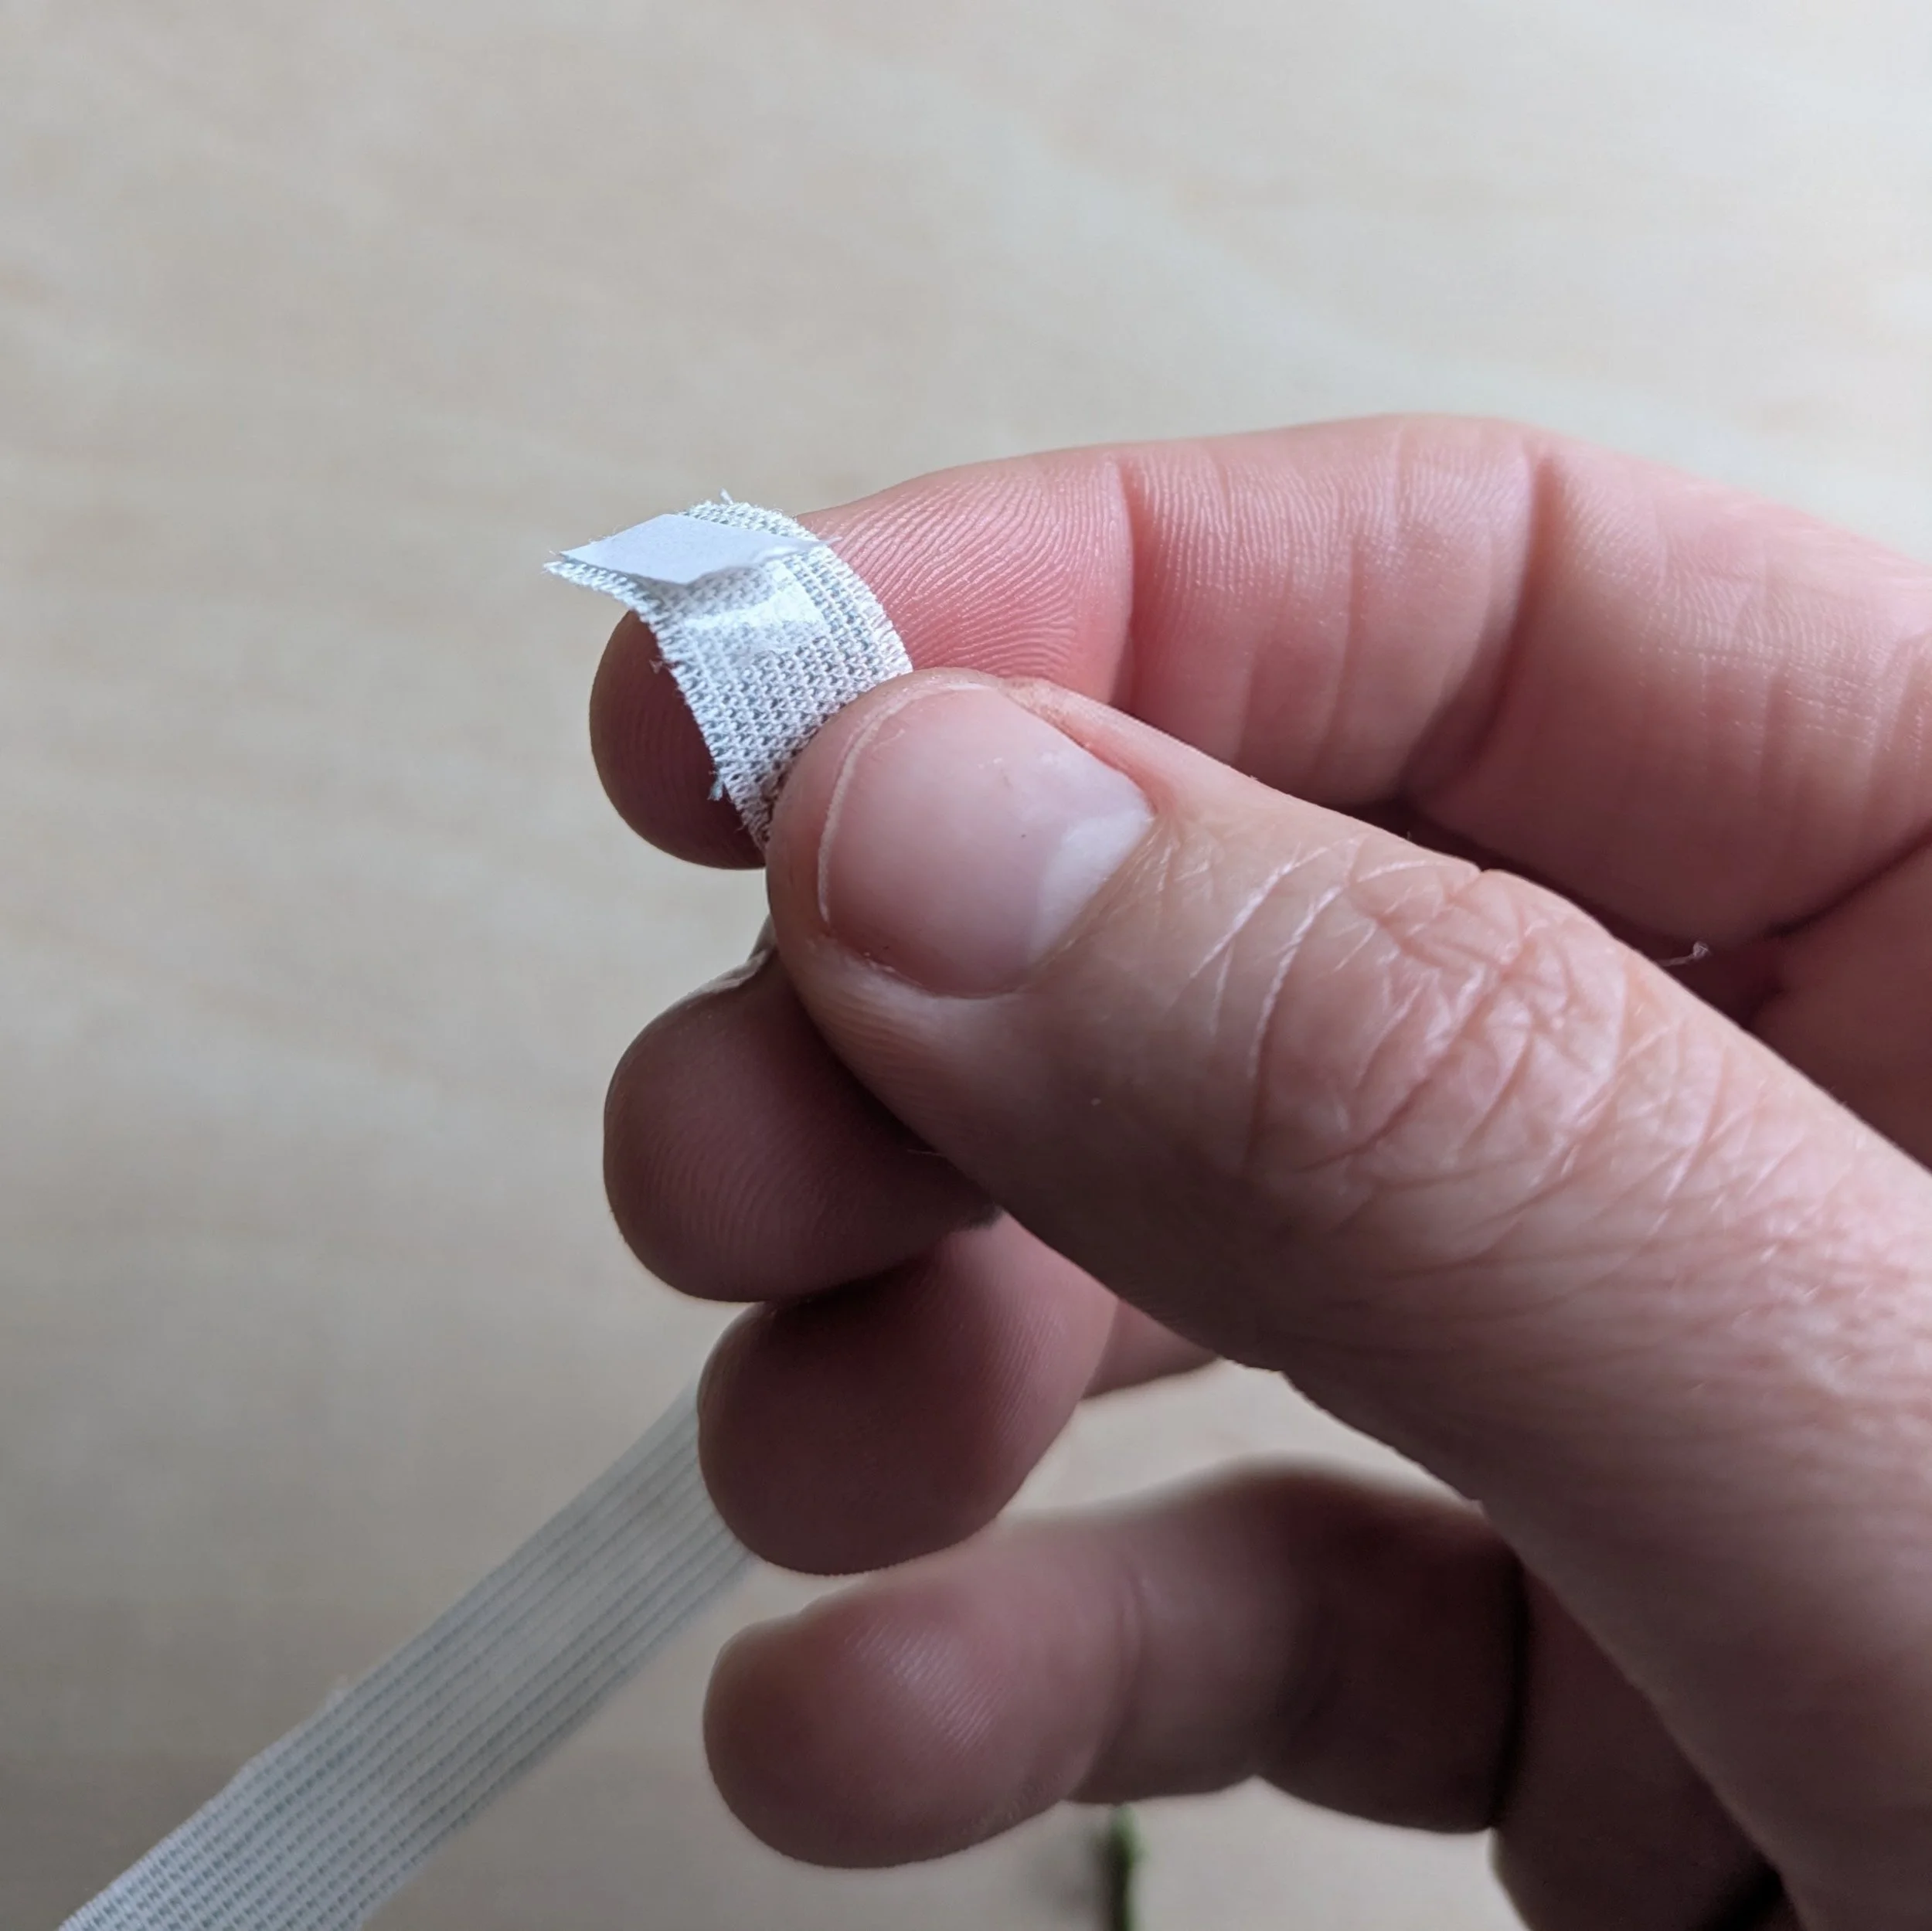
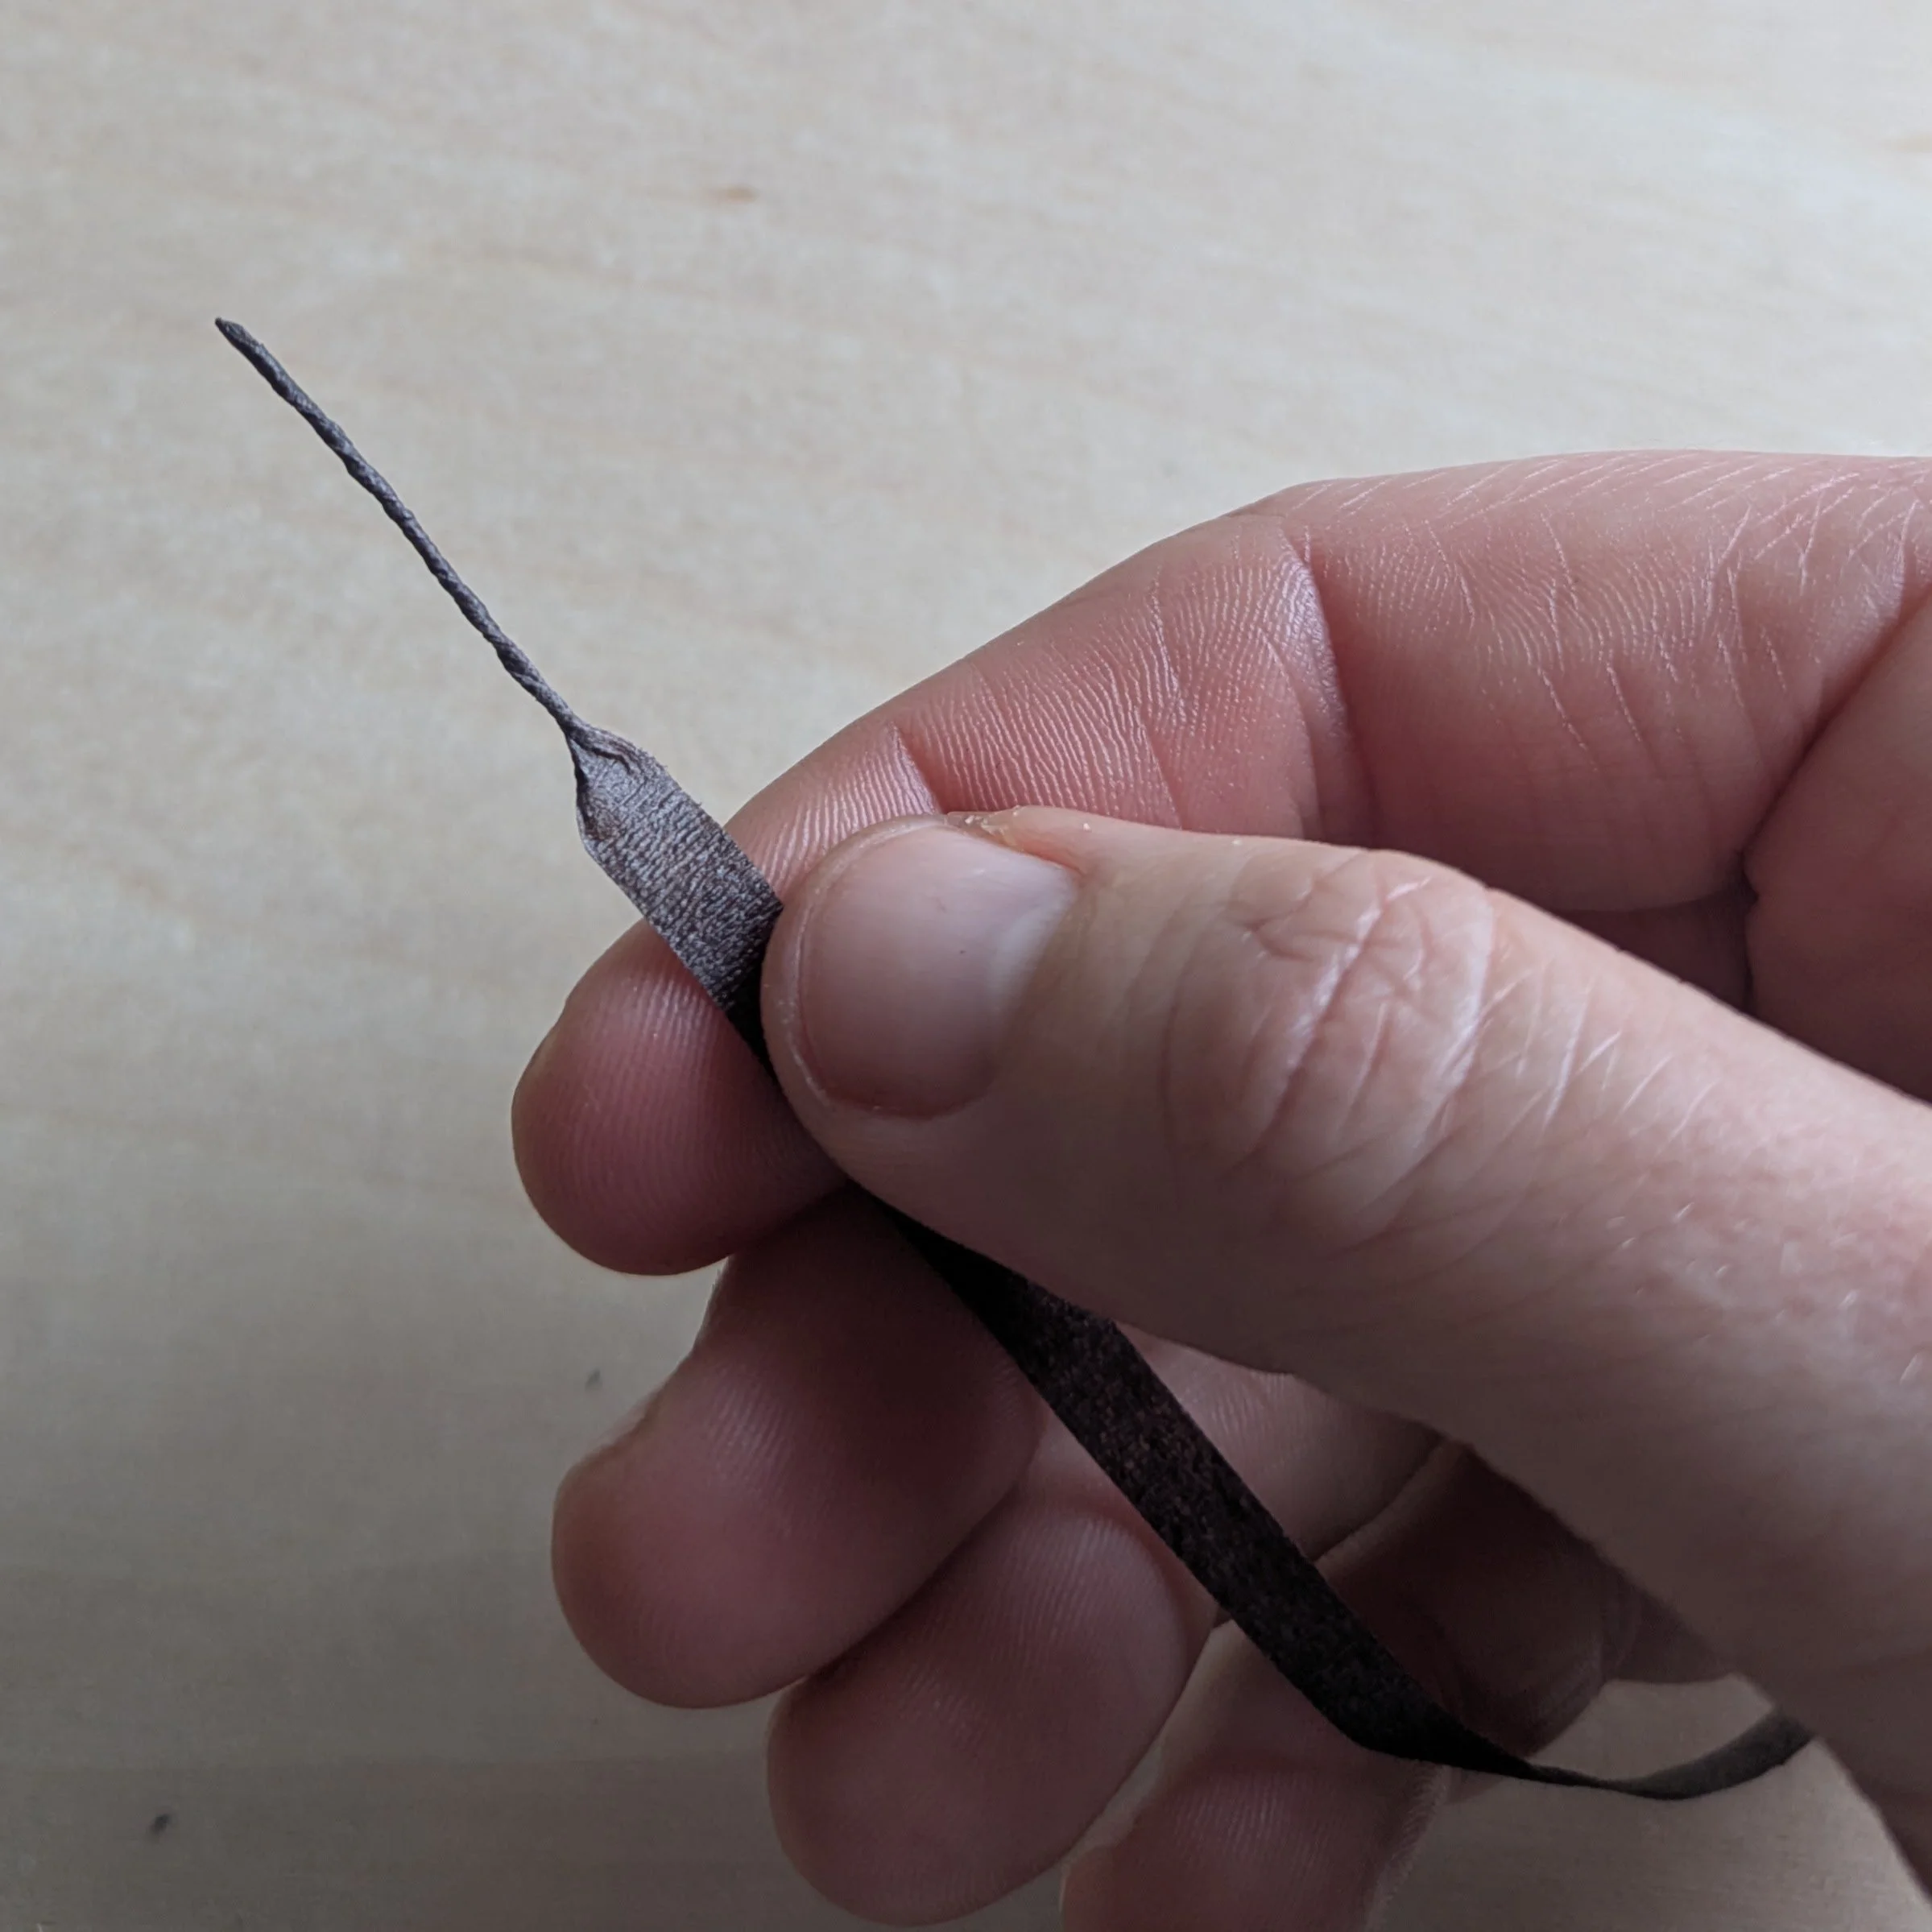
Next, find your brown floral tape. At one end, start rolling the tape between your fingers so that it looks like a thick piece of string. As you do this, do not pull or twist the tape too hard or it will break. If this does happen, just use the adhesive quality of the tape to attached the two pieces back together and keep twisting.
When you are done twisting, this is what your brown floral tape will look like.

Hold one end of the brown floral tape against the stem wire, just below the seedpod. Bring the other end of the brown floral tape up over the top of the seedpod and back down the other side.

Keep doing this, rotating where the brown floral tape comes up on one side and back down the other.
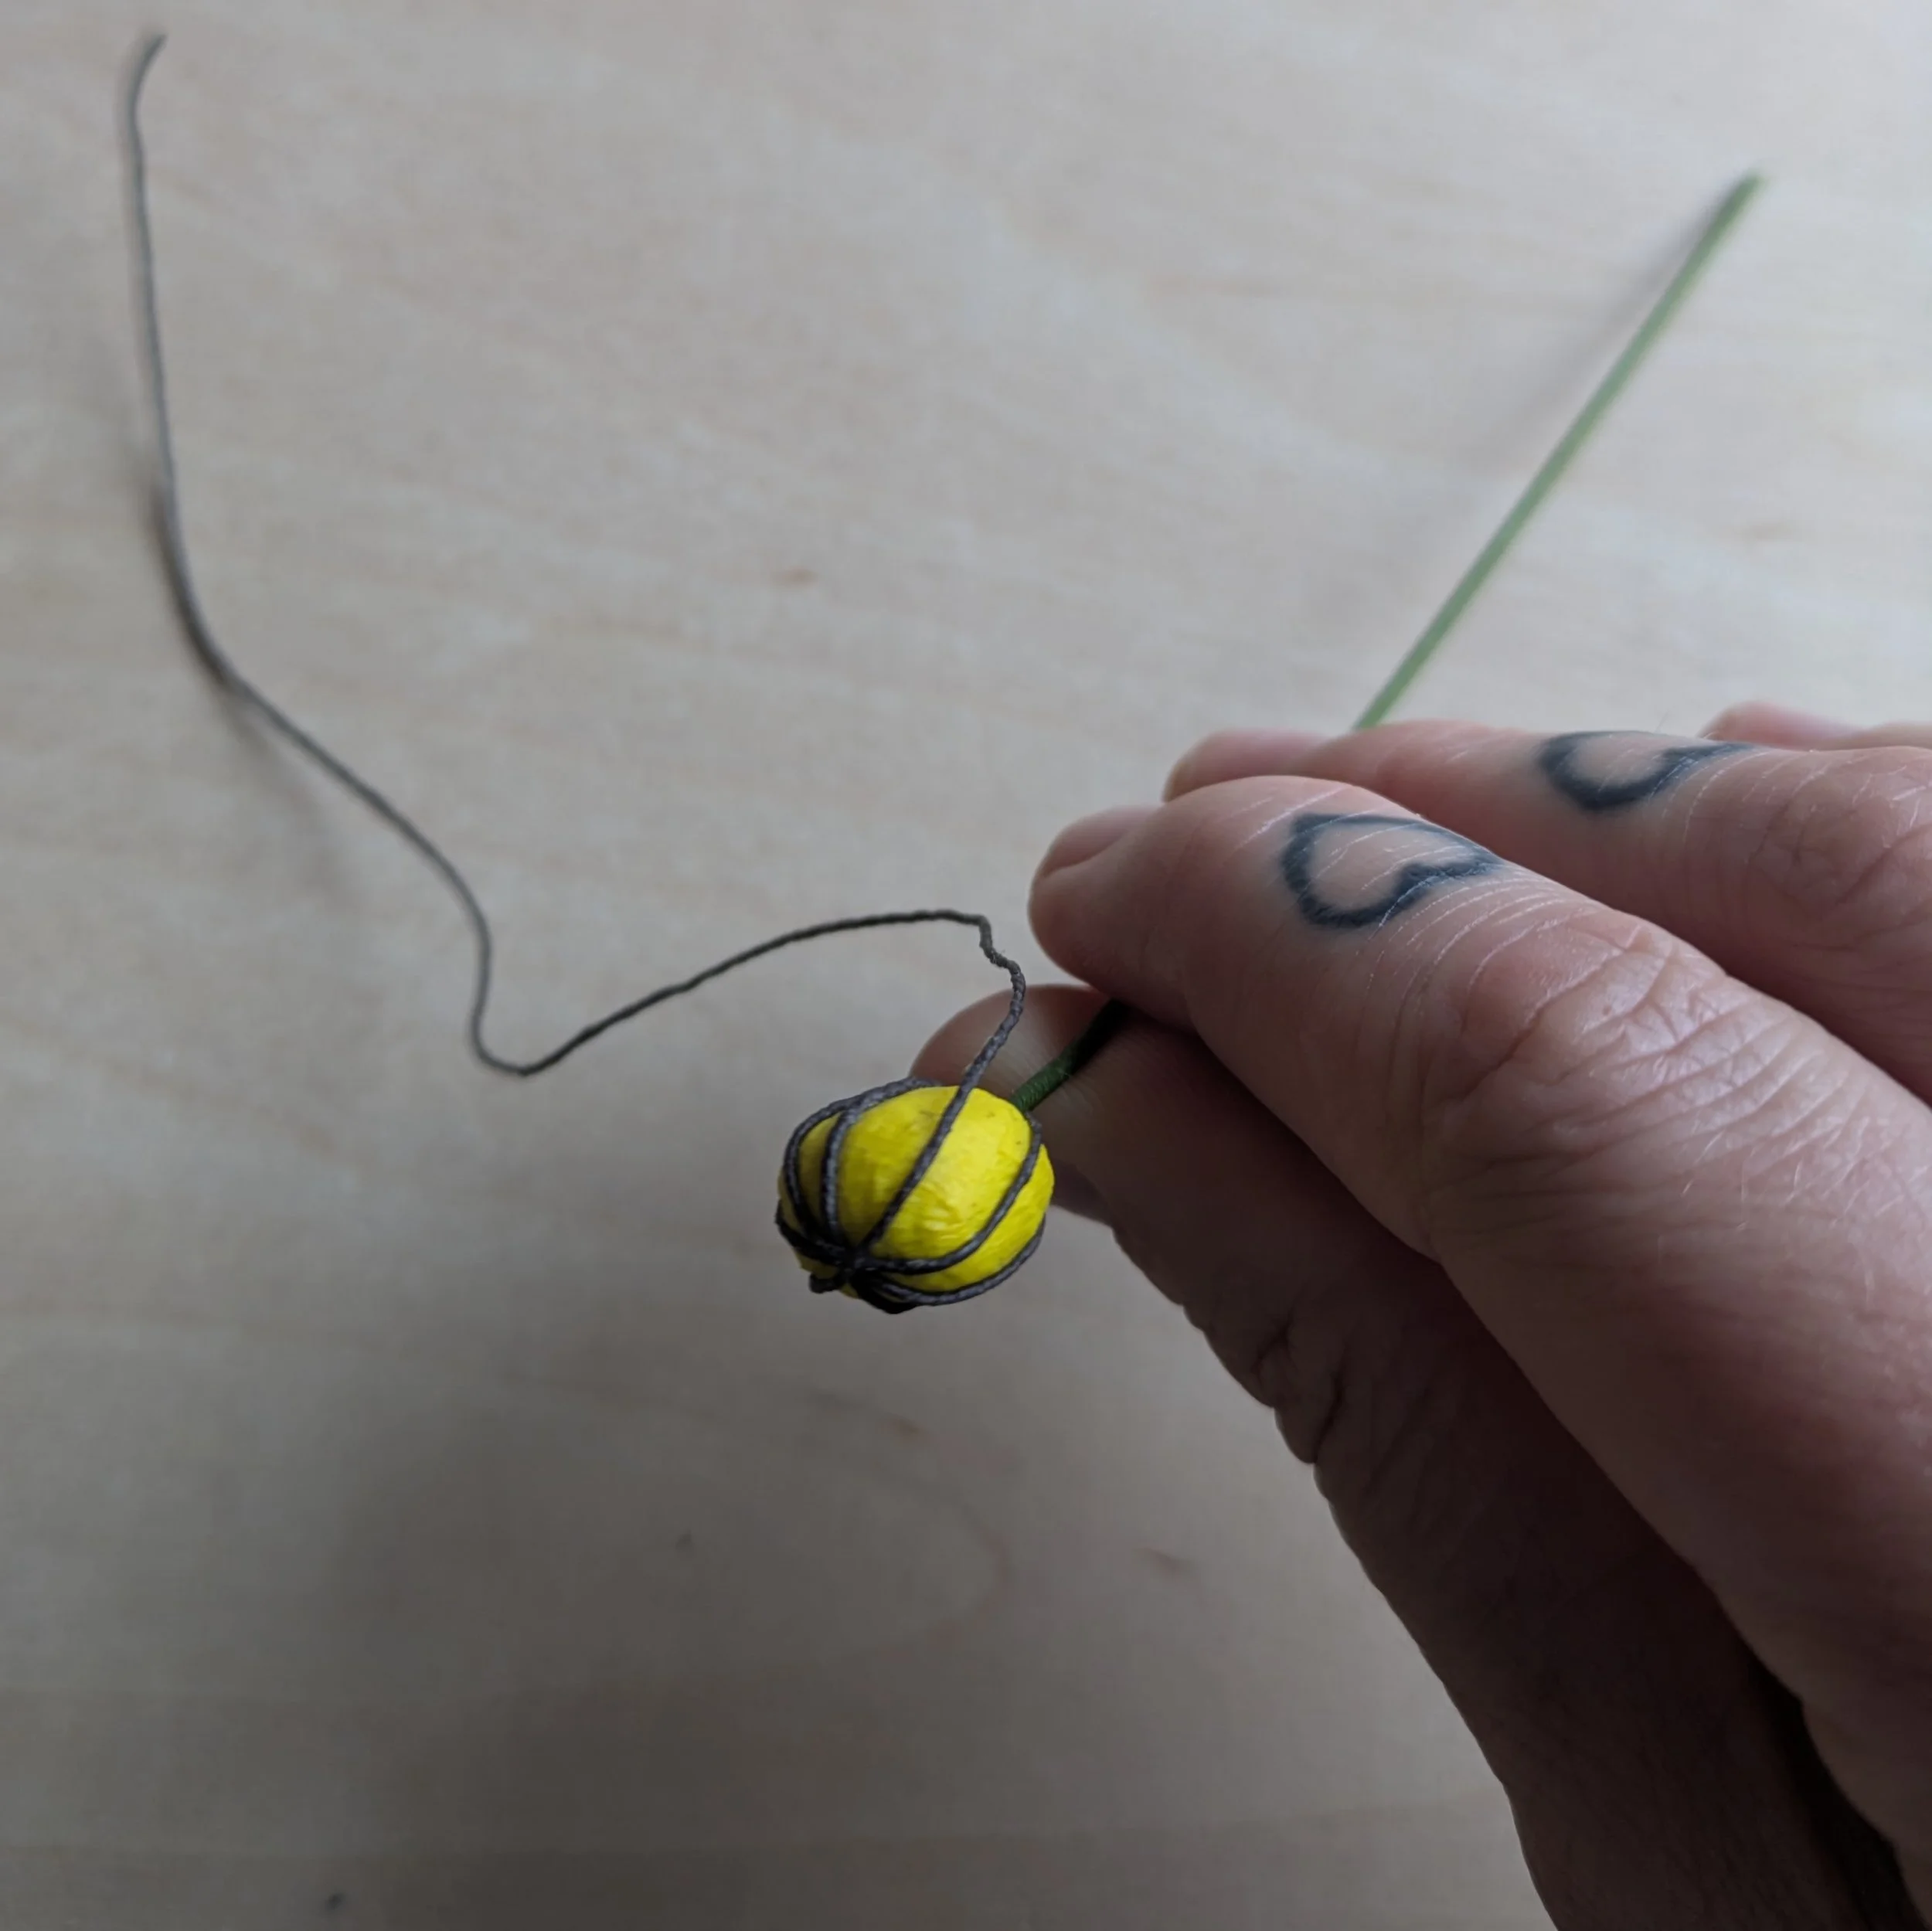
When you have done this 5 or 6 times, wrap the rest of the brown floral tape around the stem wire. At this point, you can adjust any of the brown floral tape so that the lines are relatively even. This is what your seedpod will look like when you’re done. Cute!

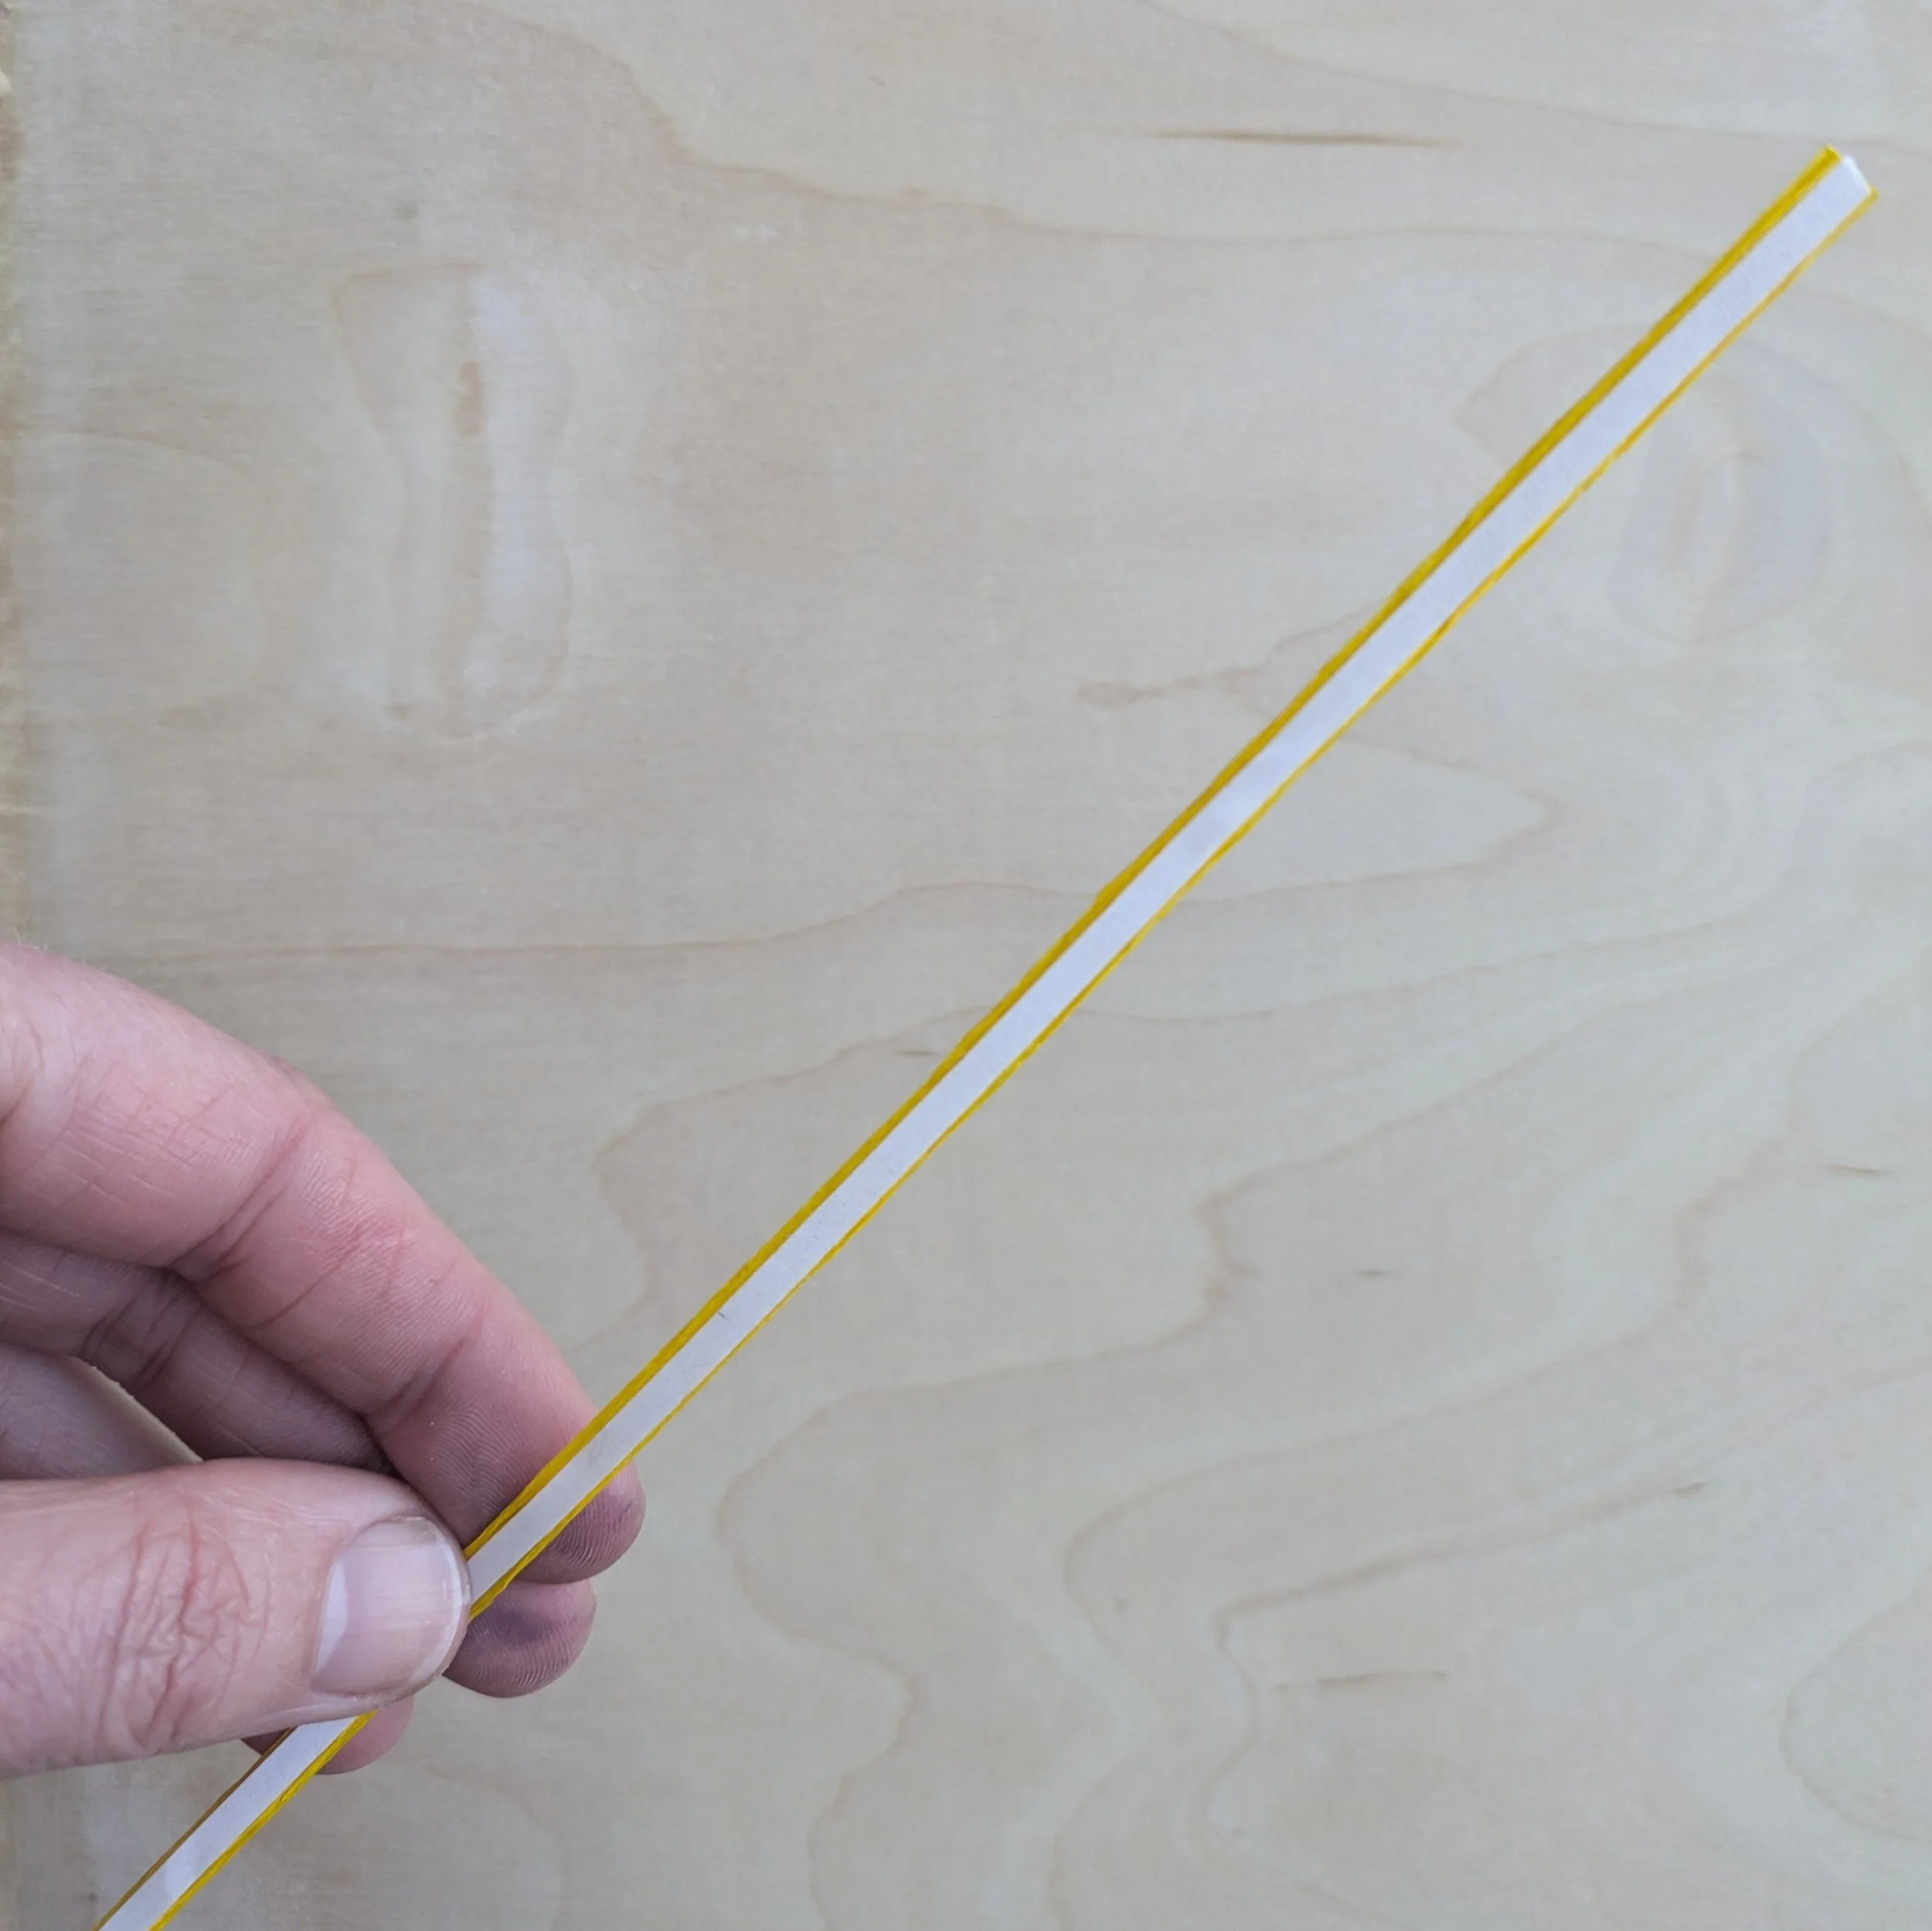
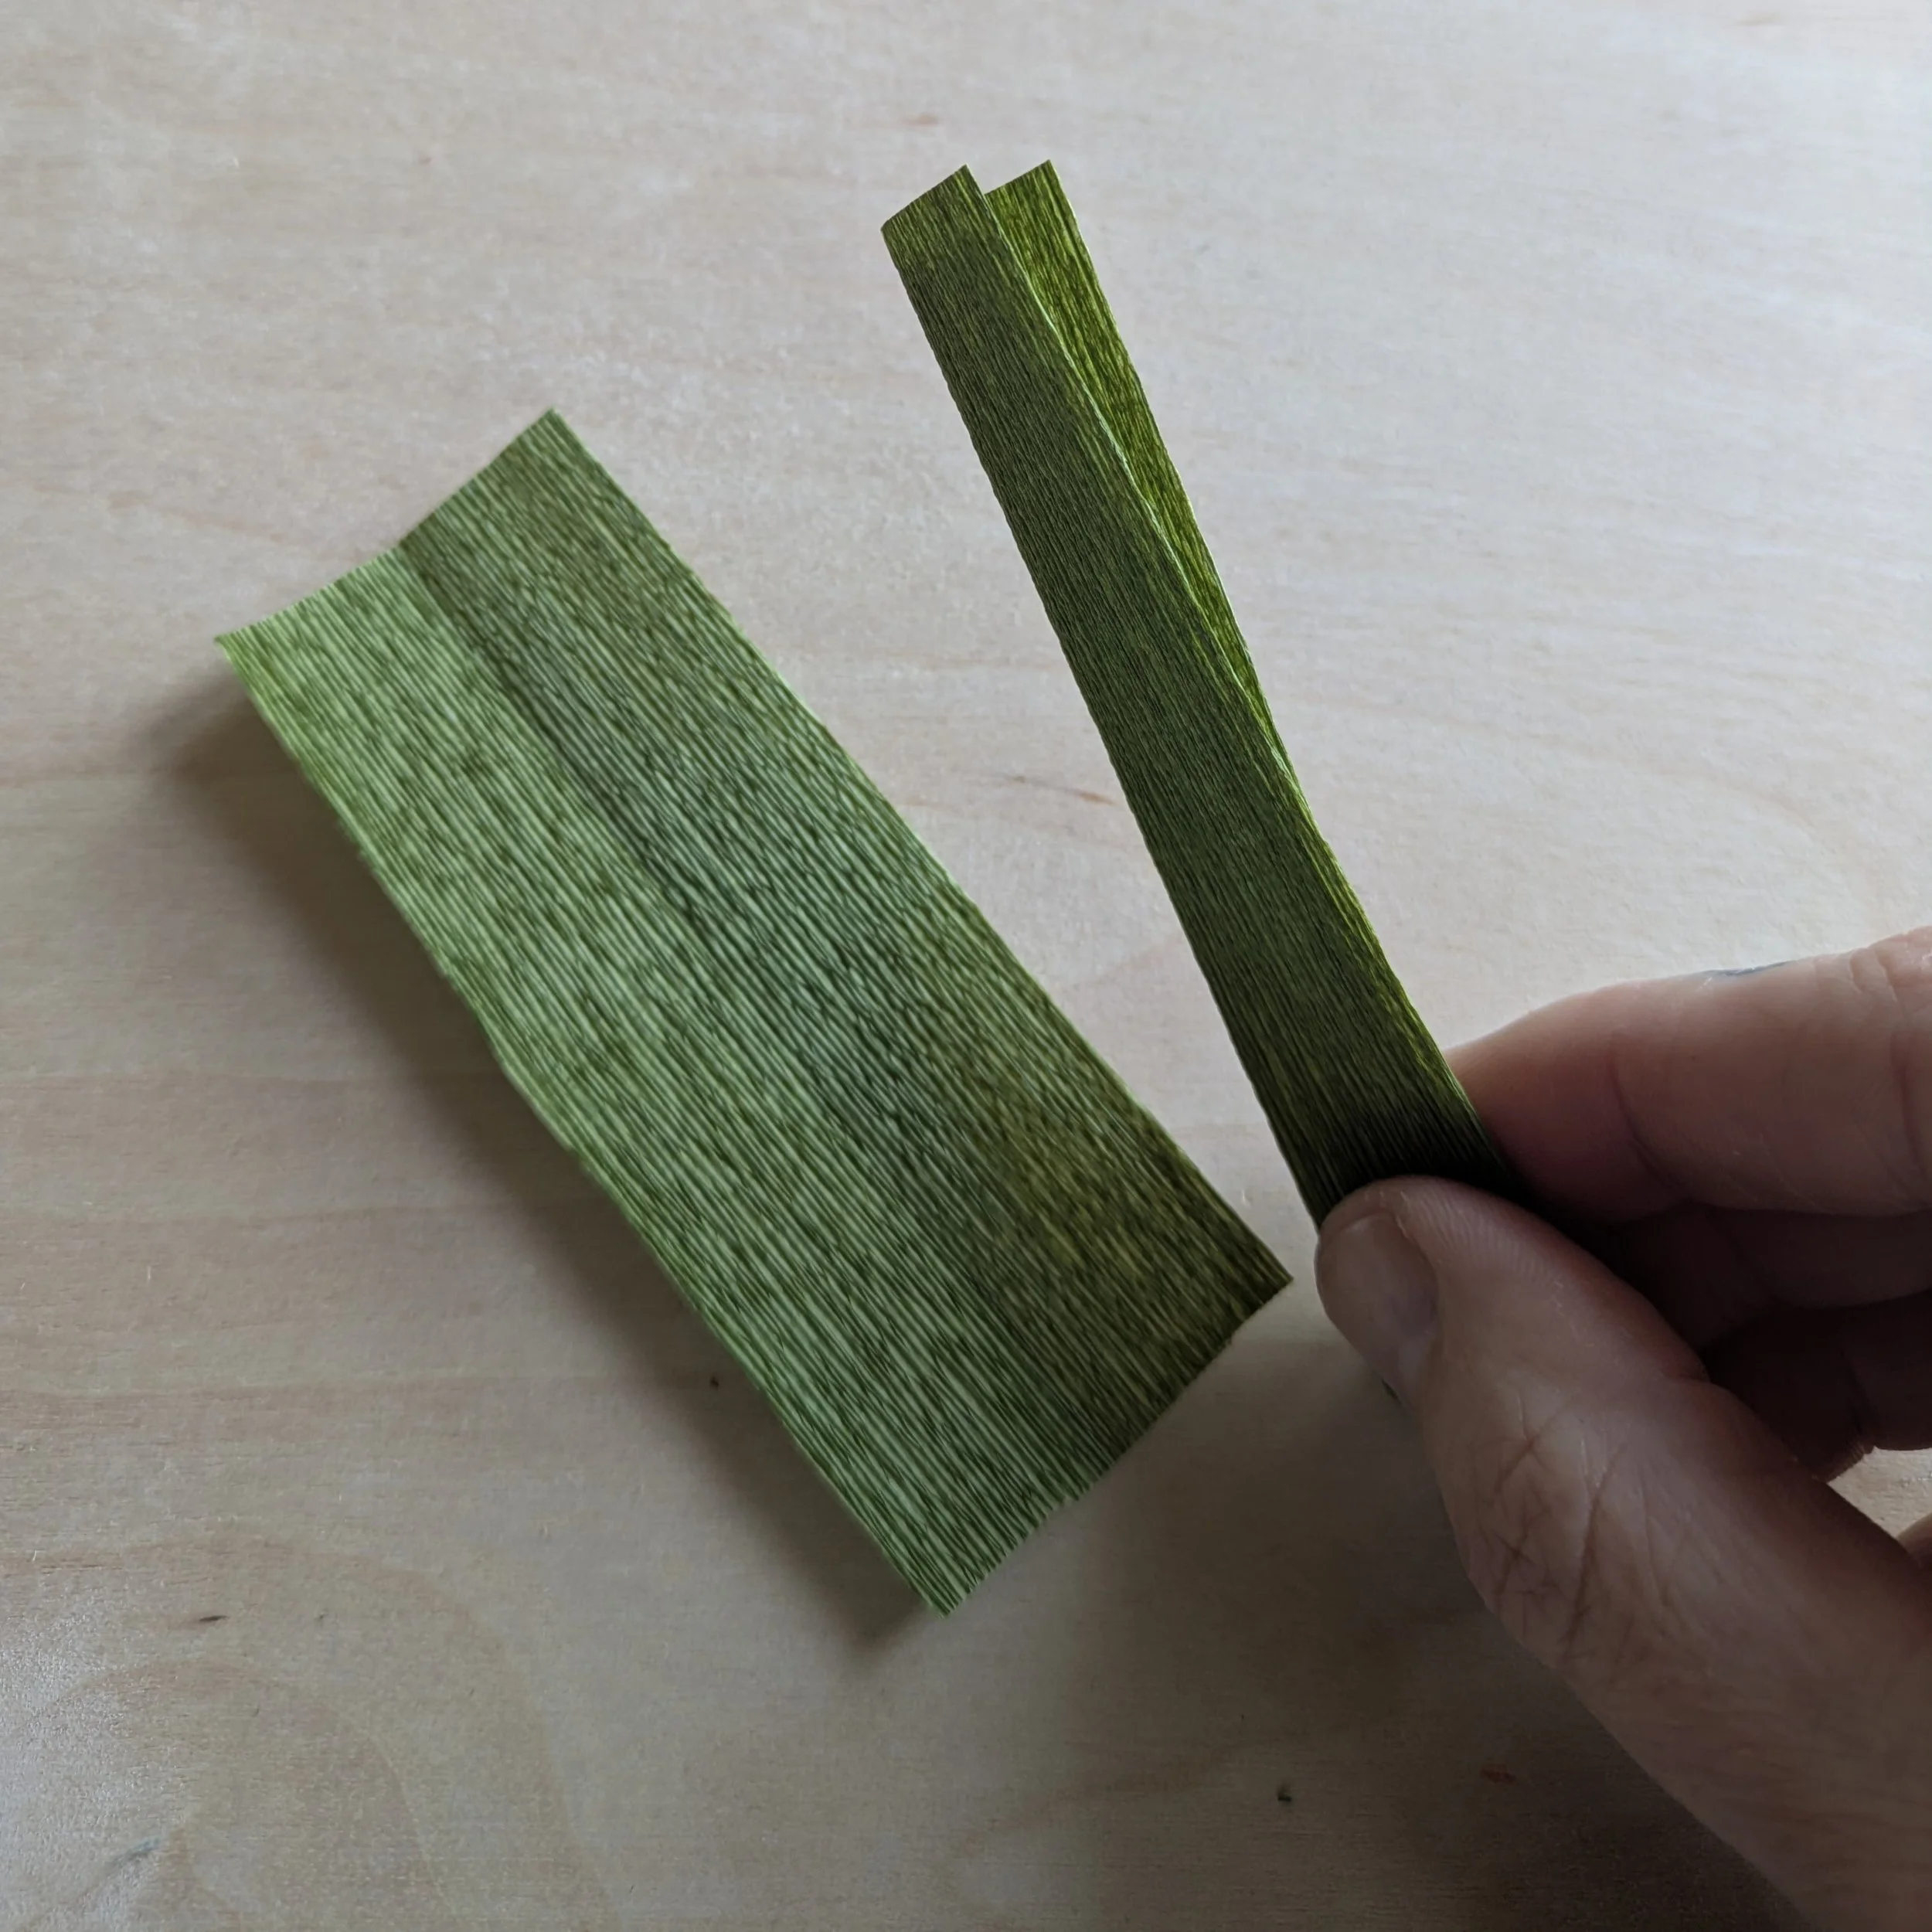
Find your yellow crepe paper, your black crepe paper, and your two uncut tape strips. Place the thin tape strip on the yellow crepe paper.
Step 4: Construct the stamens
On your yellow crepe paper, remove the white backing from the tape strip and press it along one of the long edges of the black crepe paper. As you do this, be mindful to not stretch the black crepe paper.
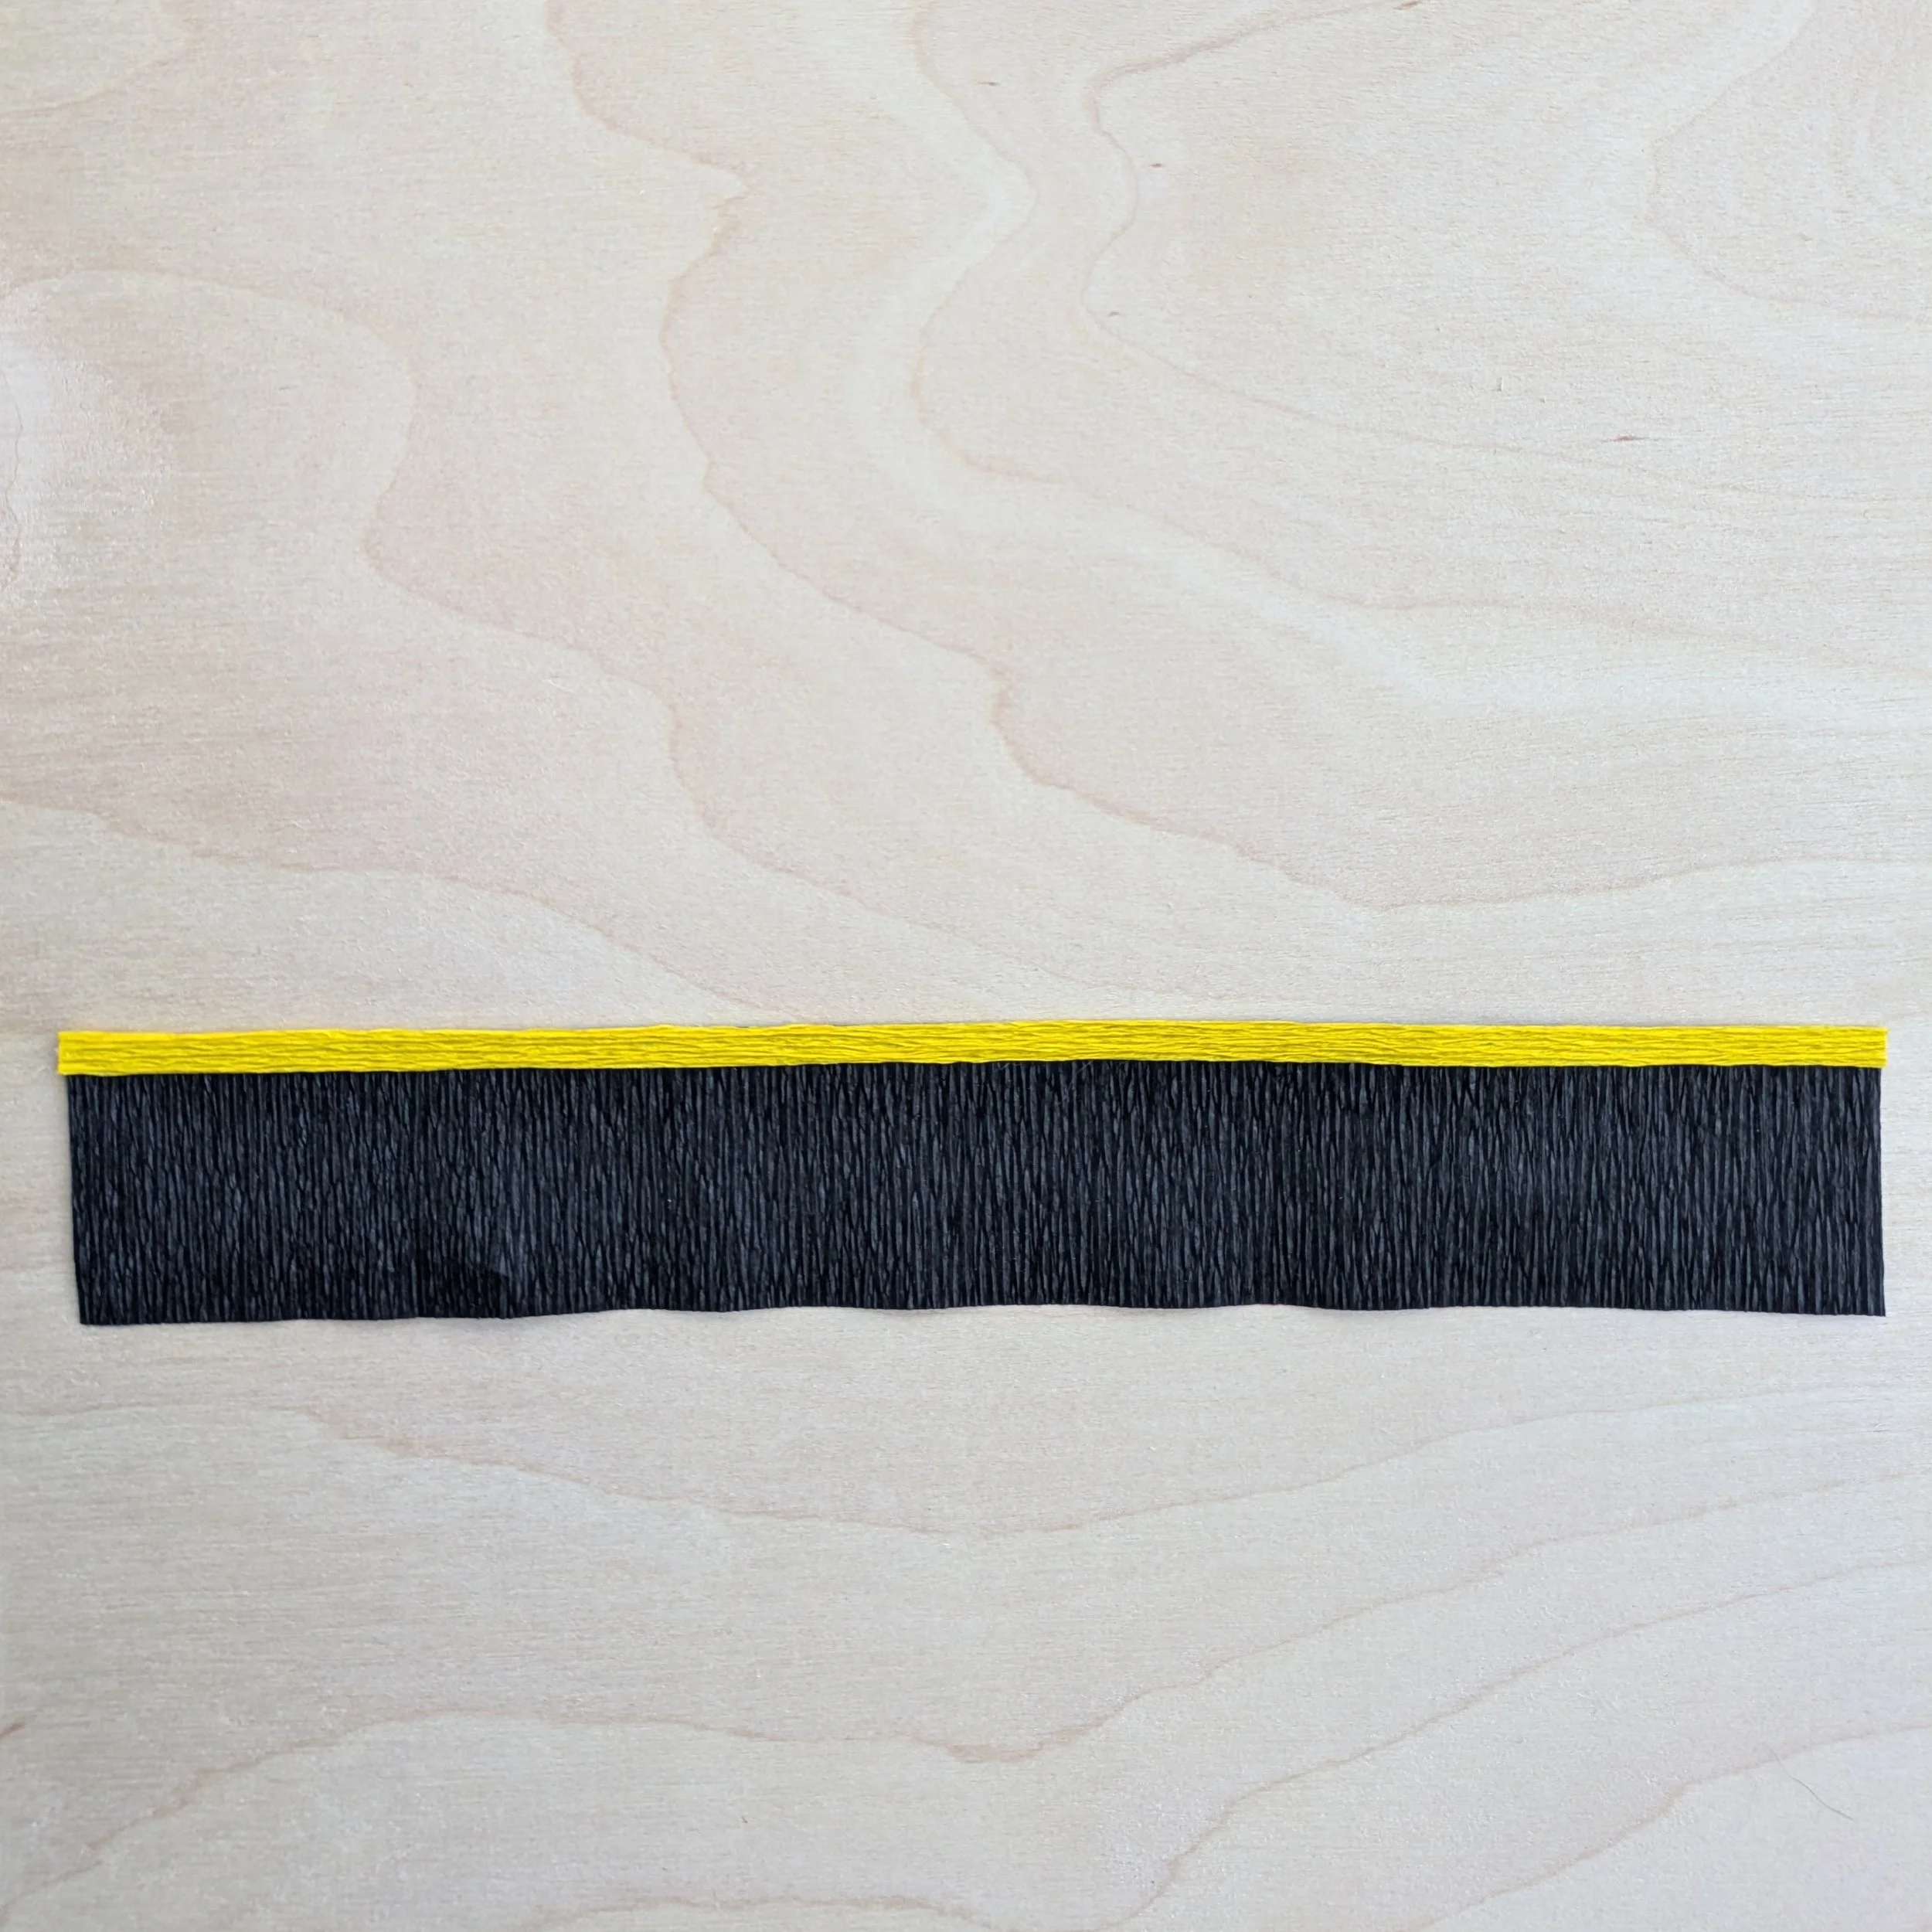
Being mindful to not stretch the black crepe paper, place the thick tape strip along the opposite edge of the black crepe paper.
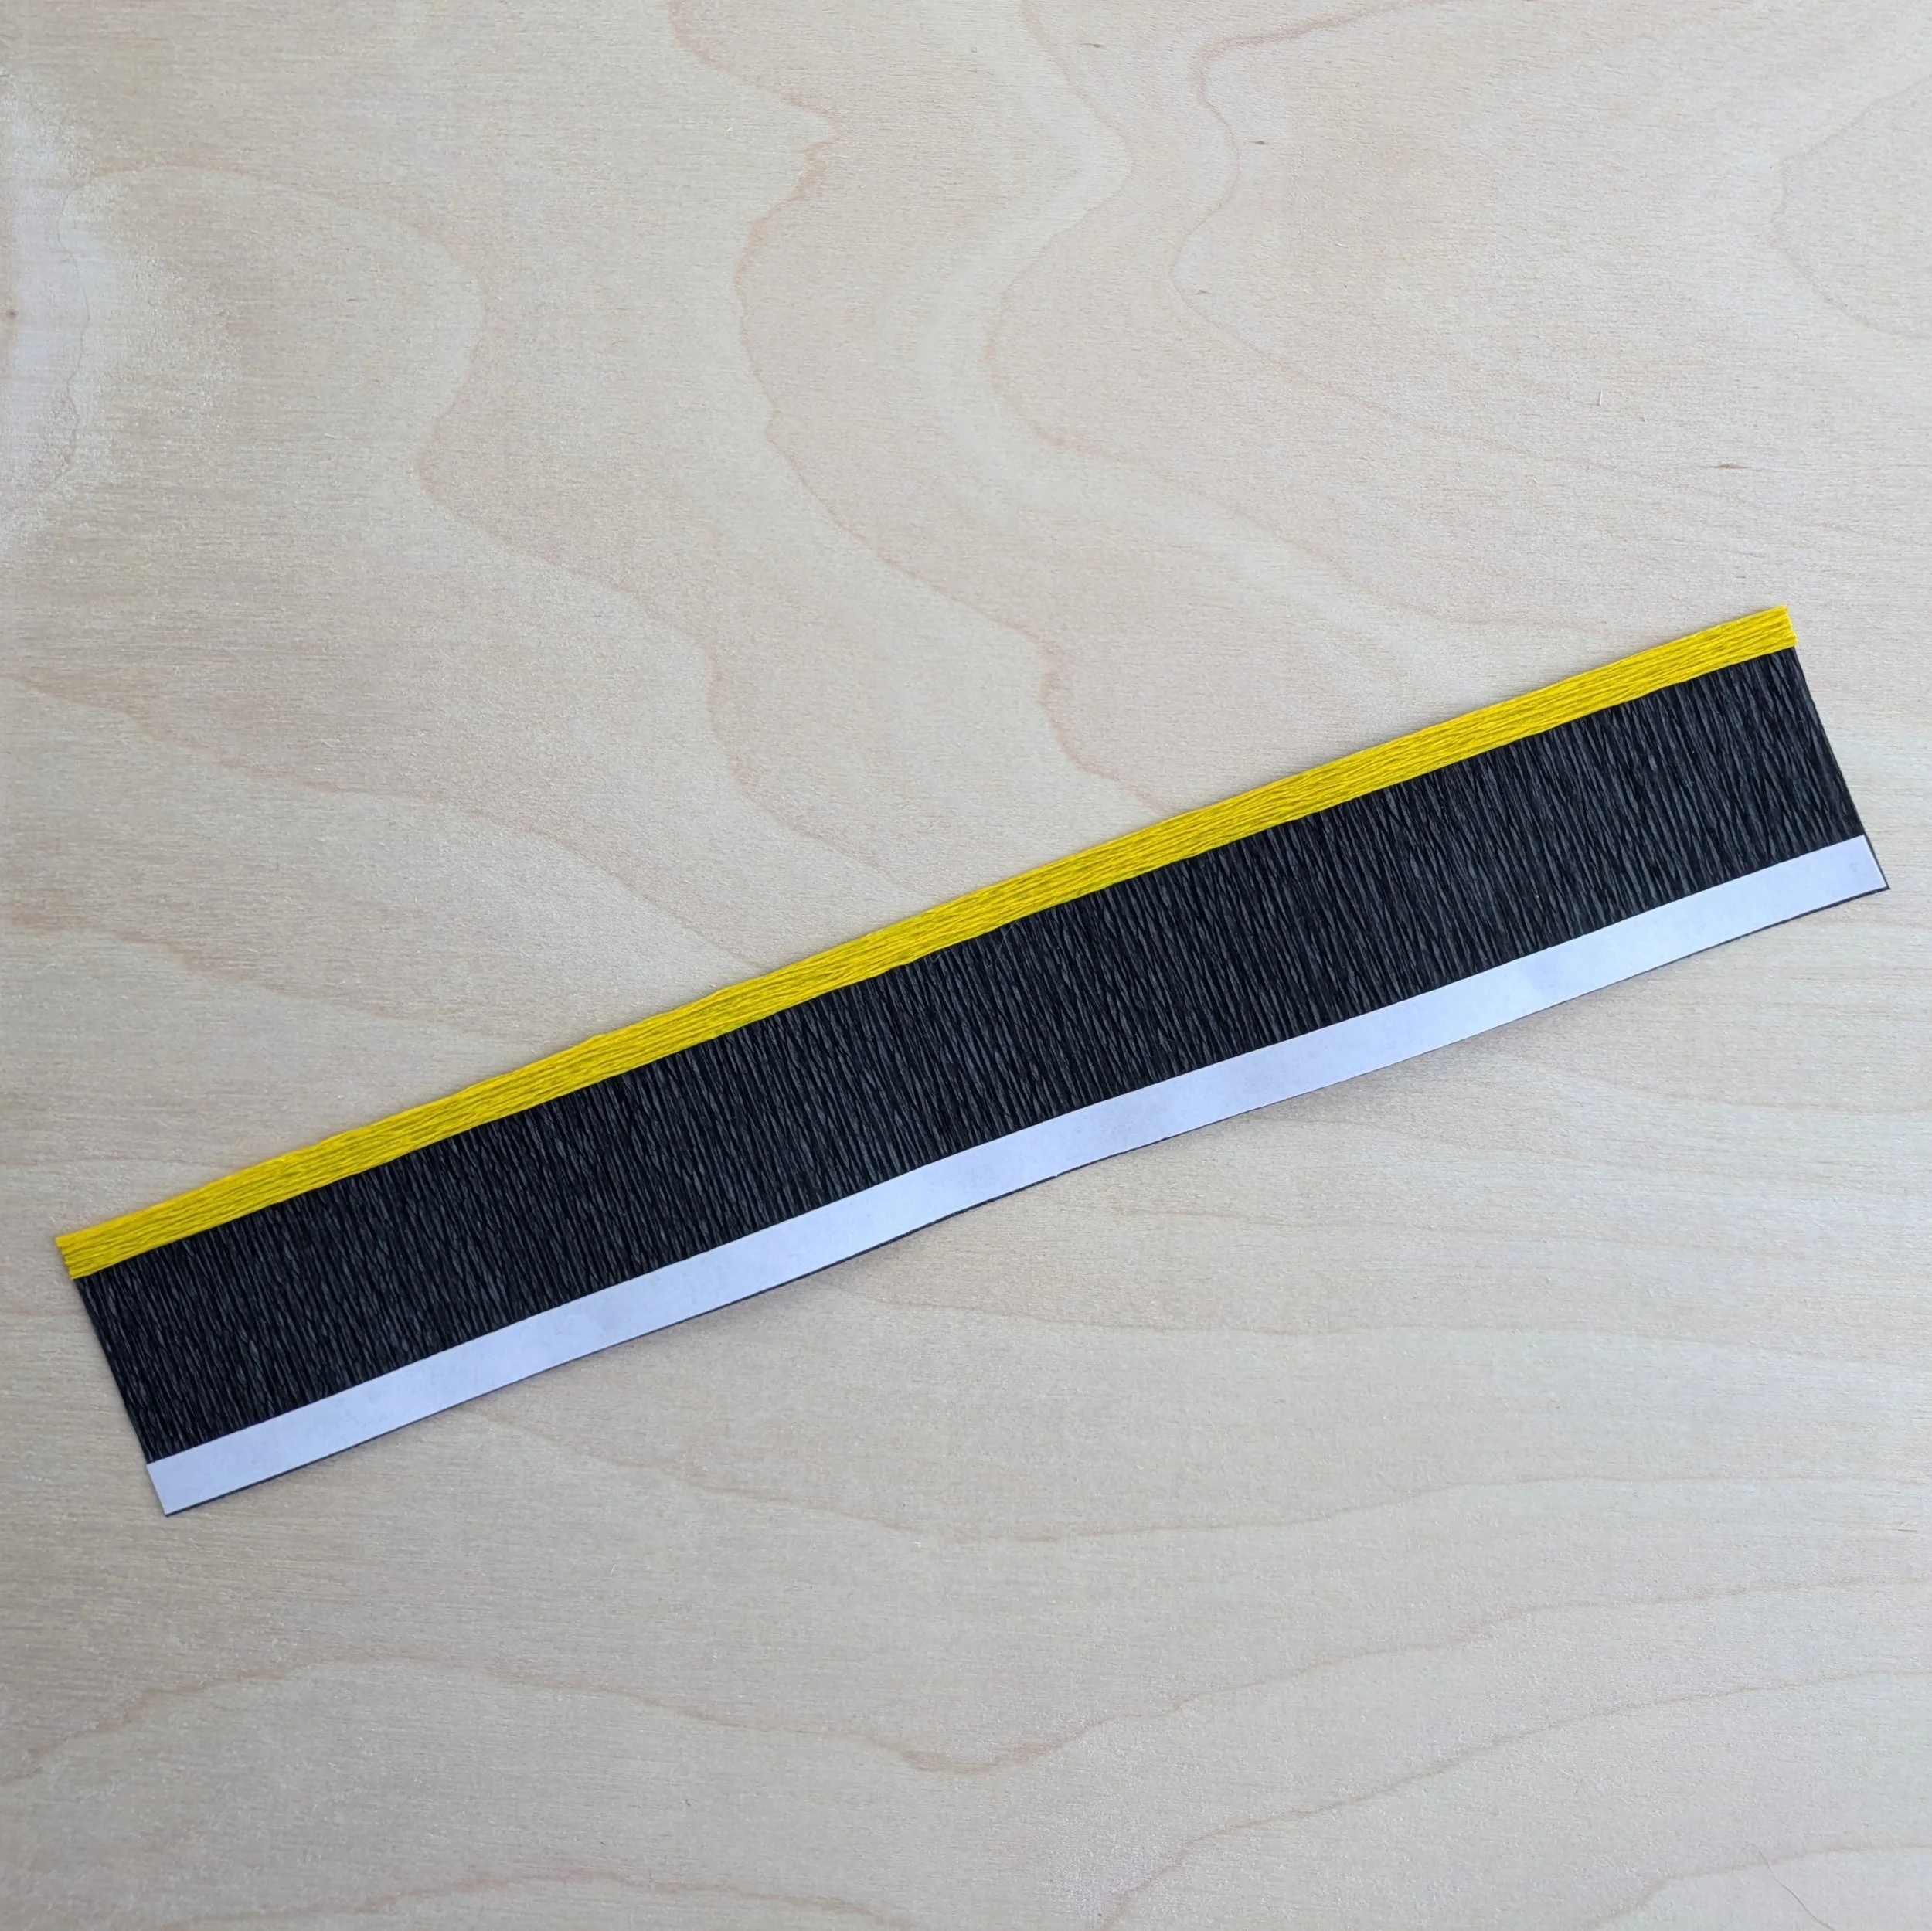
Starting at the side with the yellow crepe paper and ending before you get to the thick tape strip, cut the black crepe paper into fringe that is about 1/4” wide. For reference, this is the width of the thick tape strip.
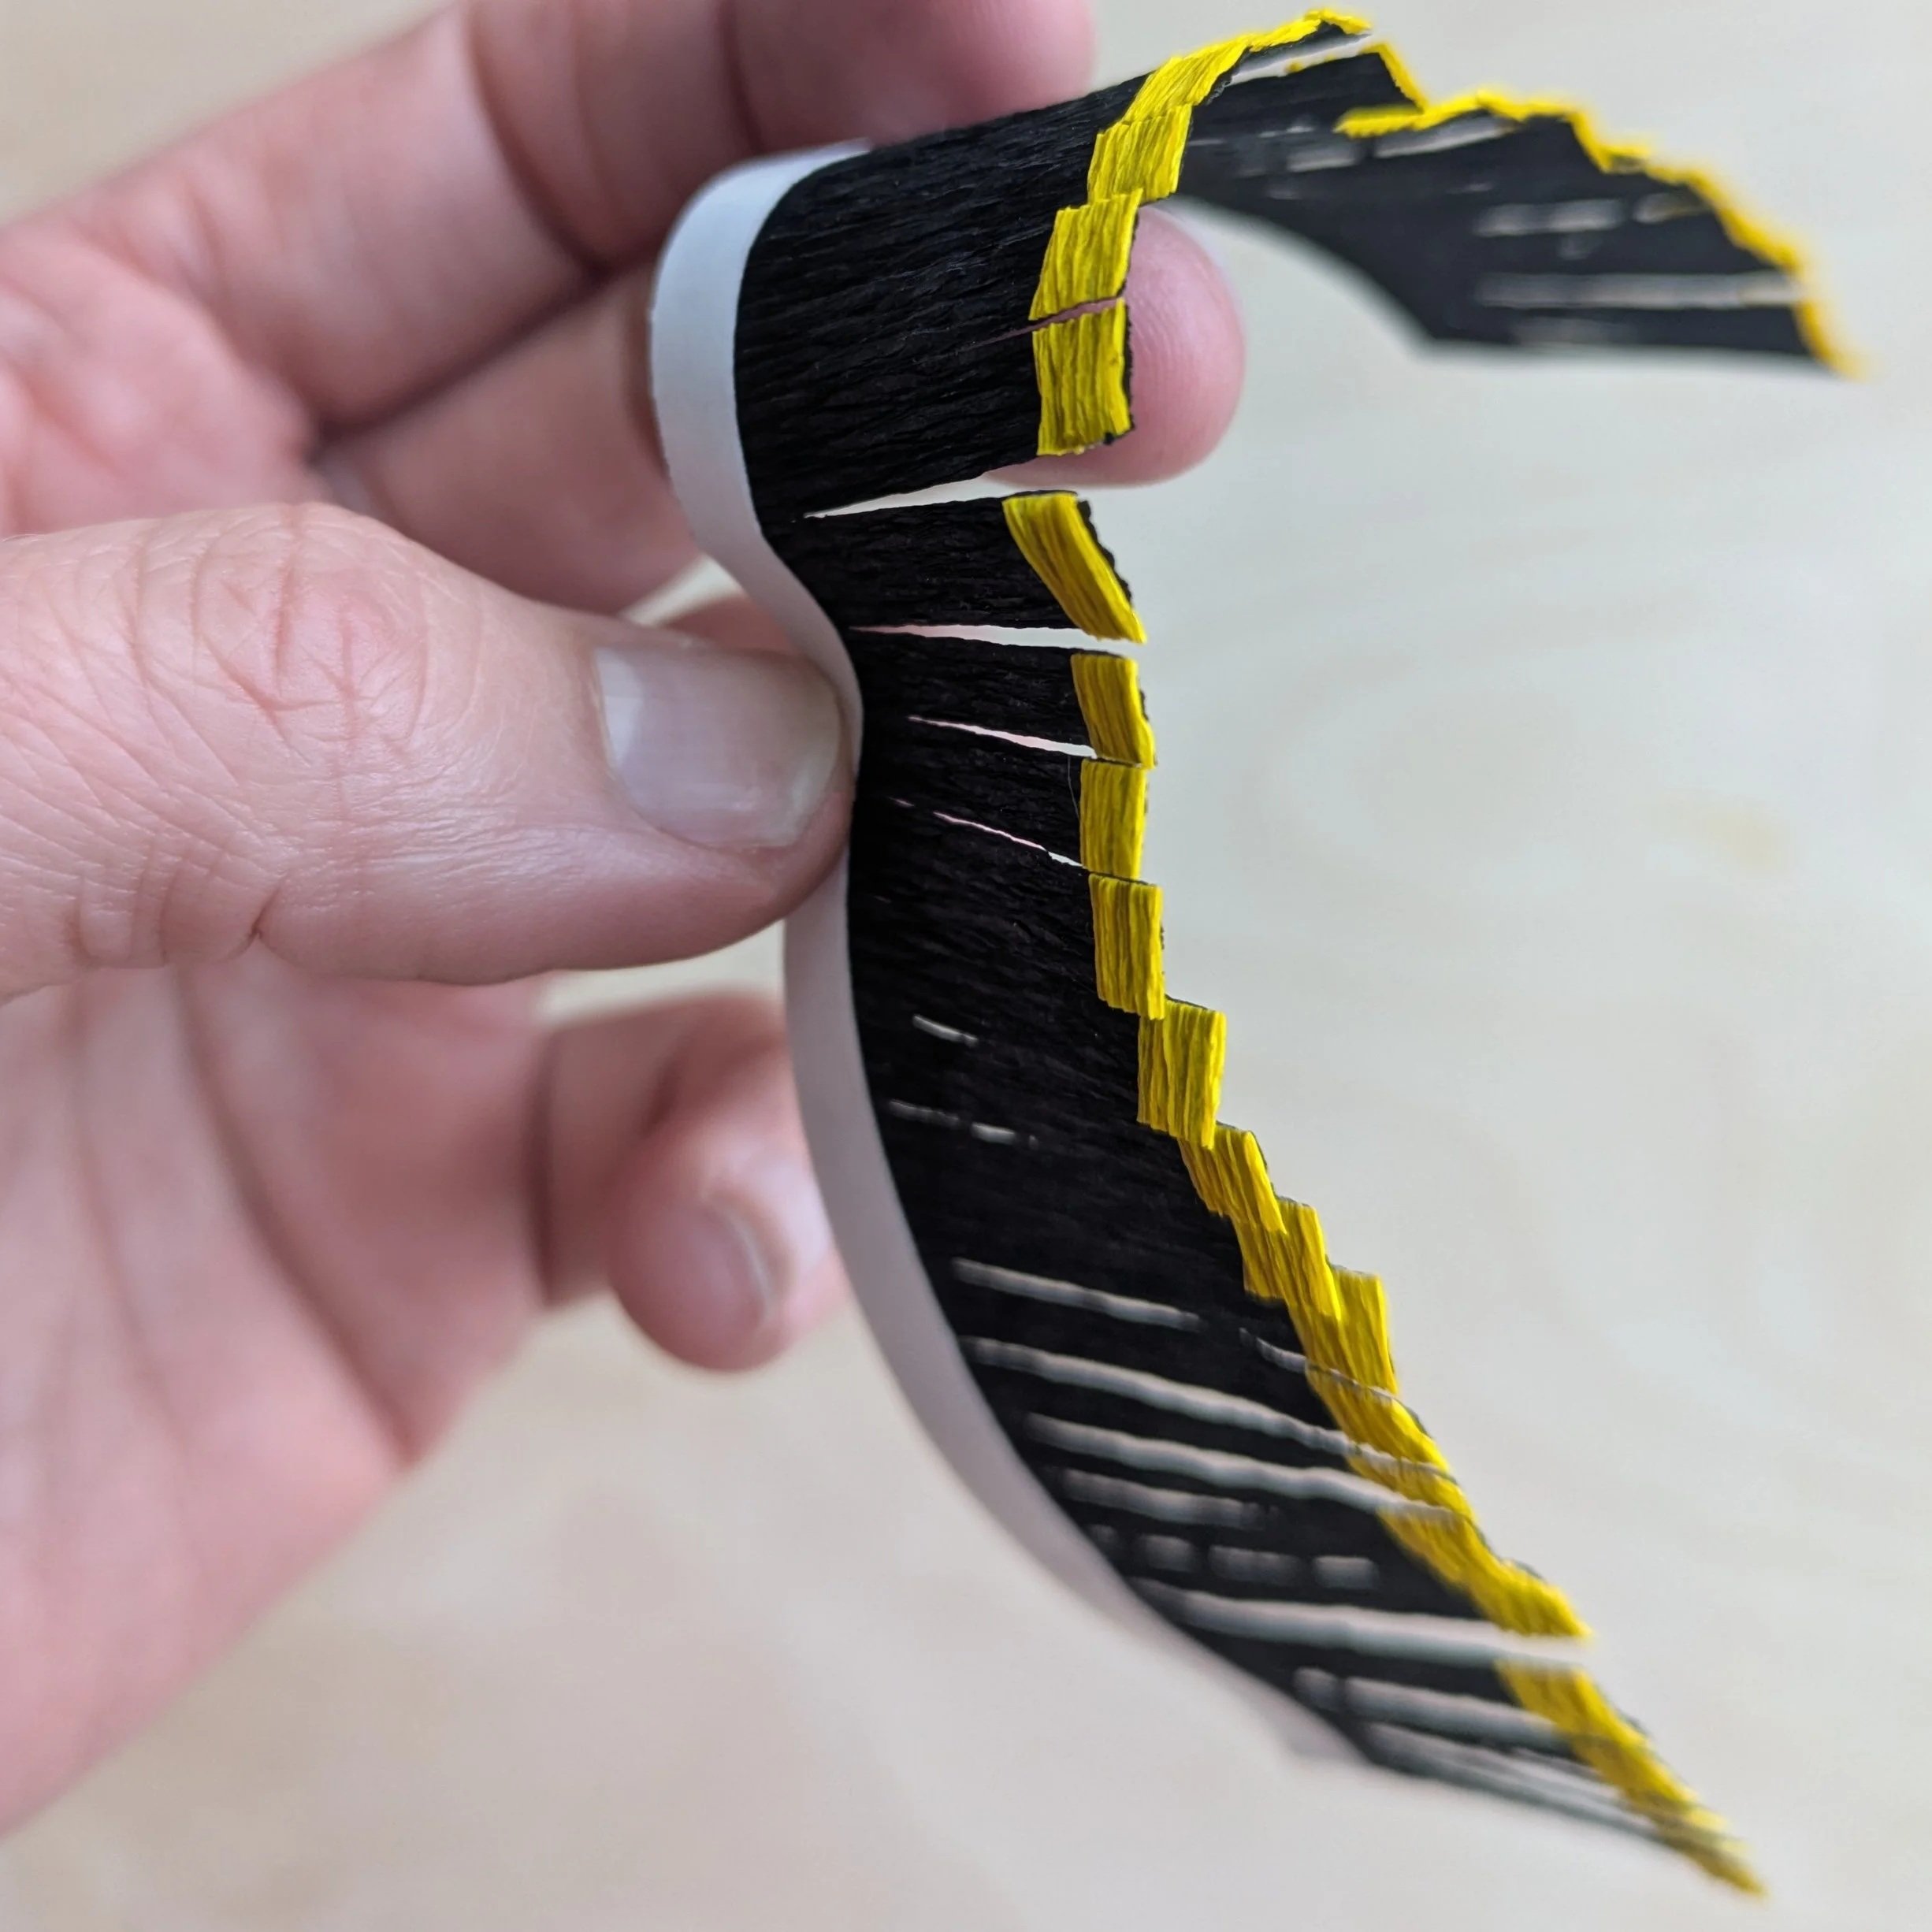
Next, you will create the stamens. Start each stamen by folding the piece of fringe in half so that the yellow crepe paper is facing the outside.
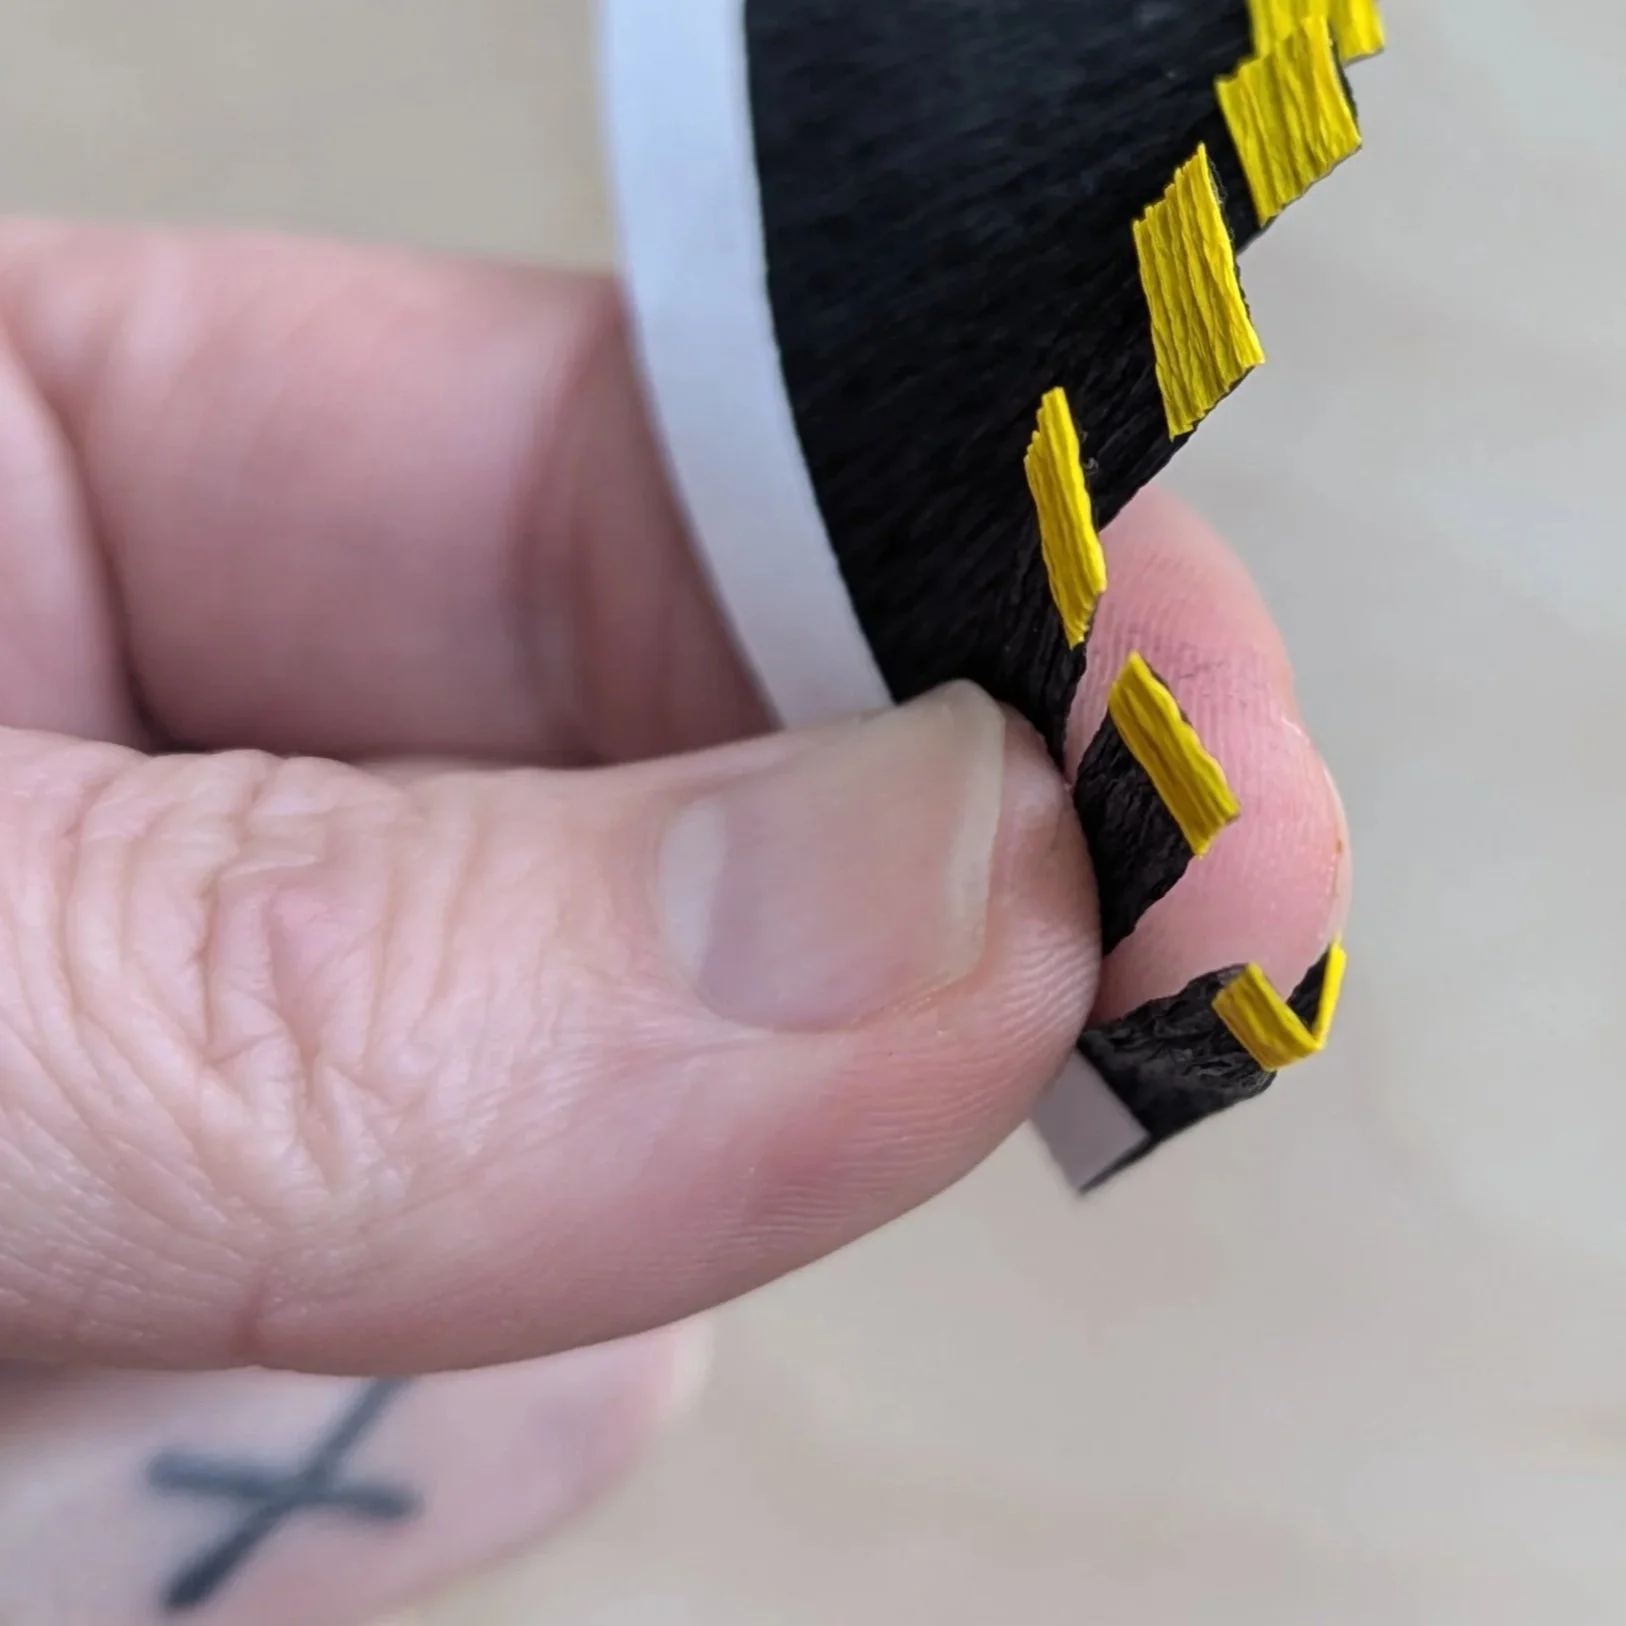
Finish creating the stamens by gently but tightly twisting each piece of fringe.
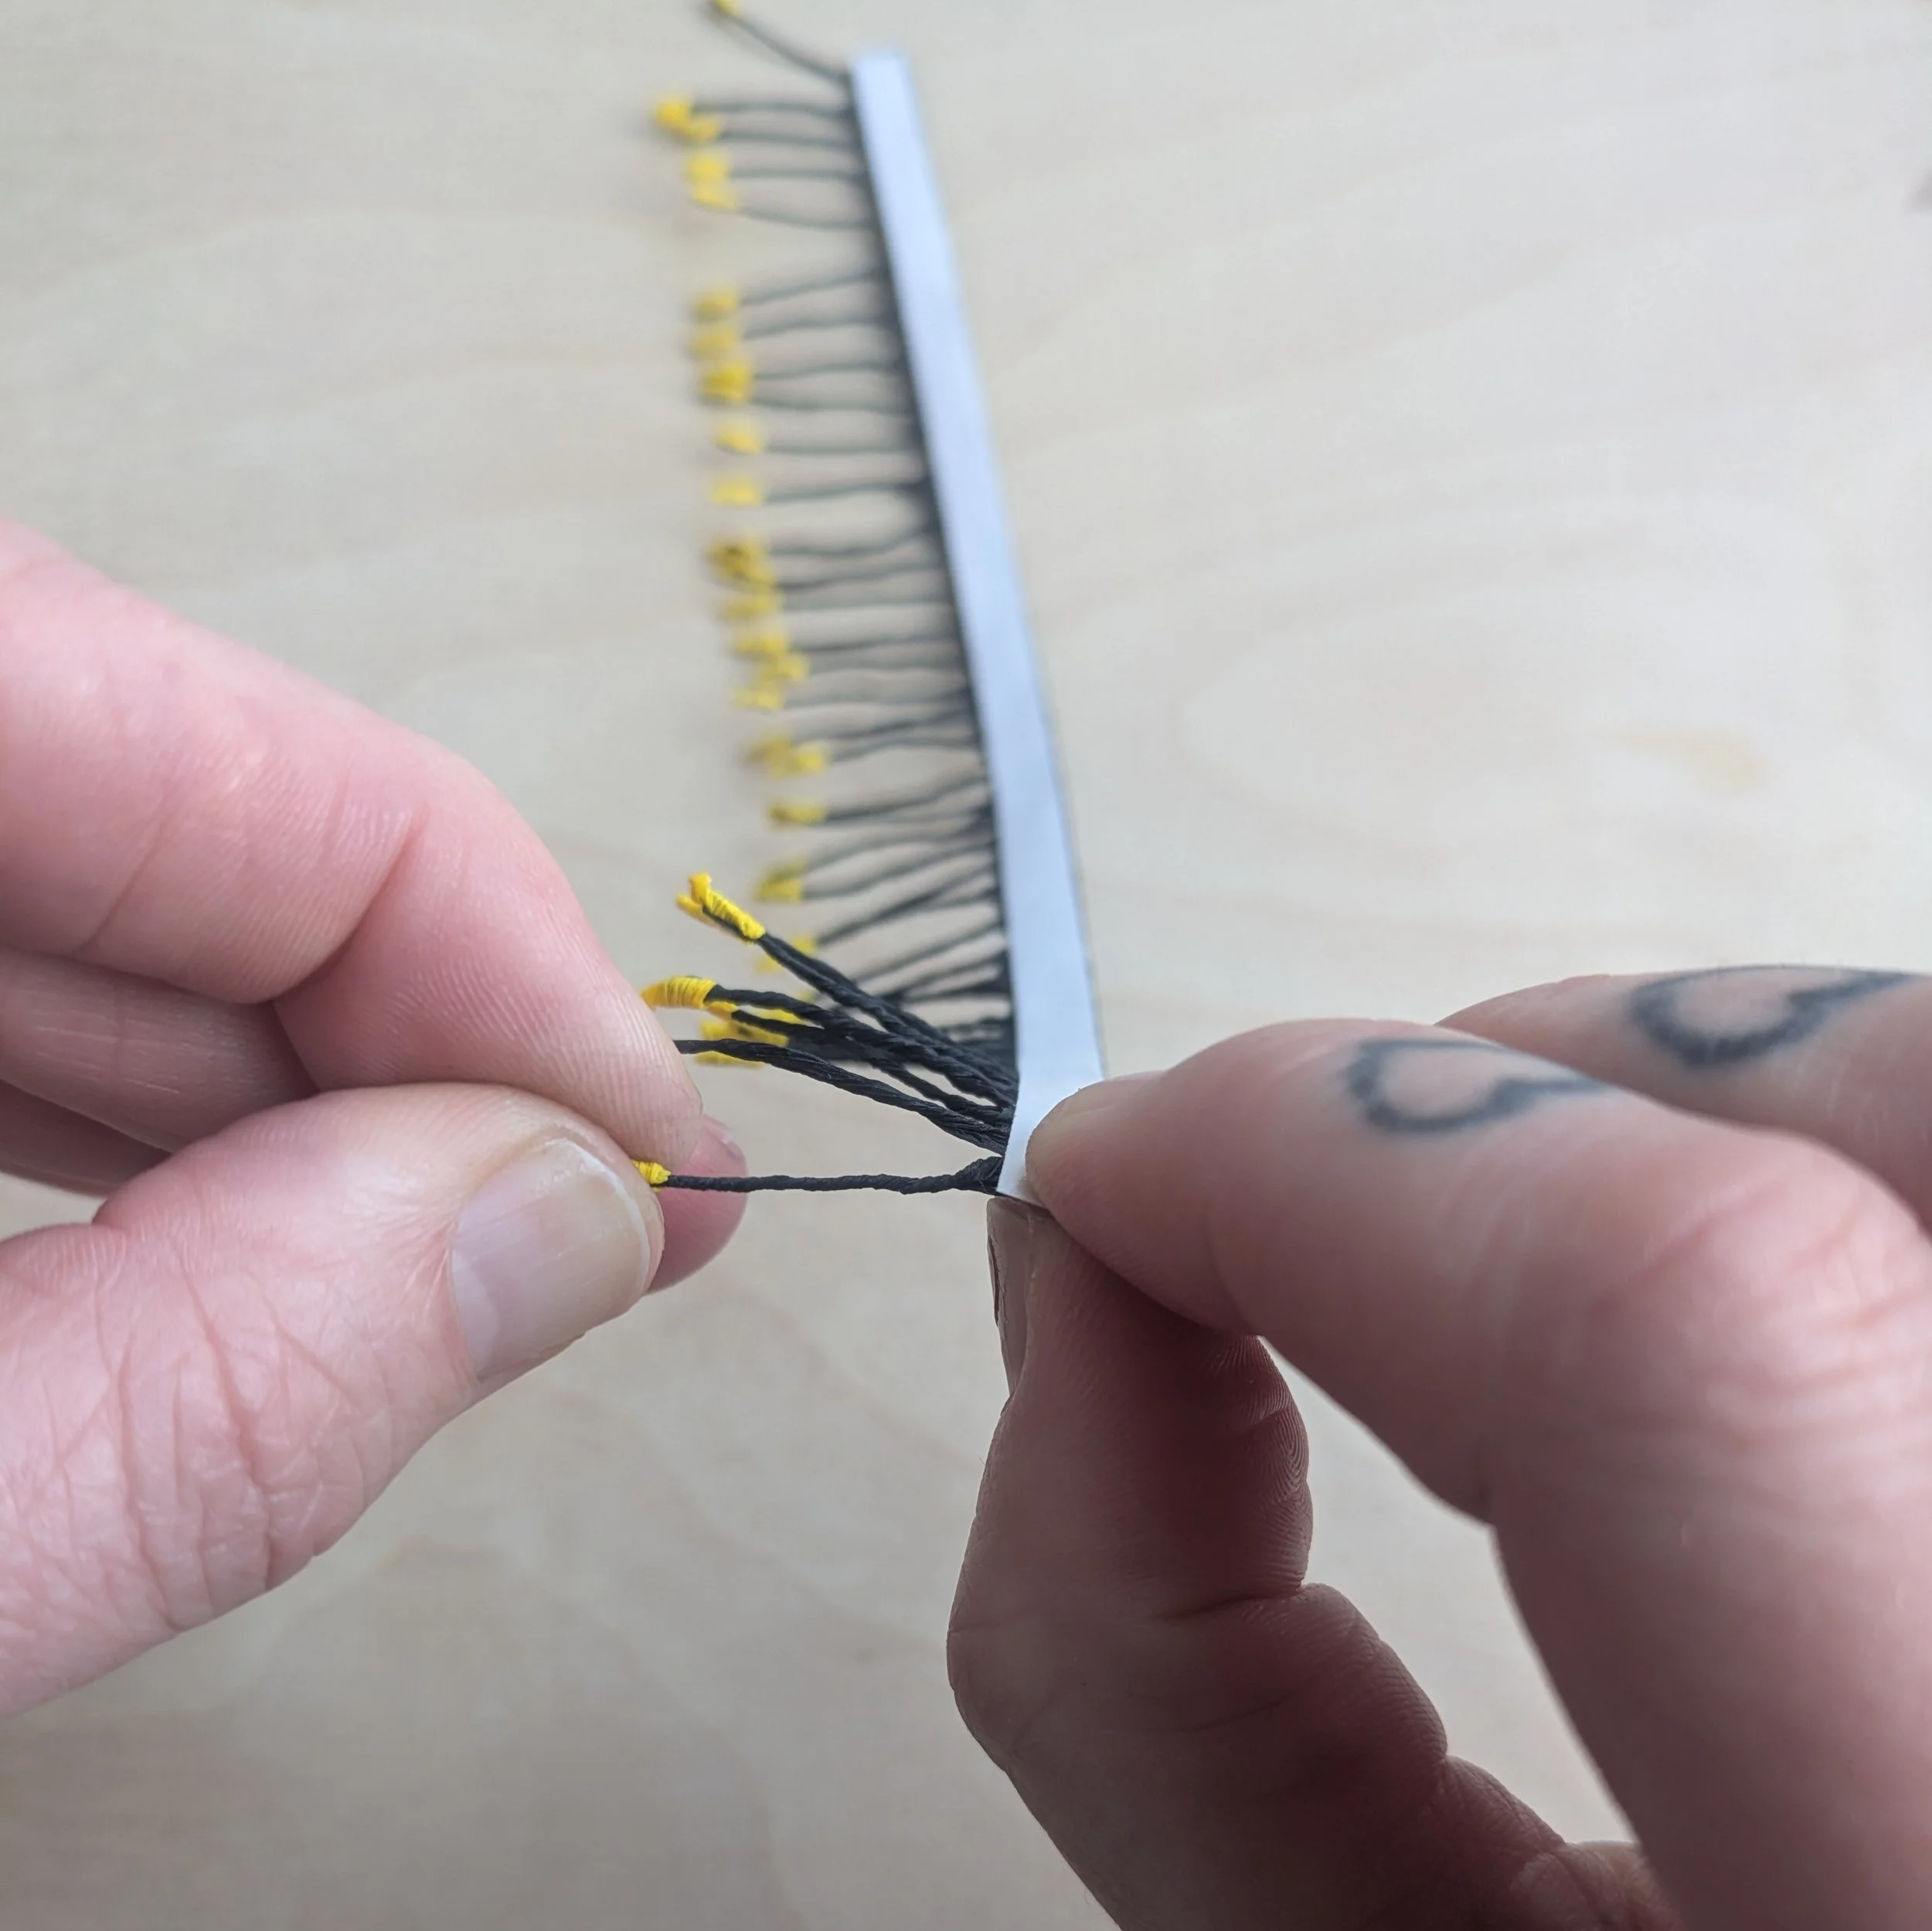
Next, start peeling back the white backing on the tick tape strap. Attach that end of the black crepe paper to the bottom edge of the seedpod.
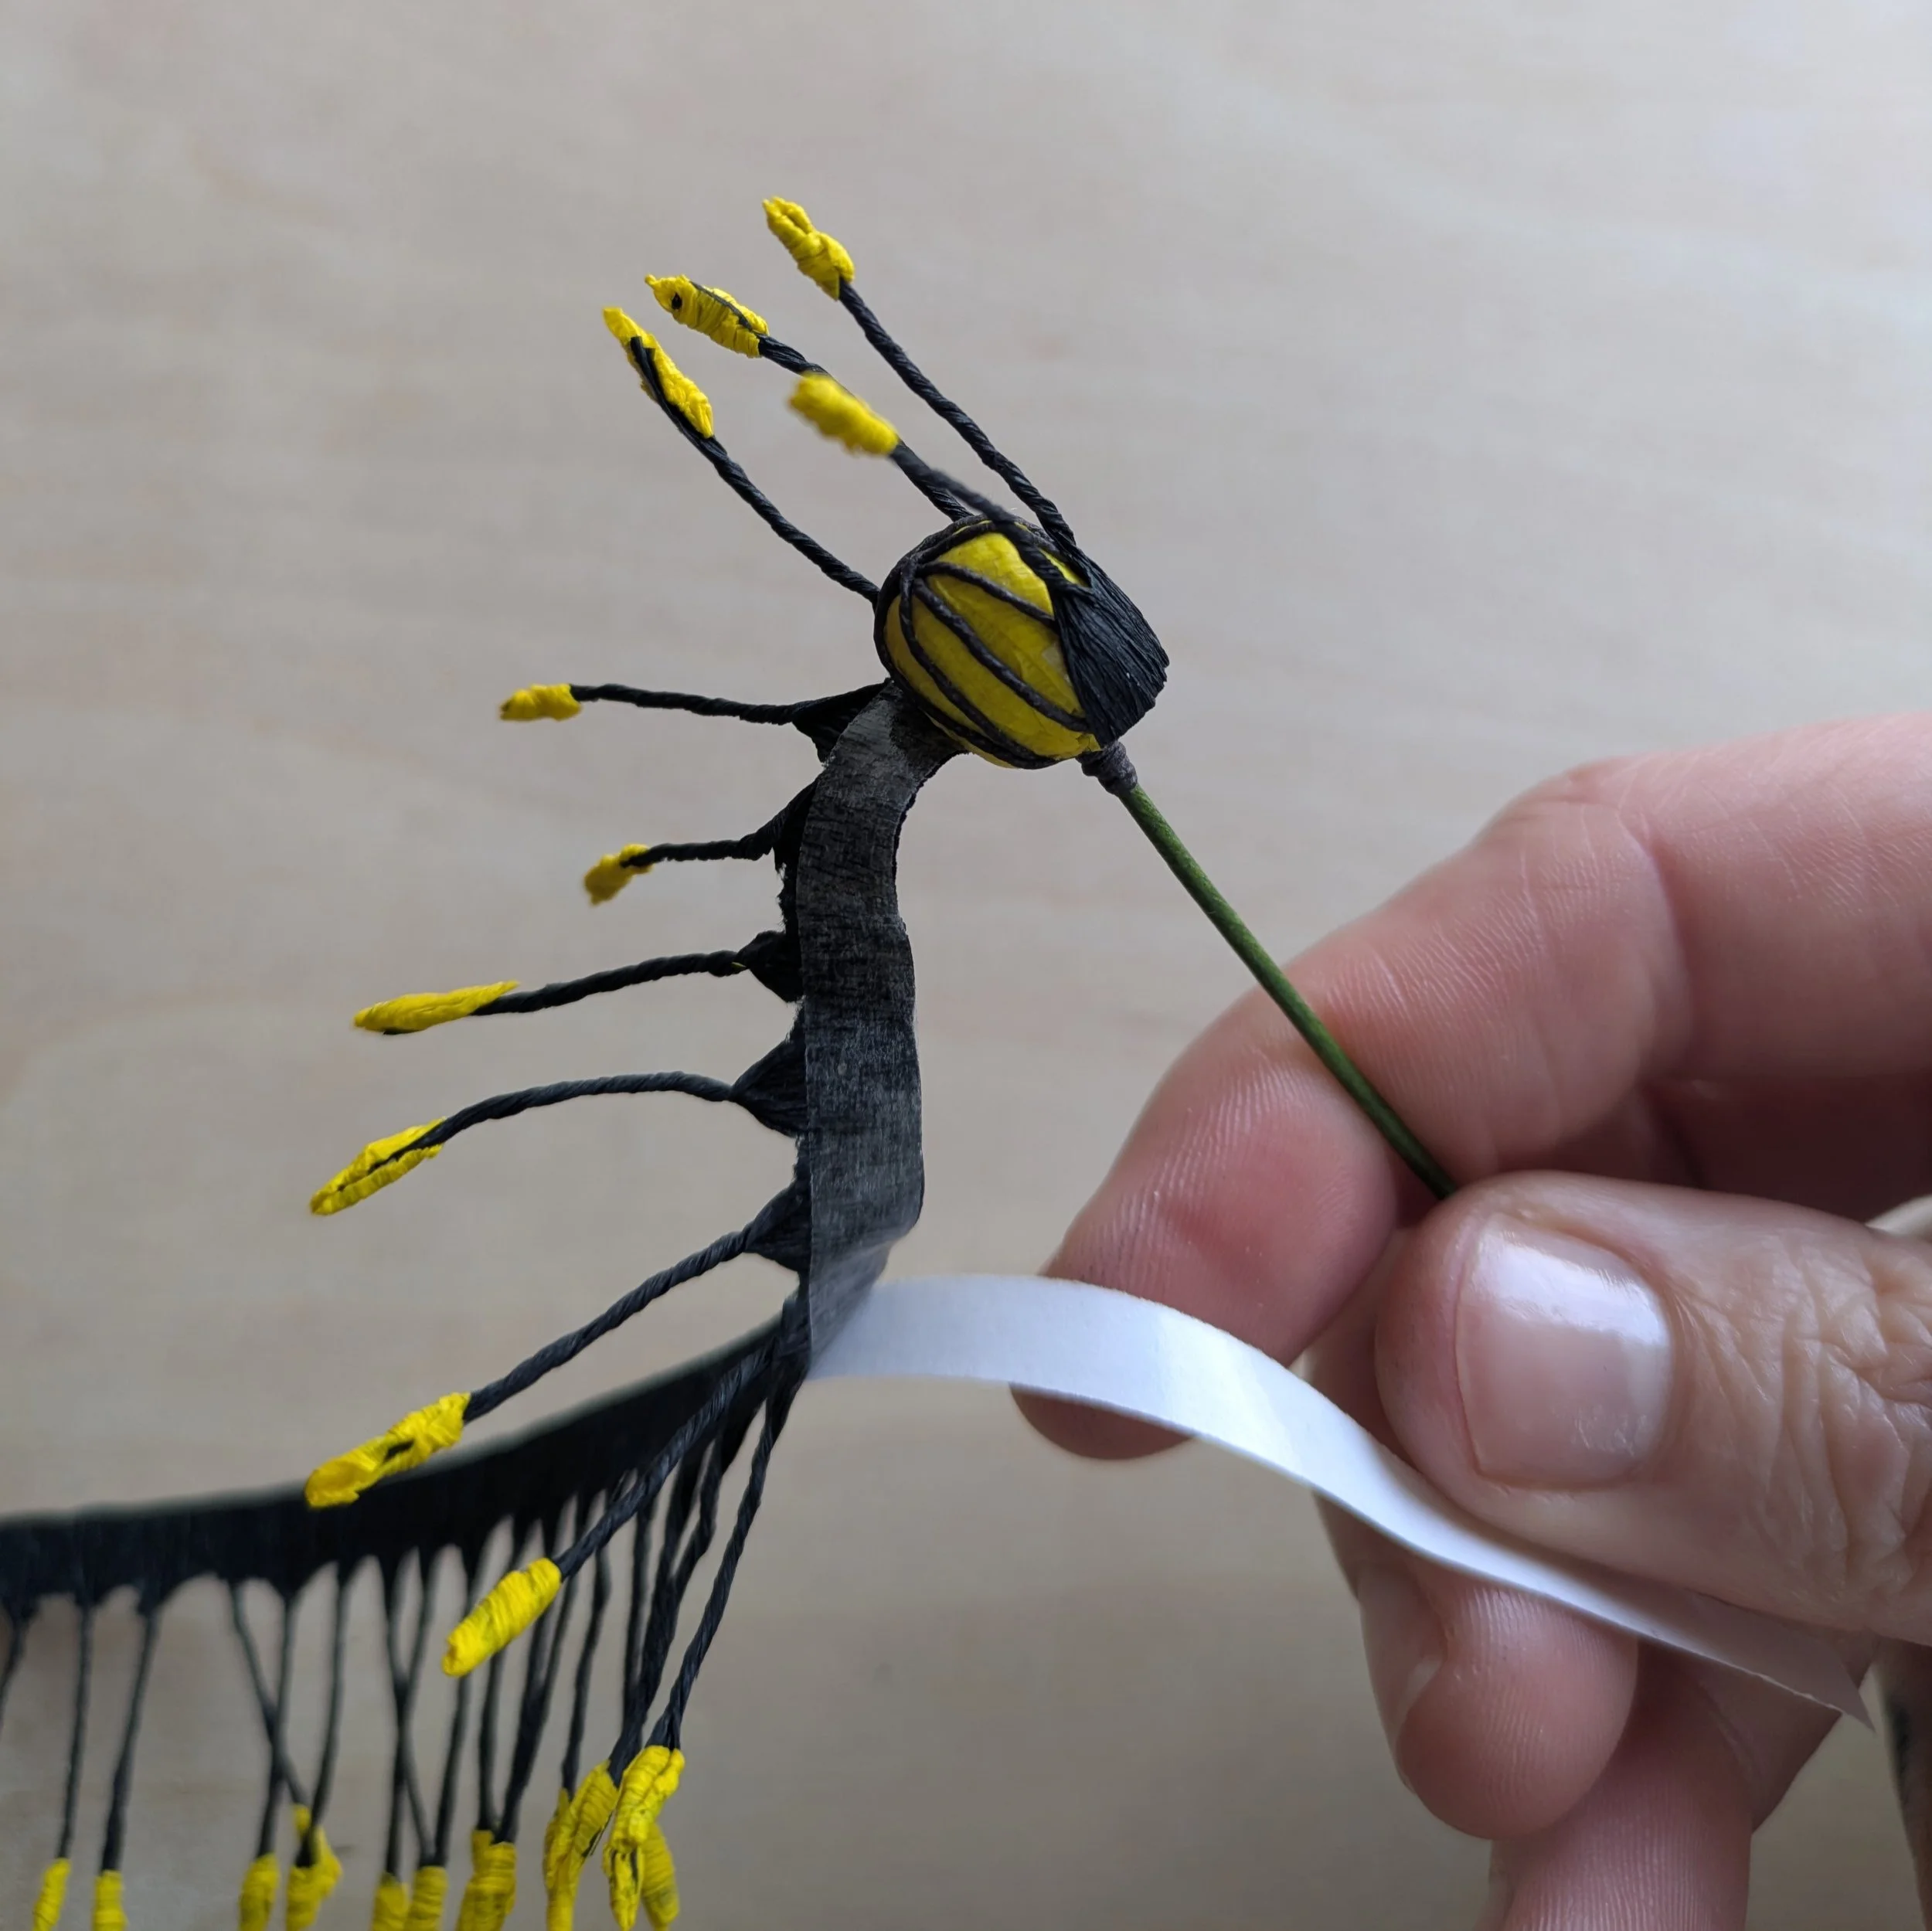
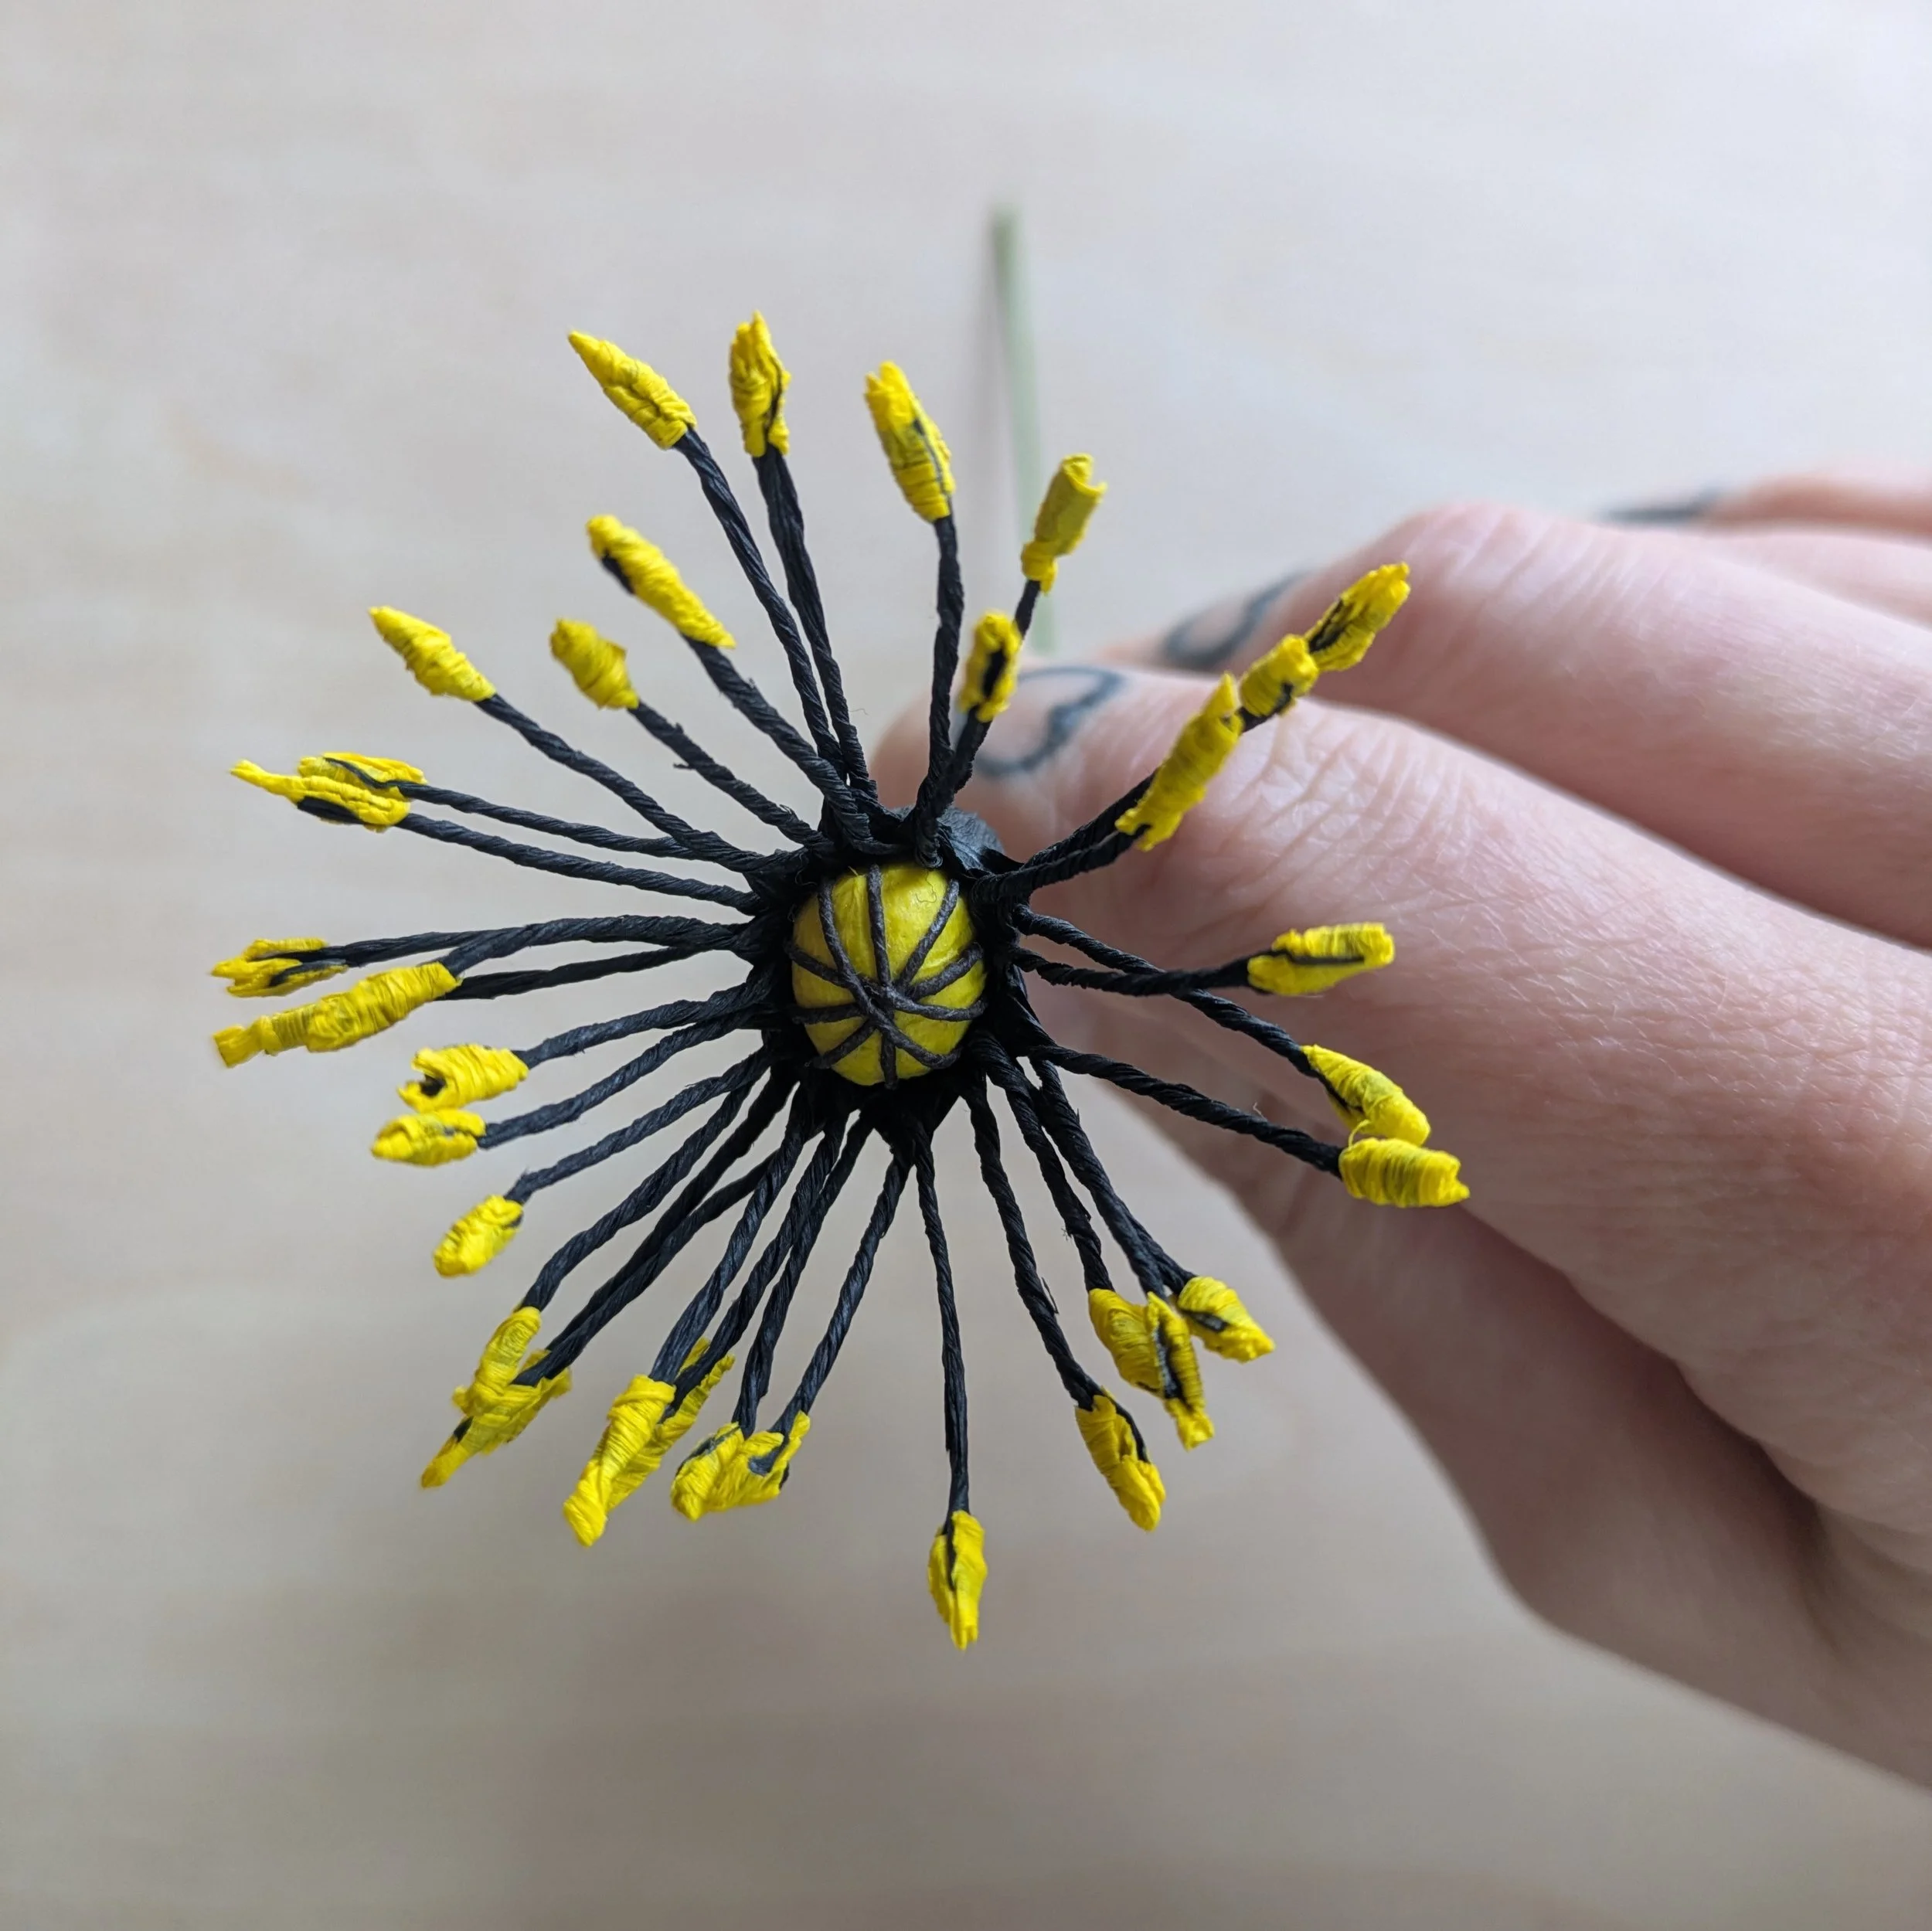
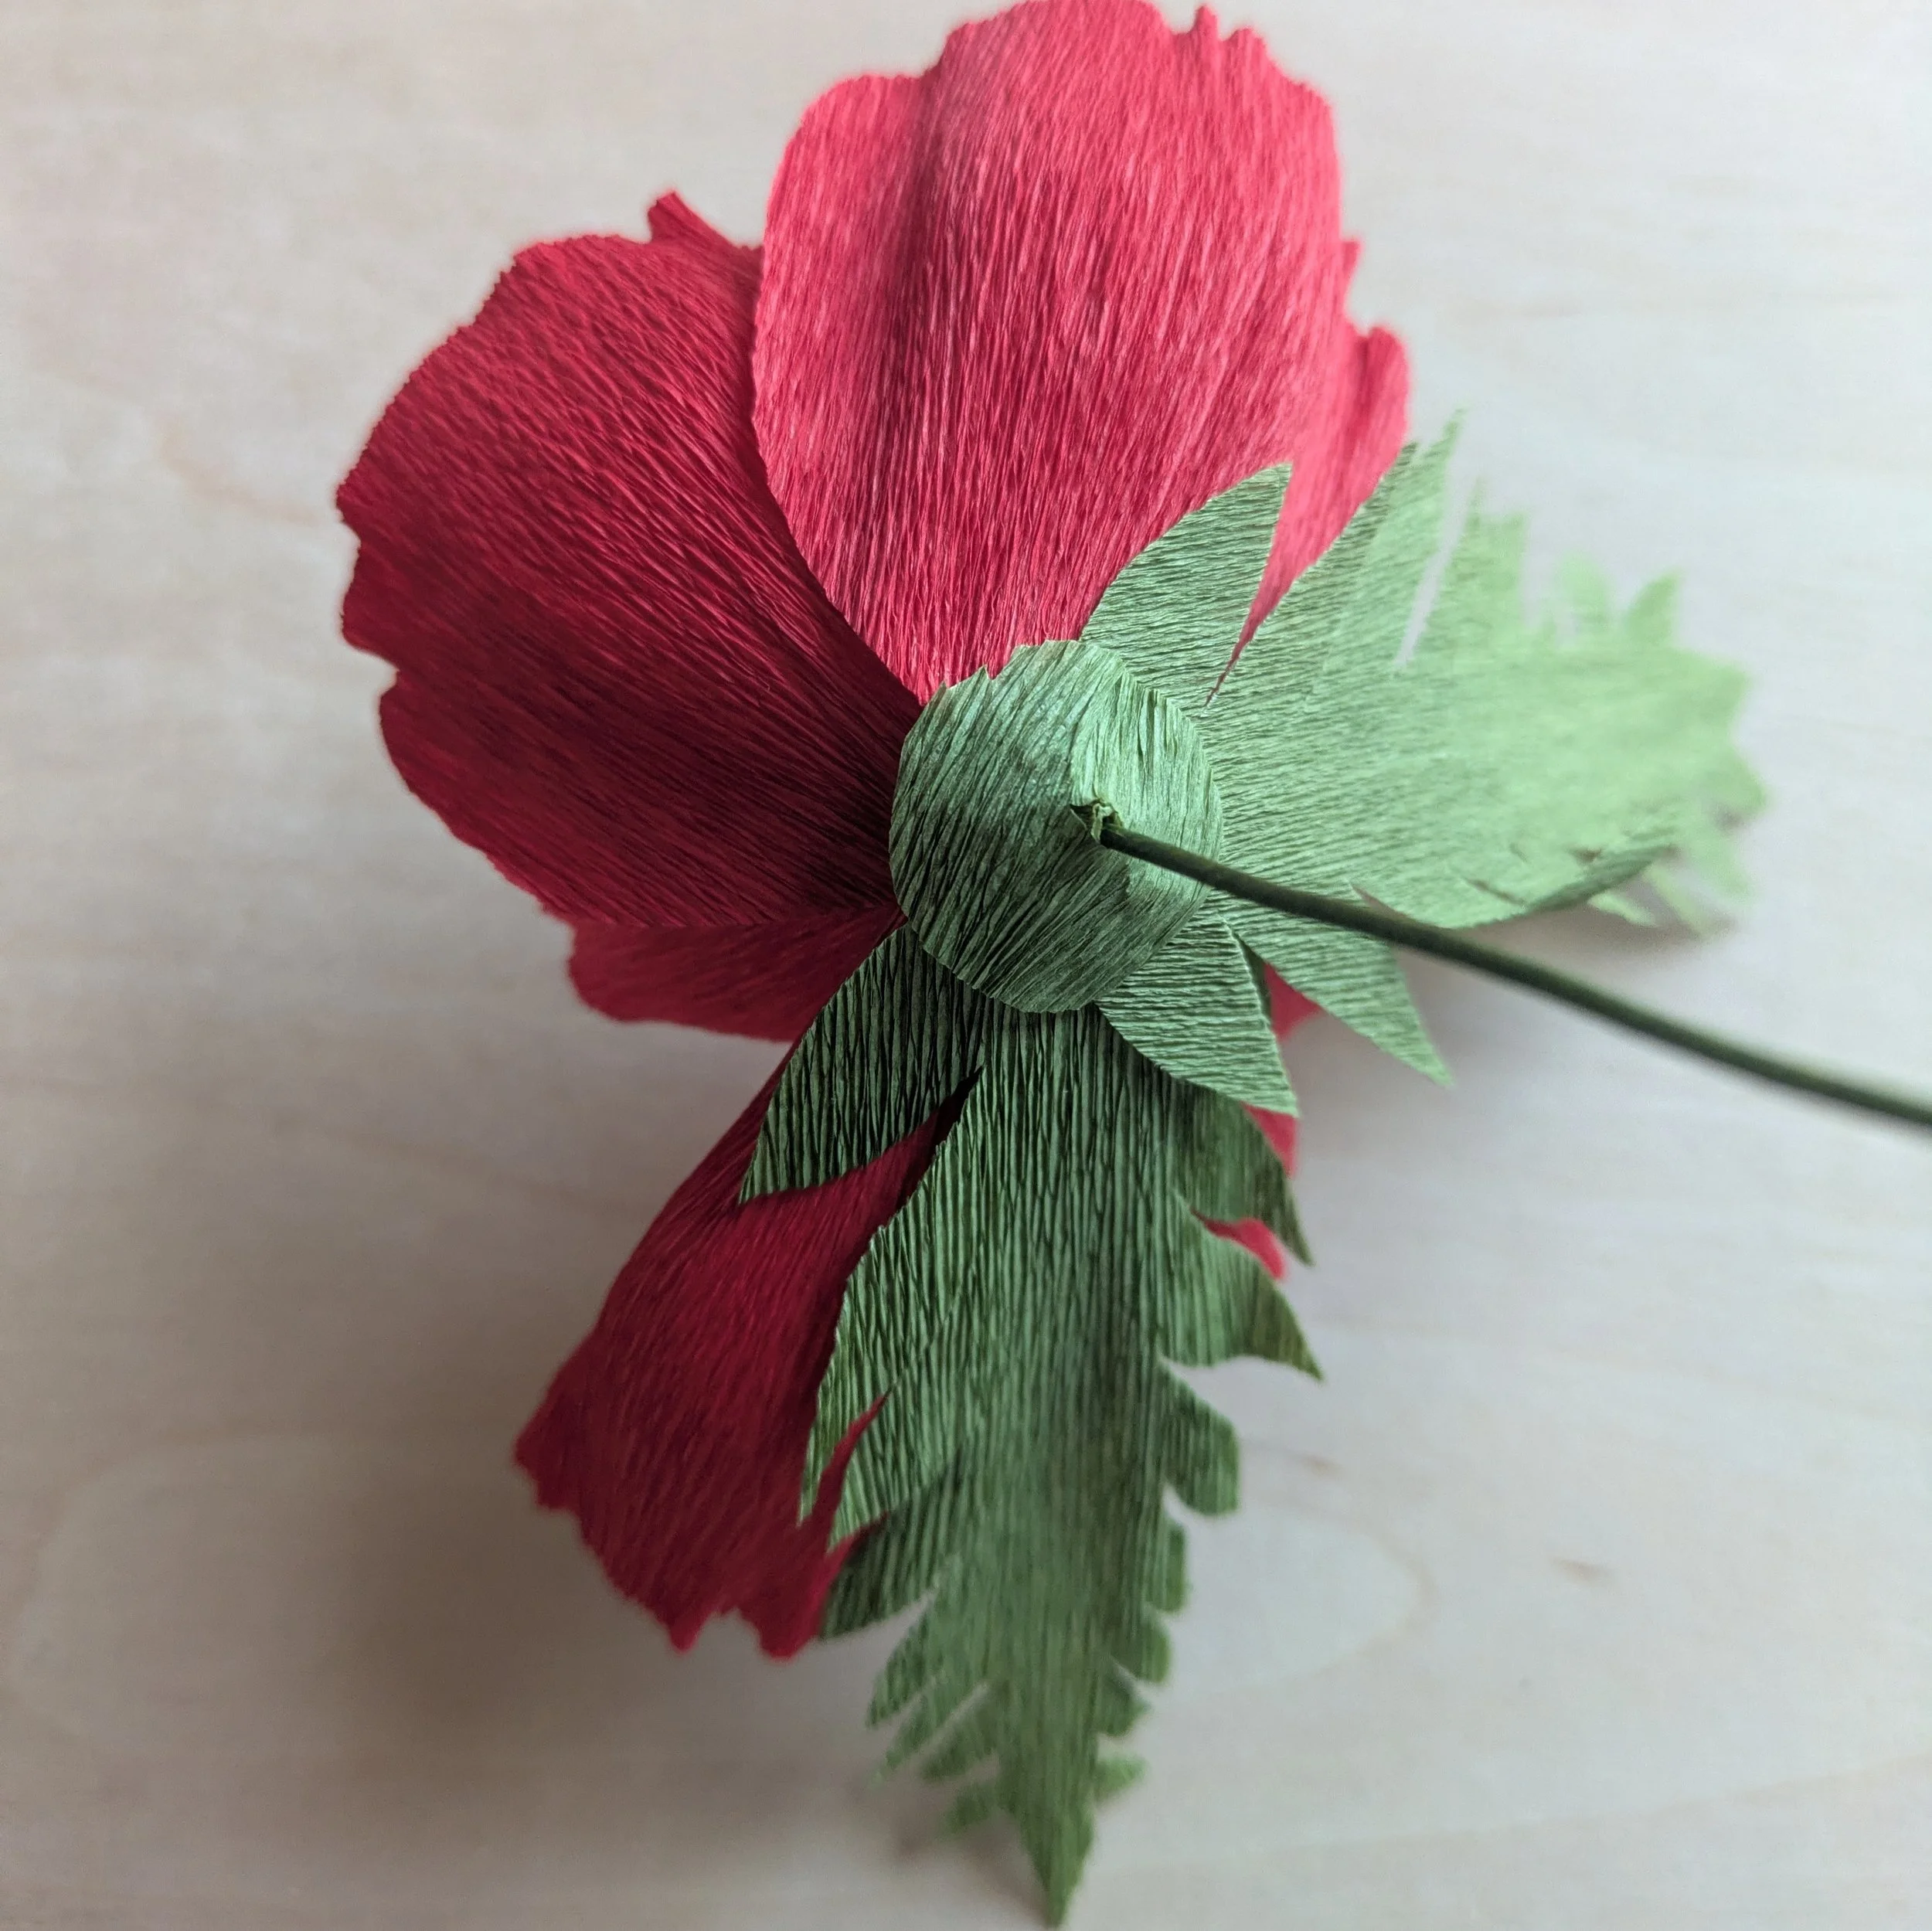
Rotate the wire stem while continuing to peel away the white back. As you do this, gently press the black crepe paper onto the bottom edge of the seedpod, and eventually onto itself. This is what your seedpod and stamens will like like when you are done.
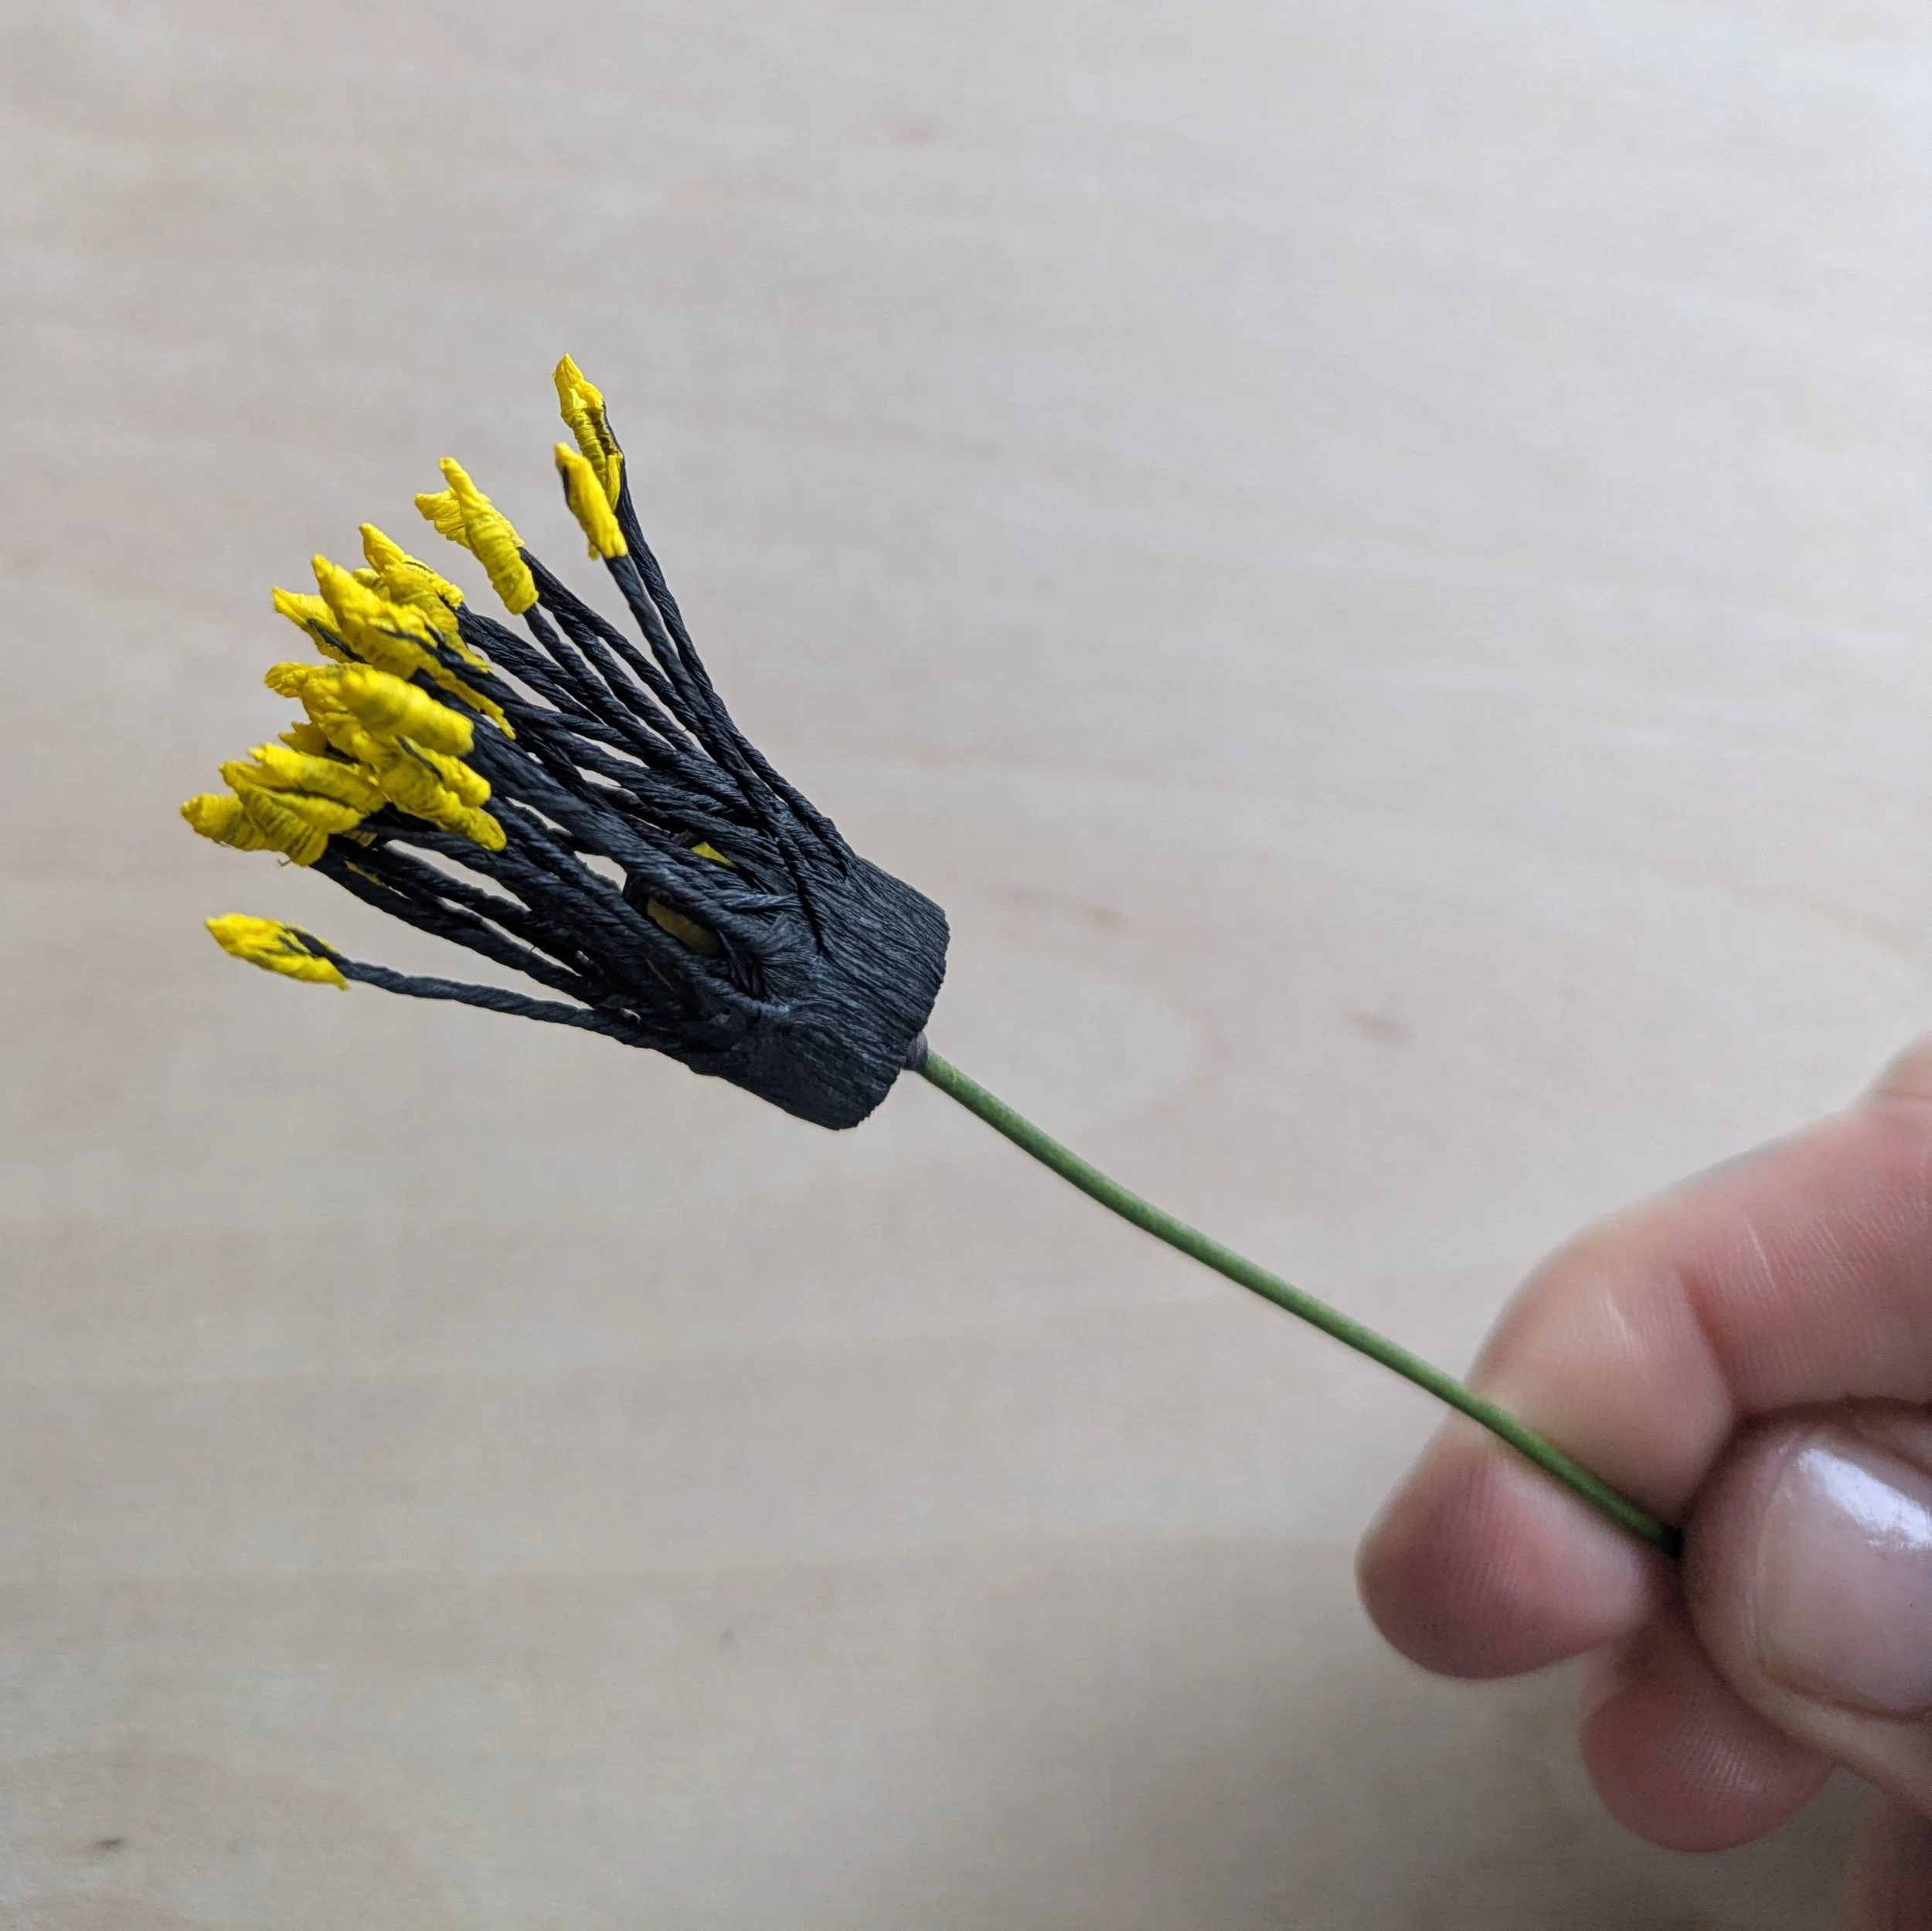
Gently pull the stamens outward to reveal the seedpod. Don’t worry about getting them positioned perfectly — you will end up making final adjustments at the very end of the project.
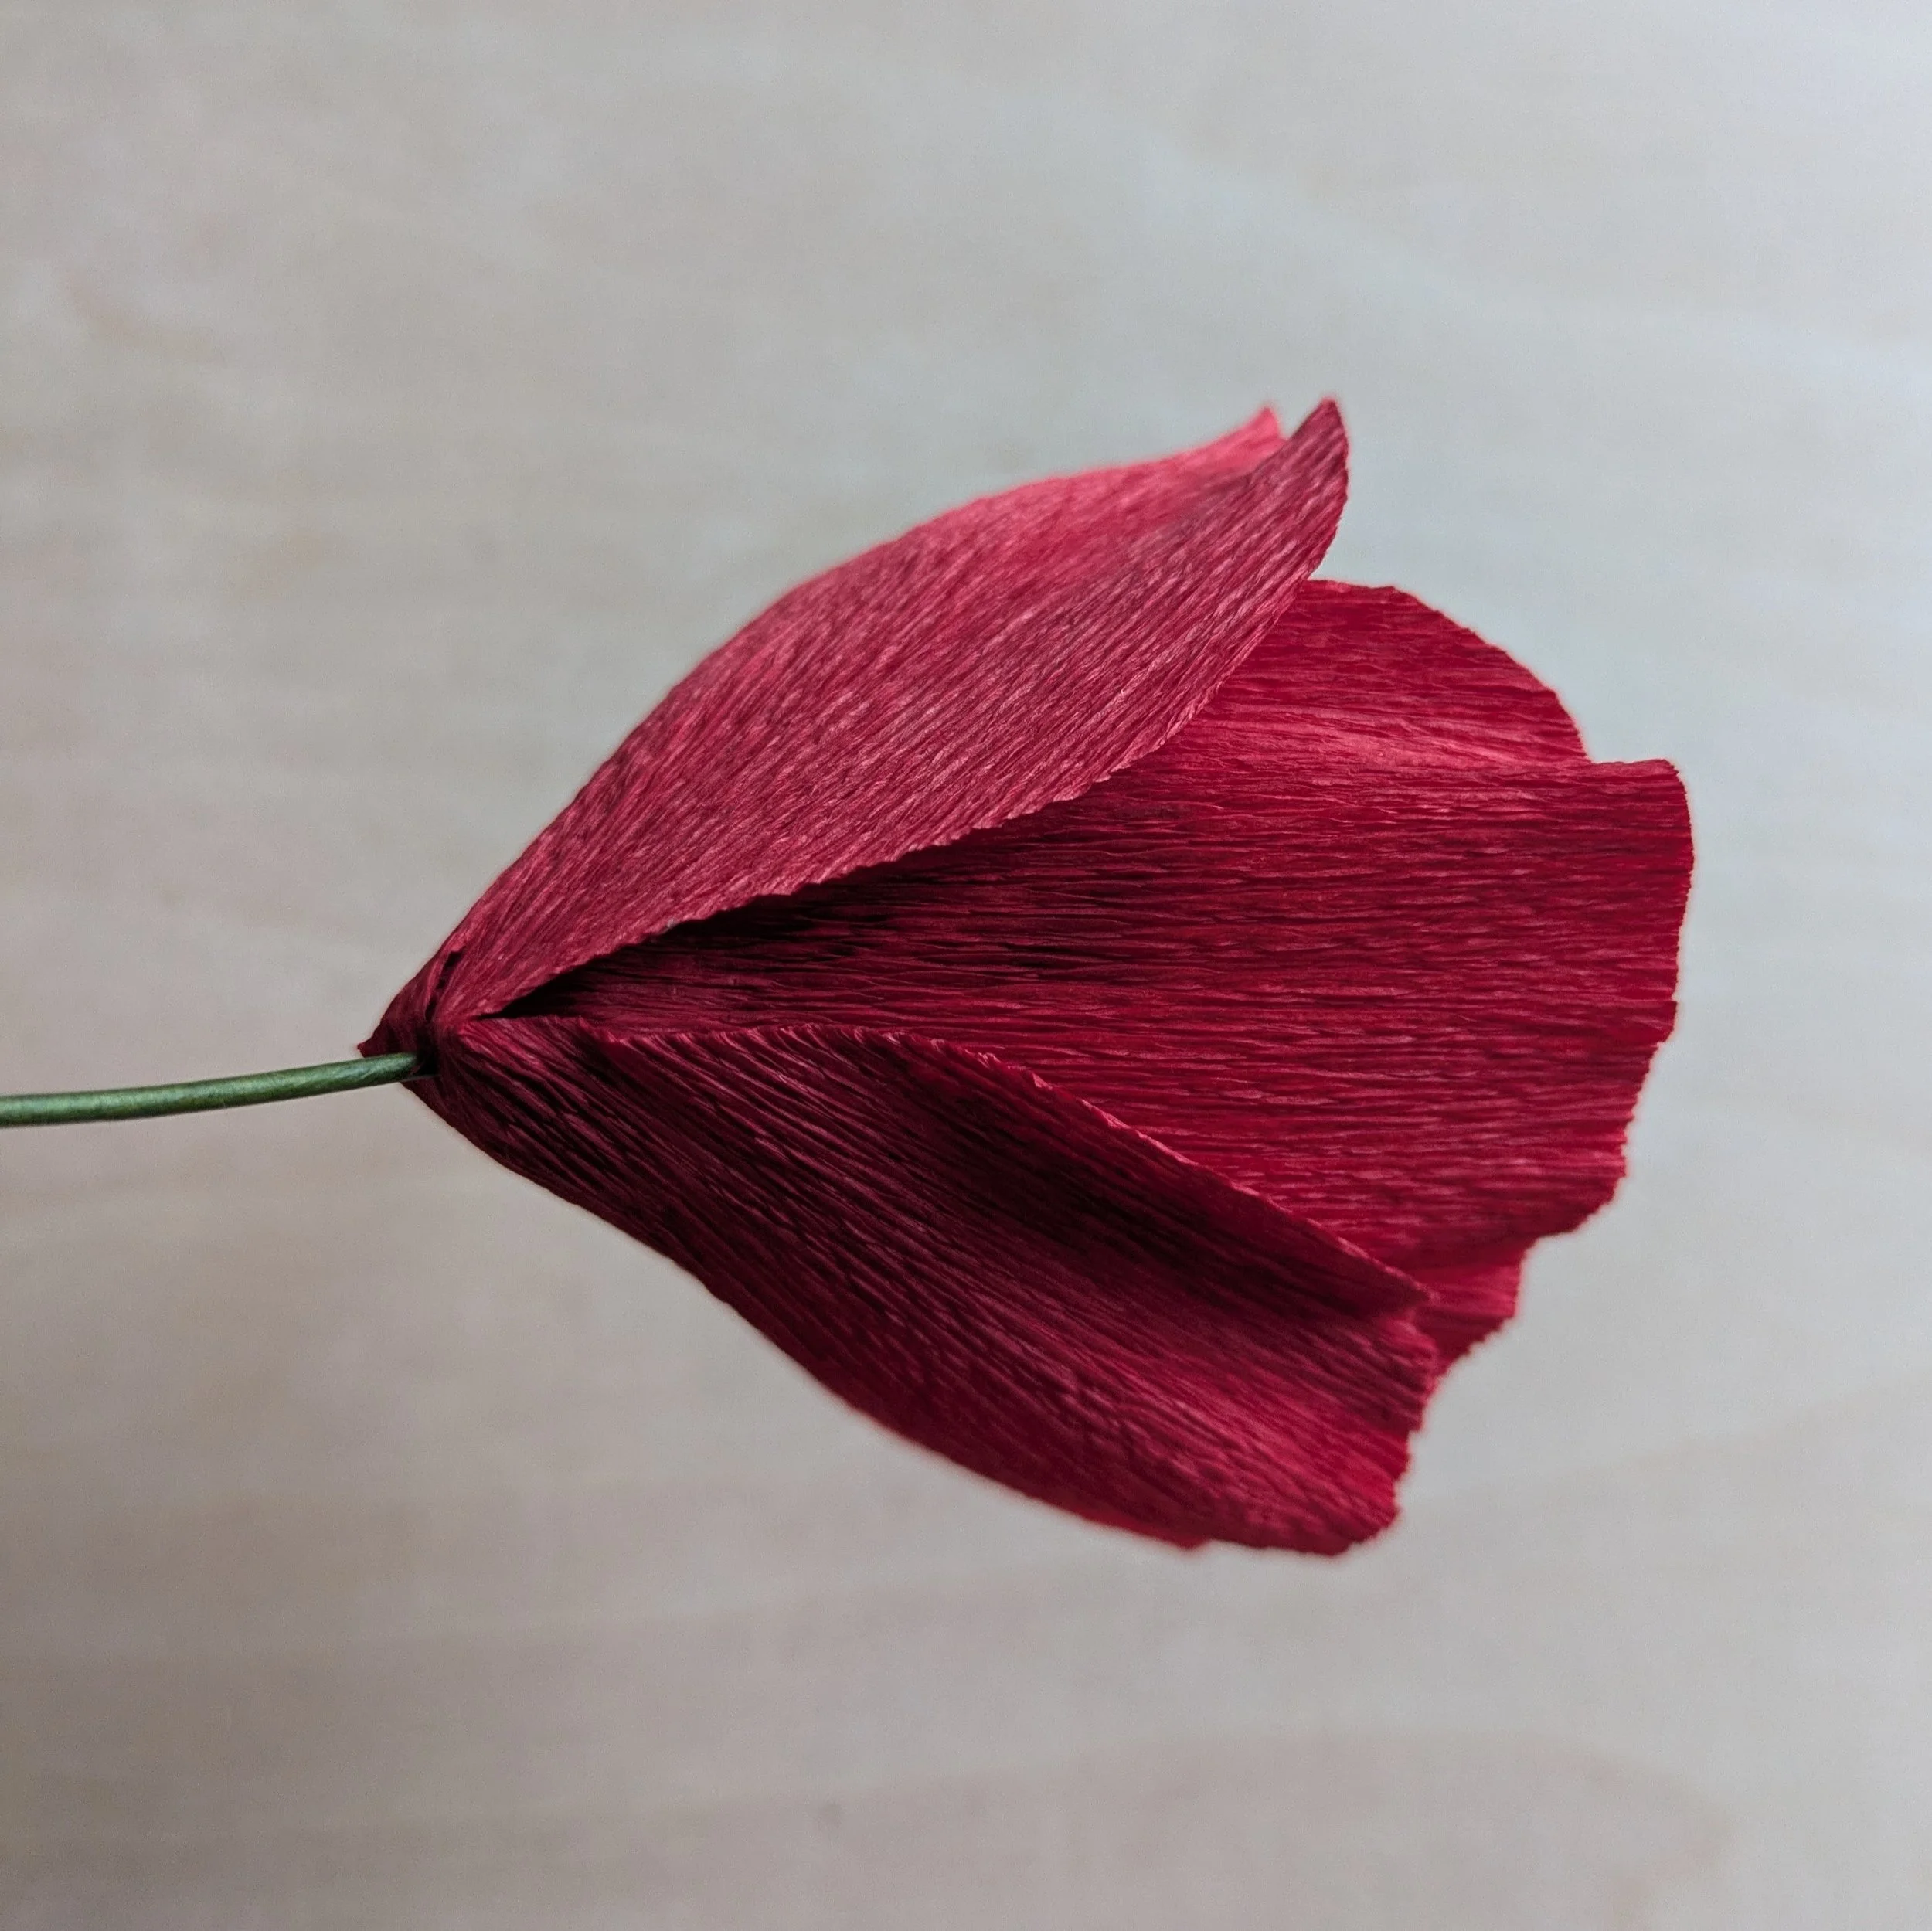
Find your three pieces of red or white crepe paper. Fold each piece in half lengthwise.
Step 5: Create your petals
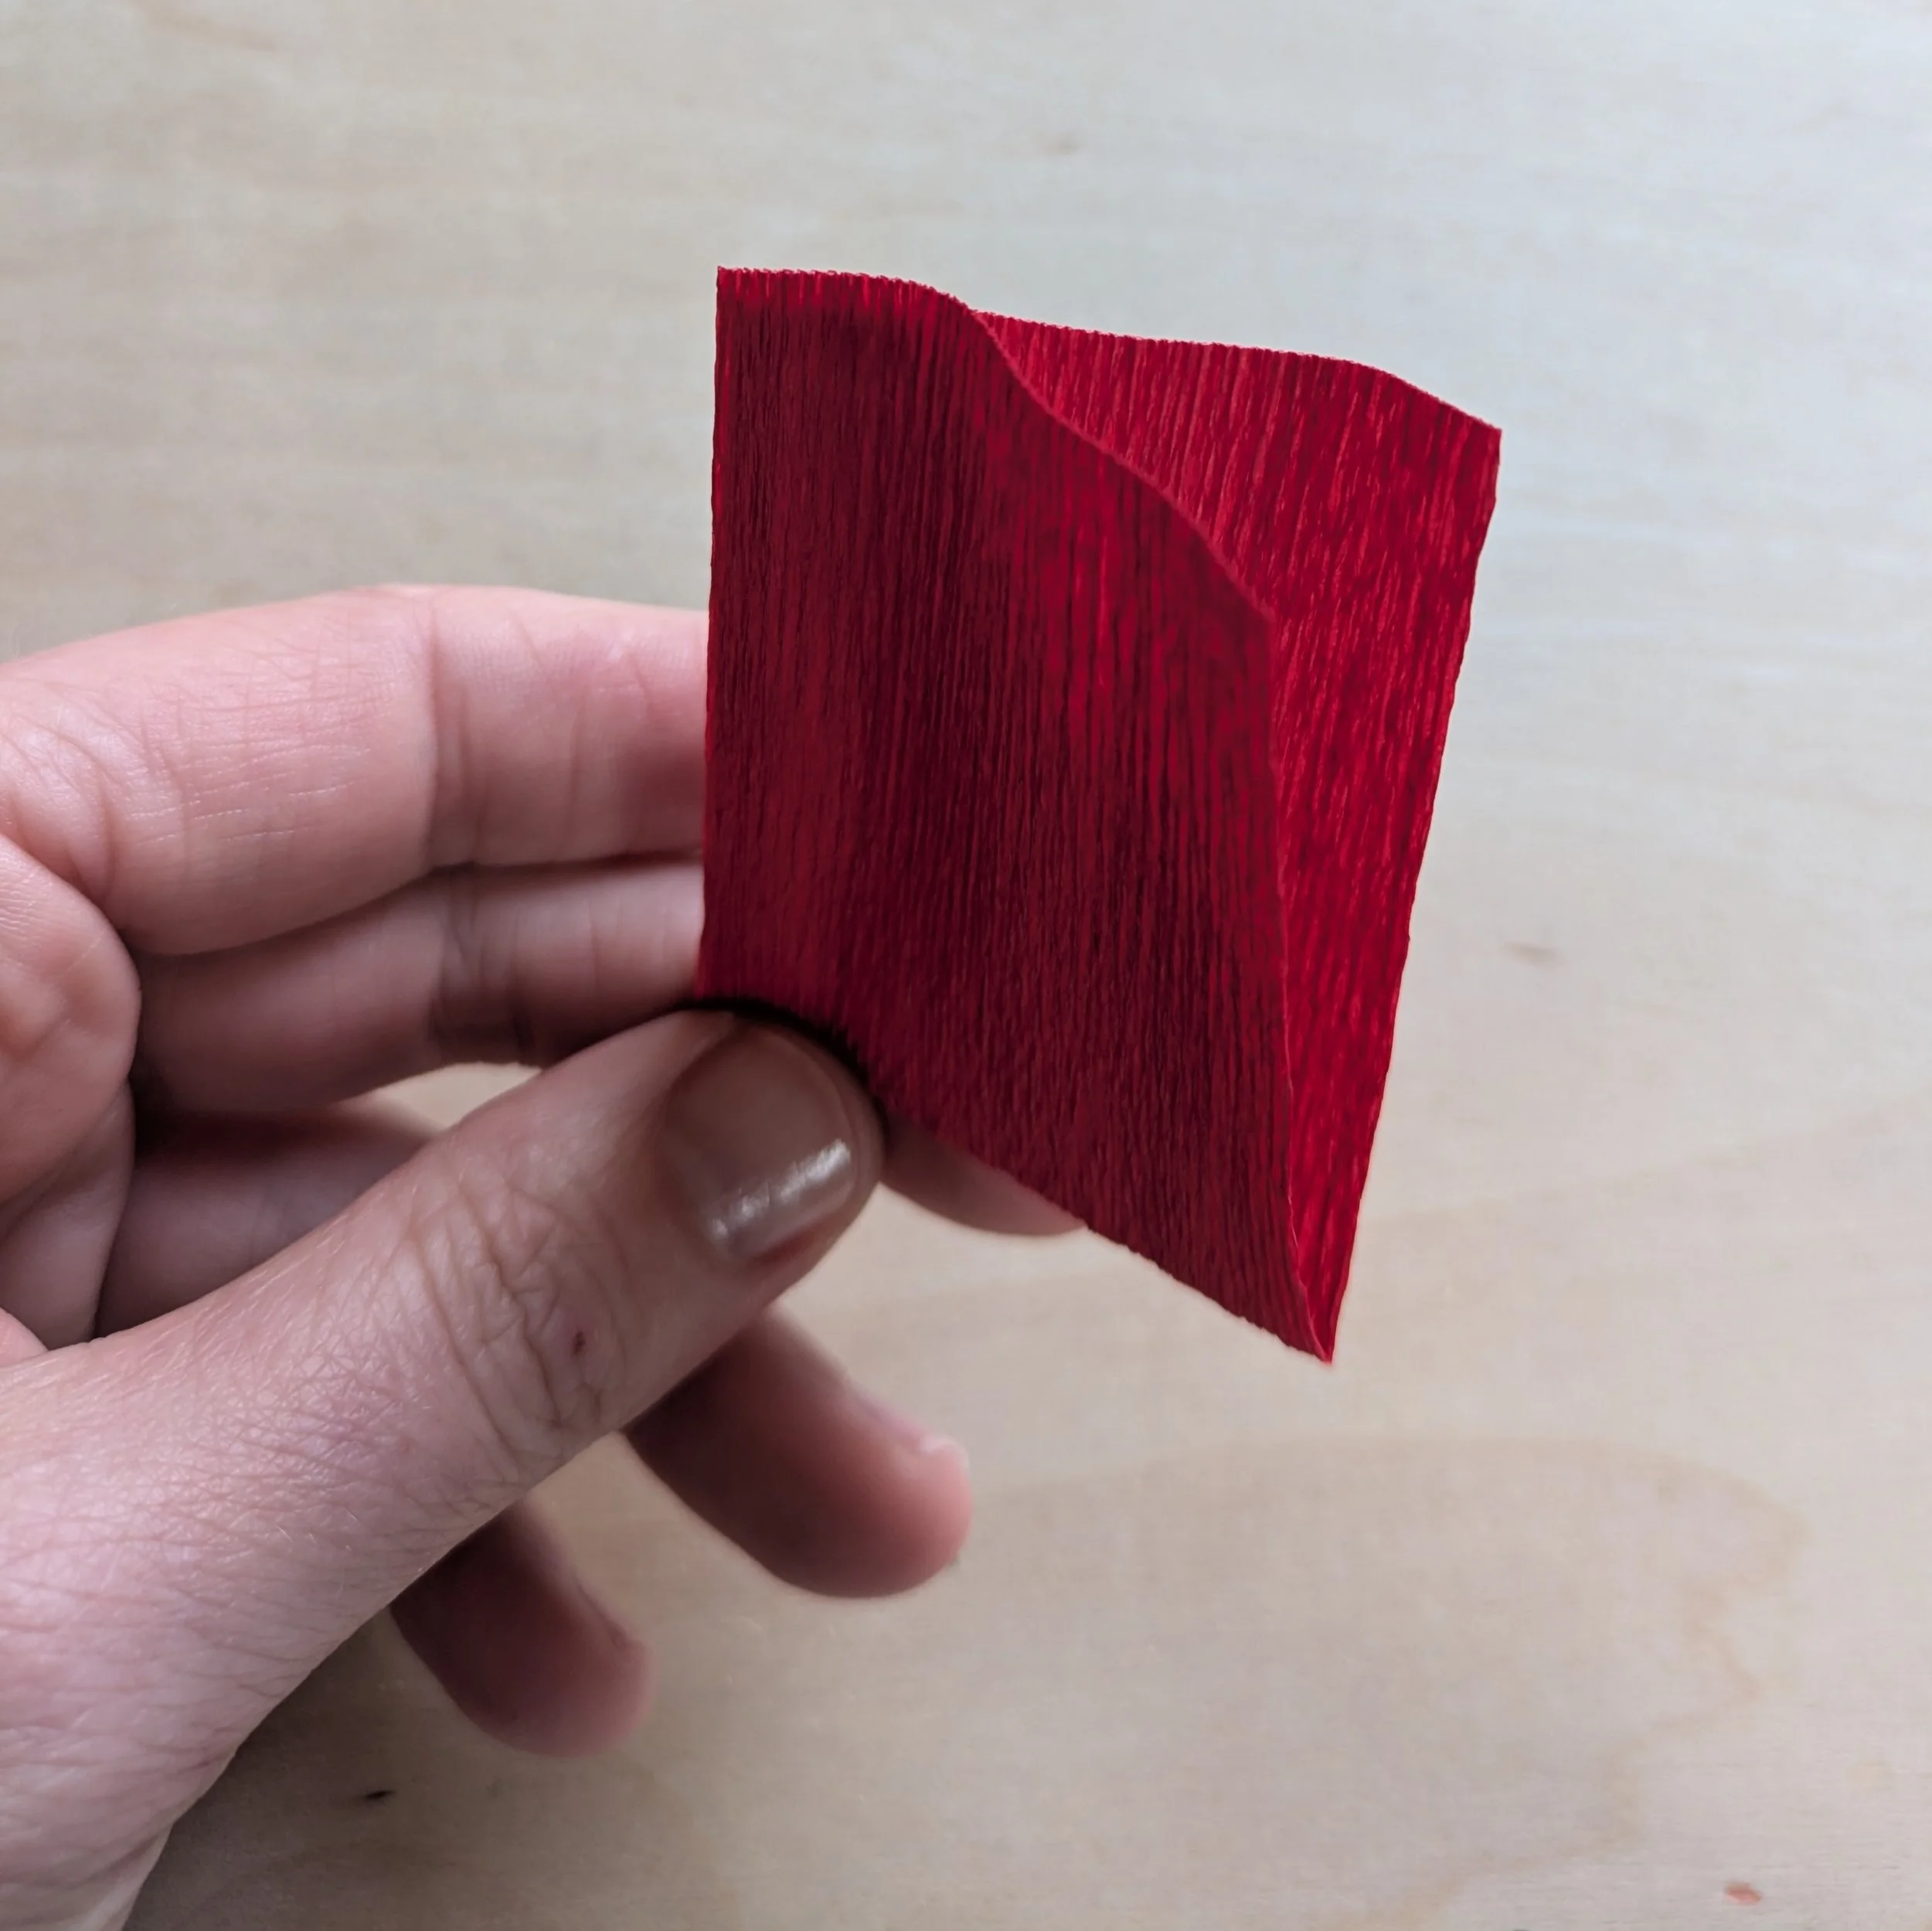
Now fold each piece in half widthwise. You will know you’ve done this correctly if the four original corners of the crepe paper are aligned, like in the top right corner of this photo.
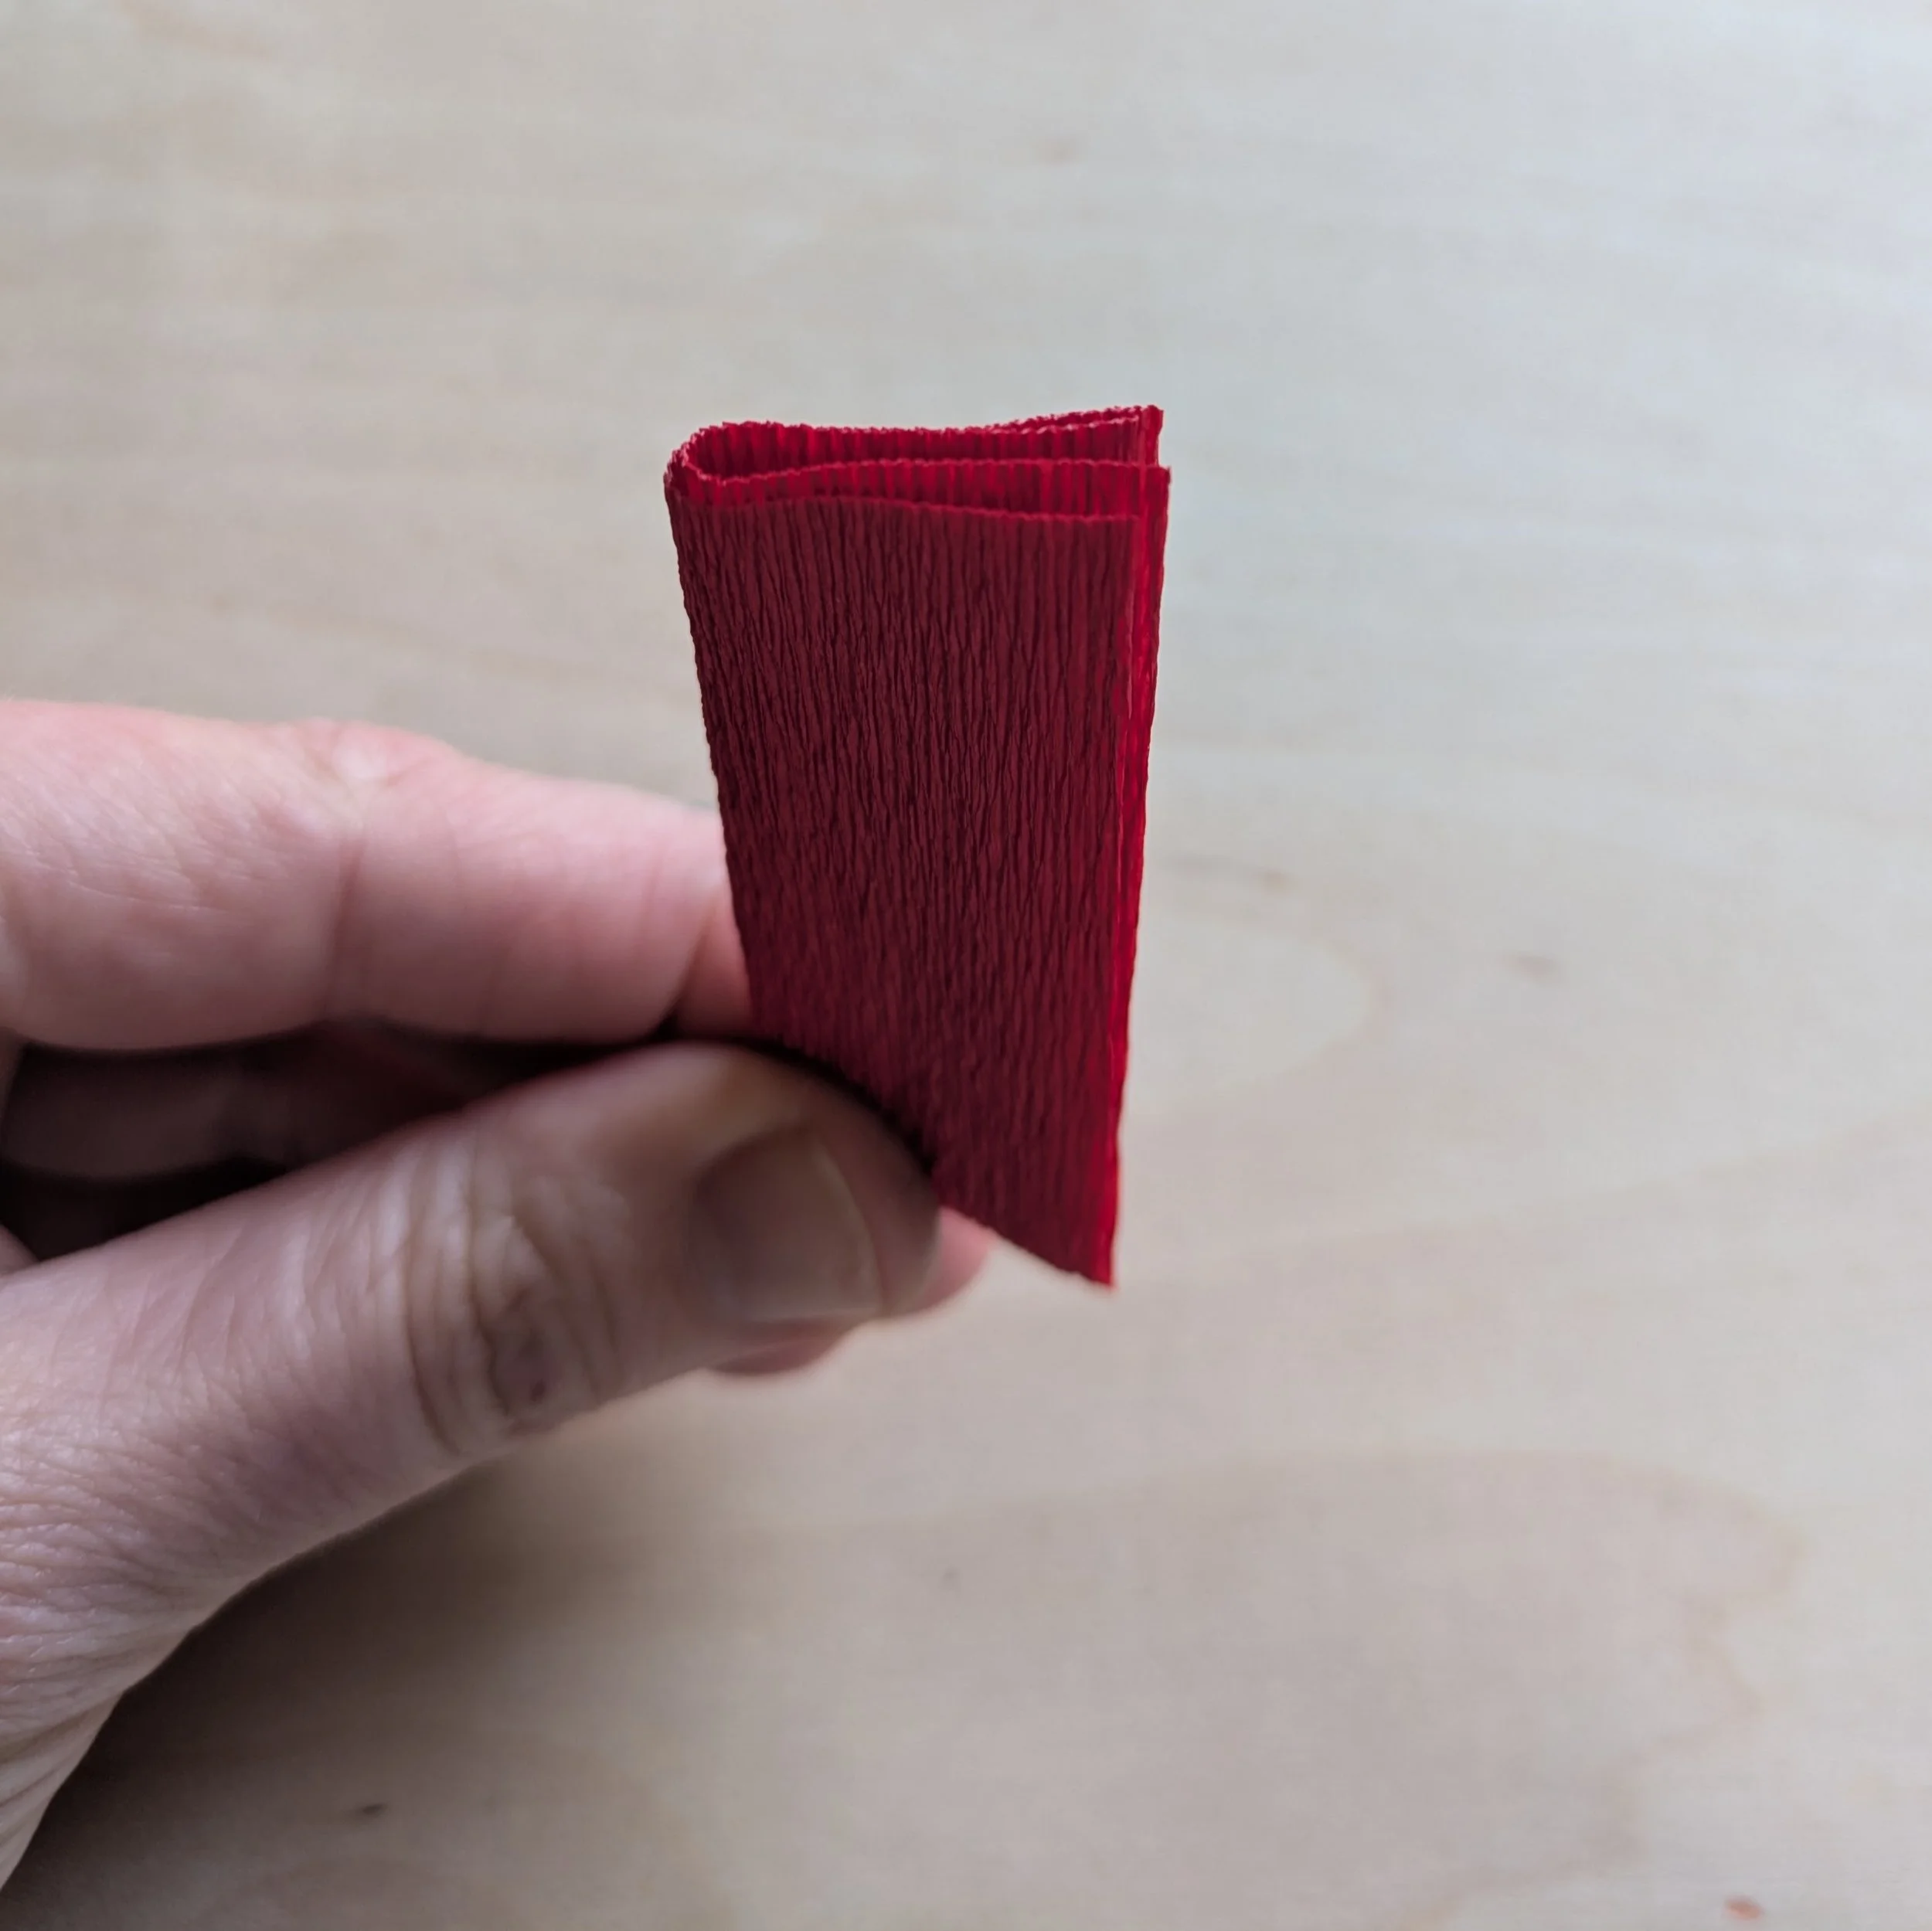
Taking care to not cut off the corner of the paper where my thumb is positioned in the previous photo, cut a petal shape through all four layers of the crepe paper. This will result in two petals that are attached at the bottom, similar to the shape of the number 8. Repeat this for each of your three pieces of crepe paper.
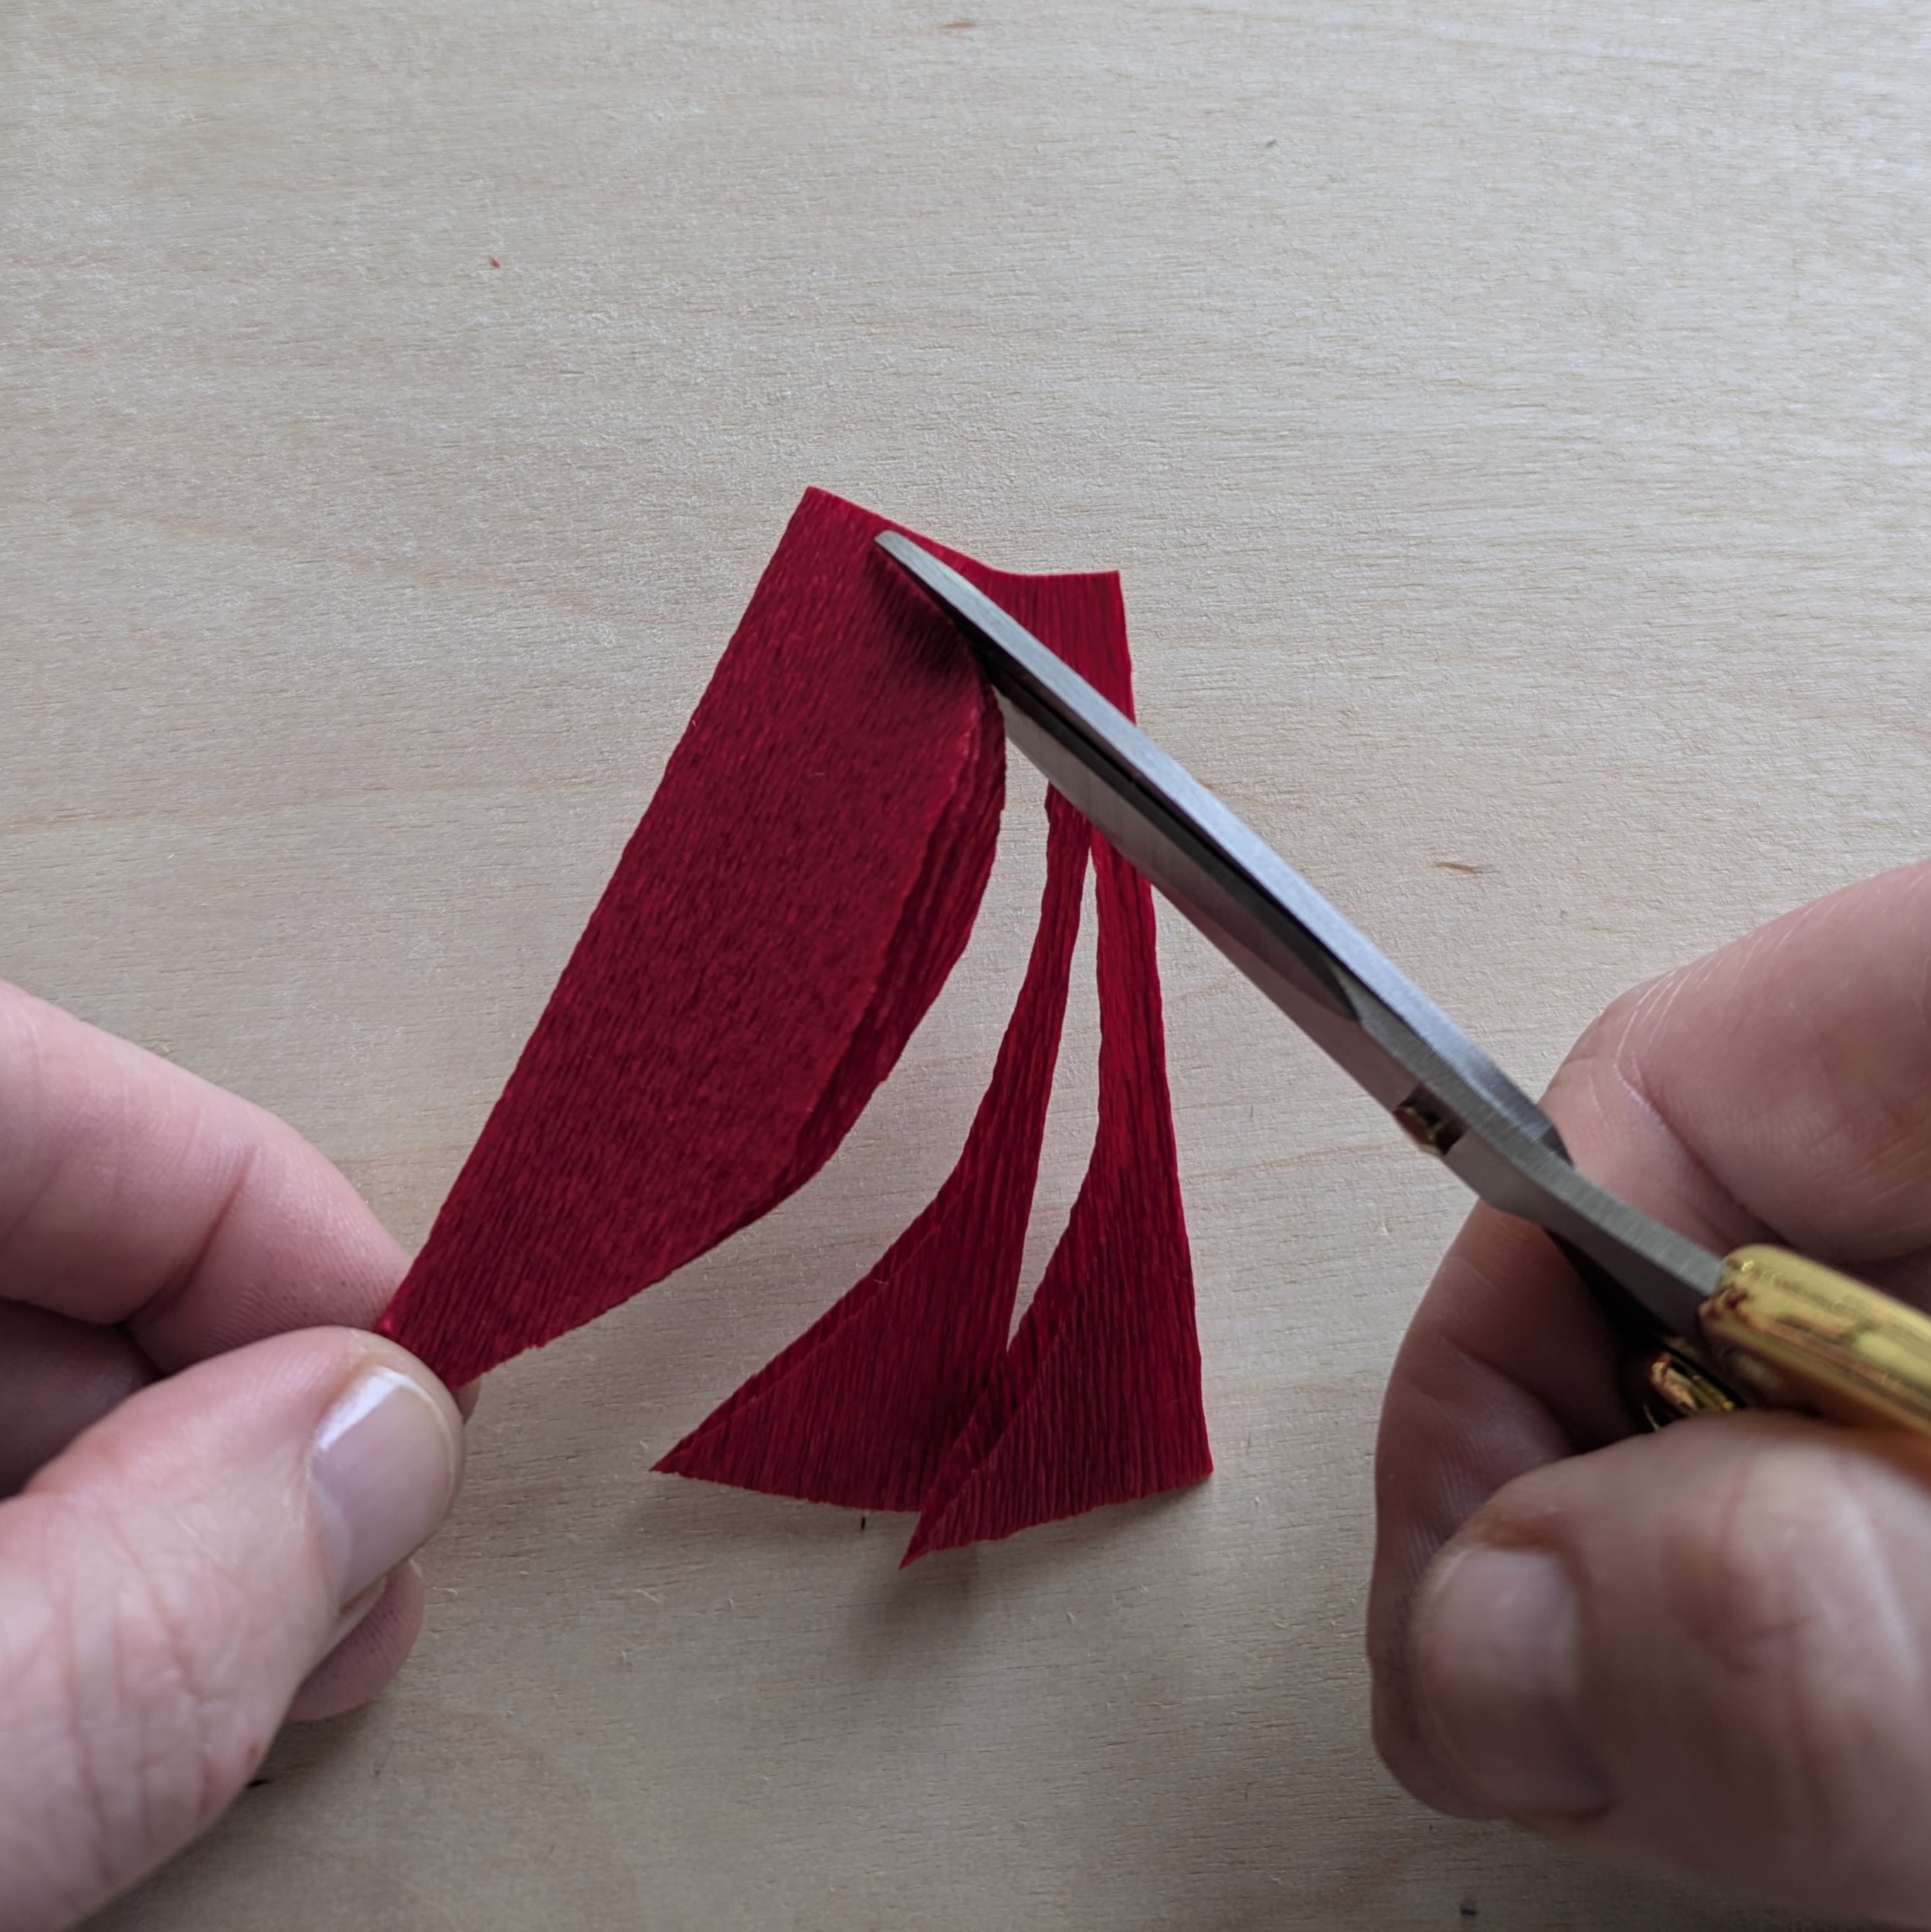
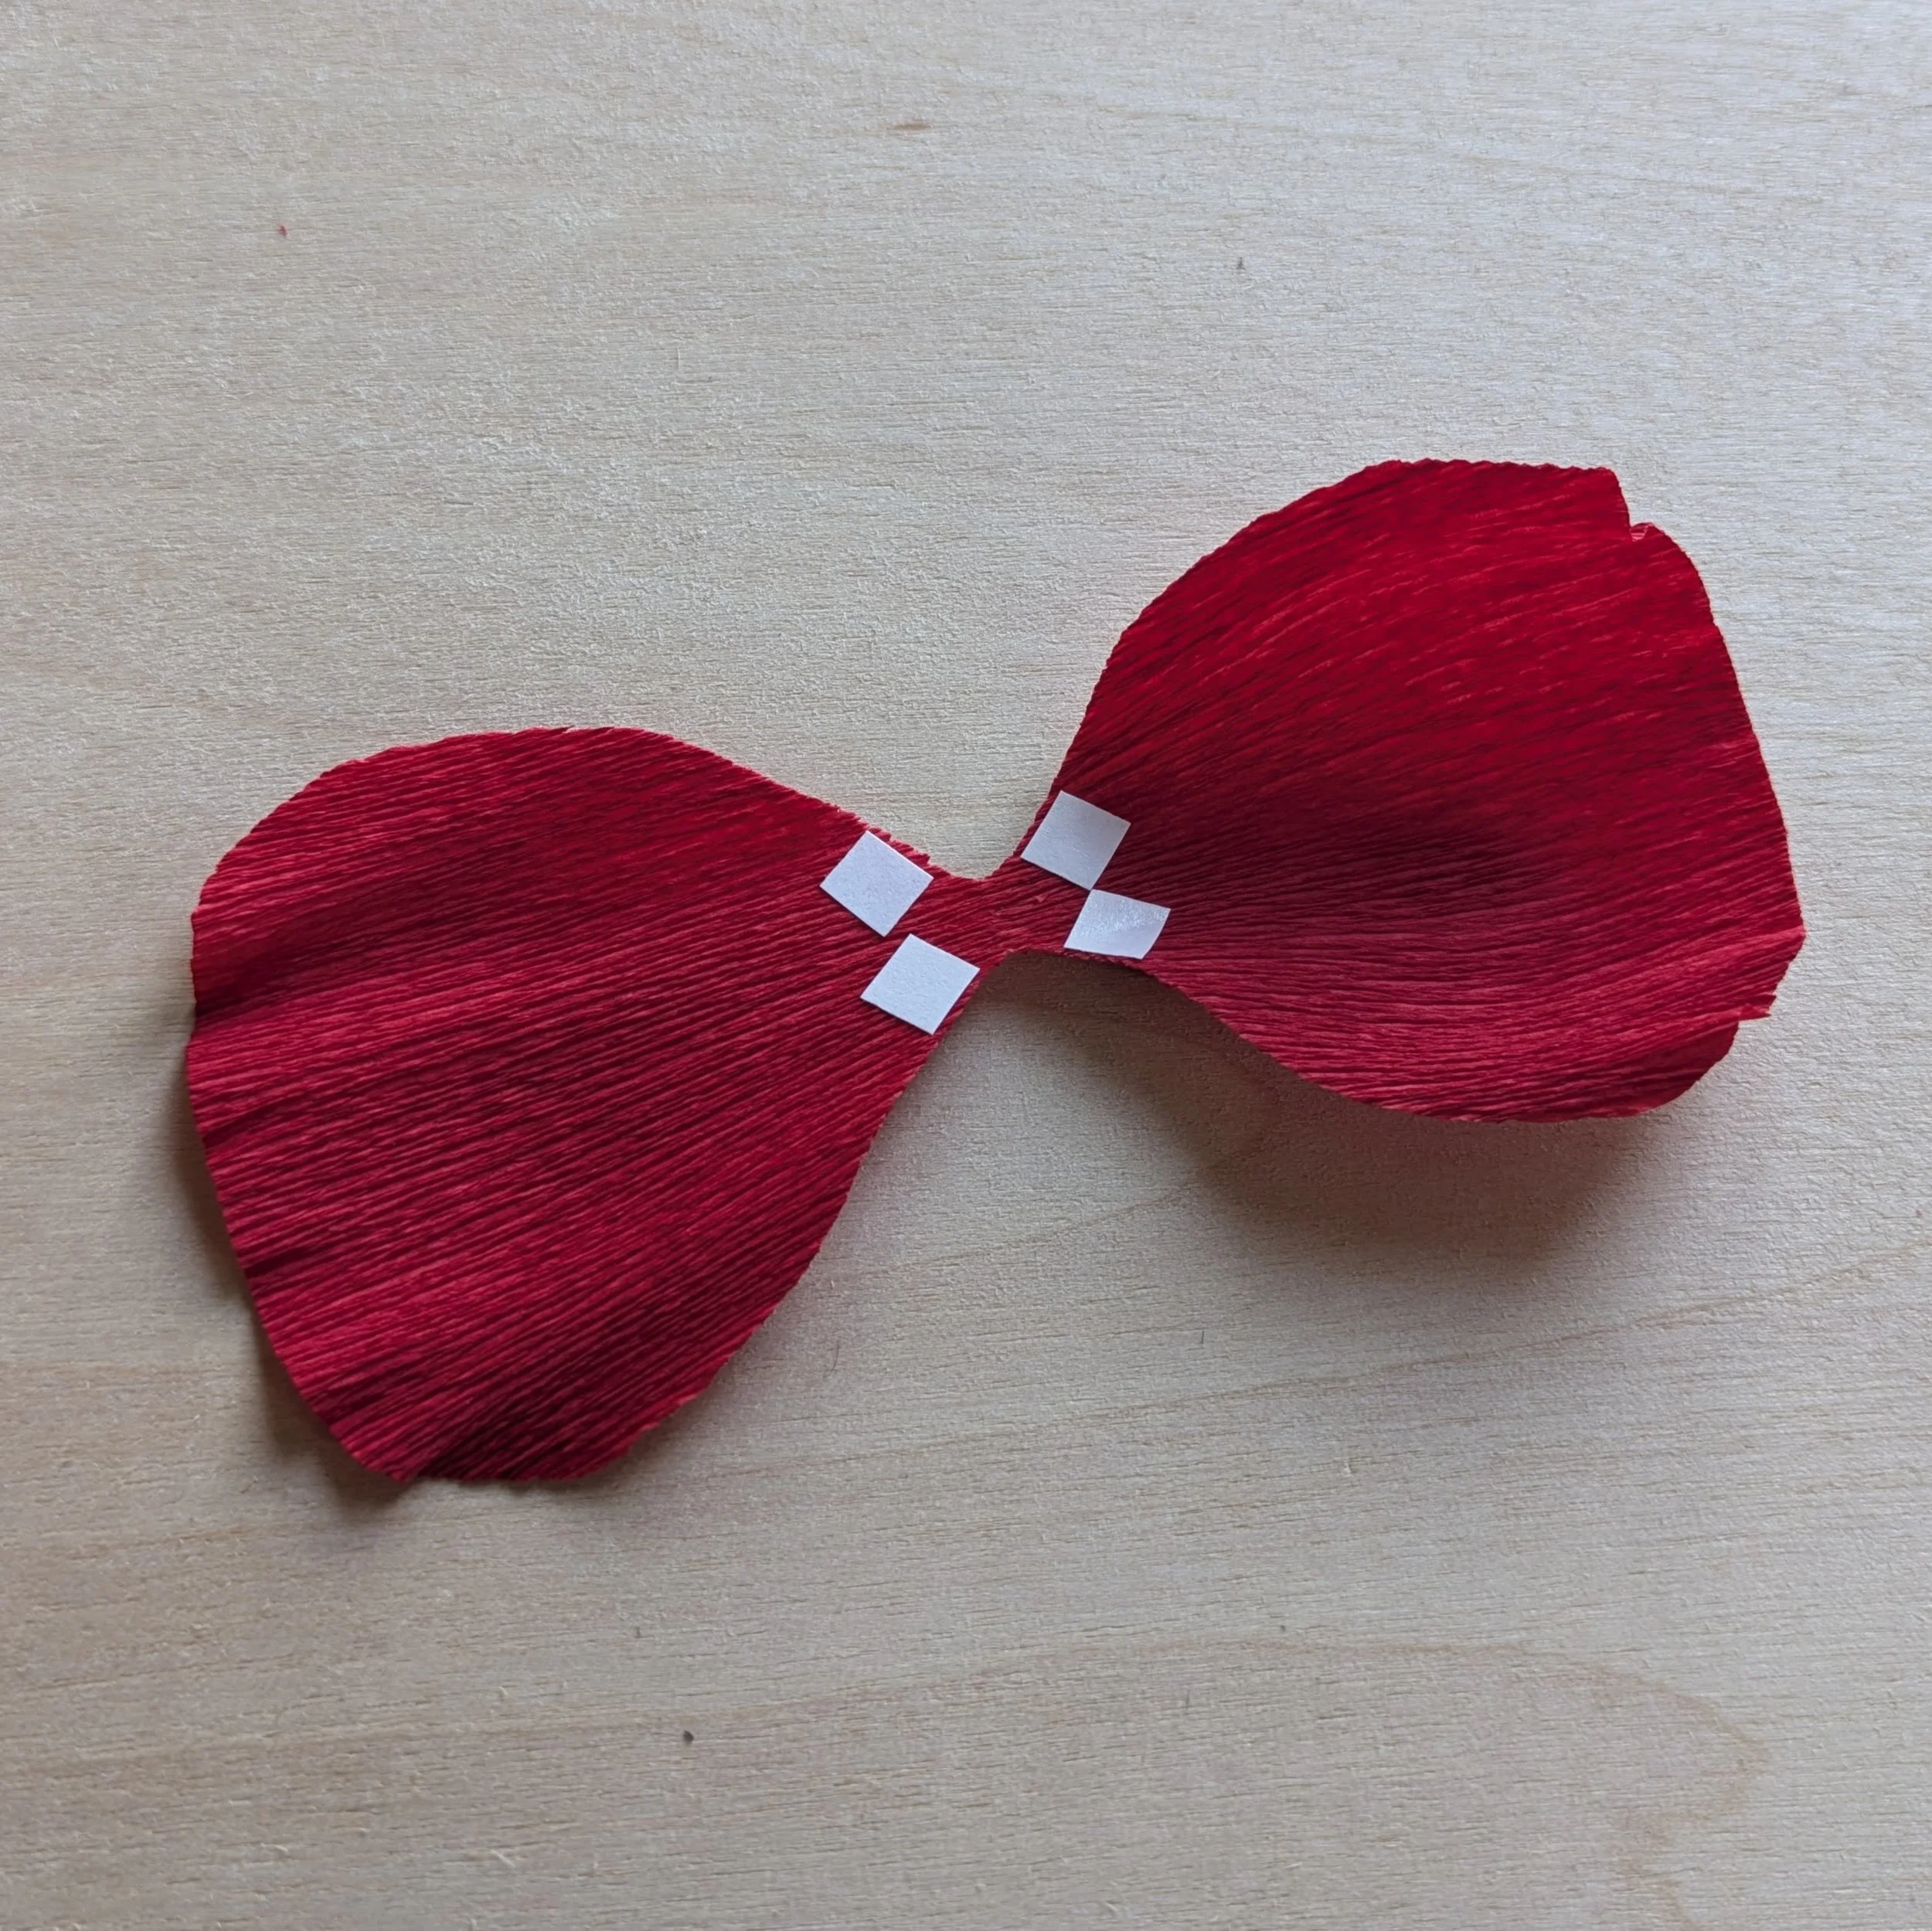
Unfold the crepe paper just once to reveal the shape of the petal you have created. At the bottom where the two petals are attached, use scissors to create a tiny slit. This is where you’ll slide the petals onto the stem wire. Repeat this for each of your three pieces of crepe paper.

Remove your thumbs and see what you think of the shape. If you’d like the petal to be more rounded, repeat the previous step. Do this for each of the six petals.
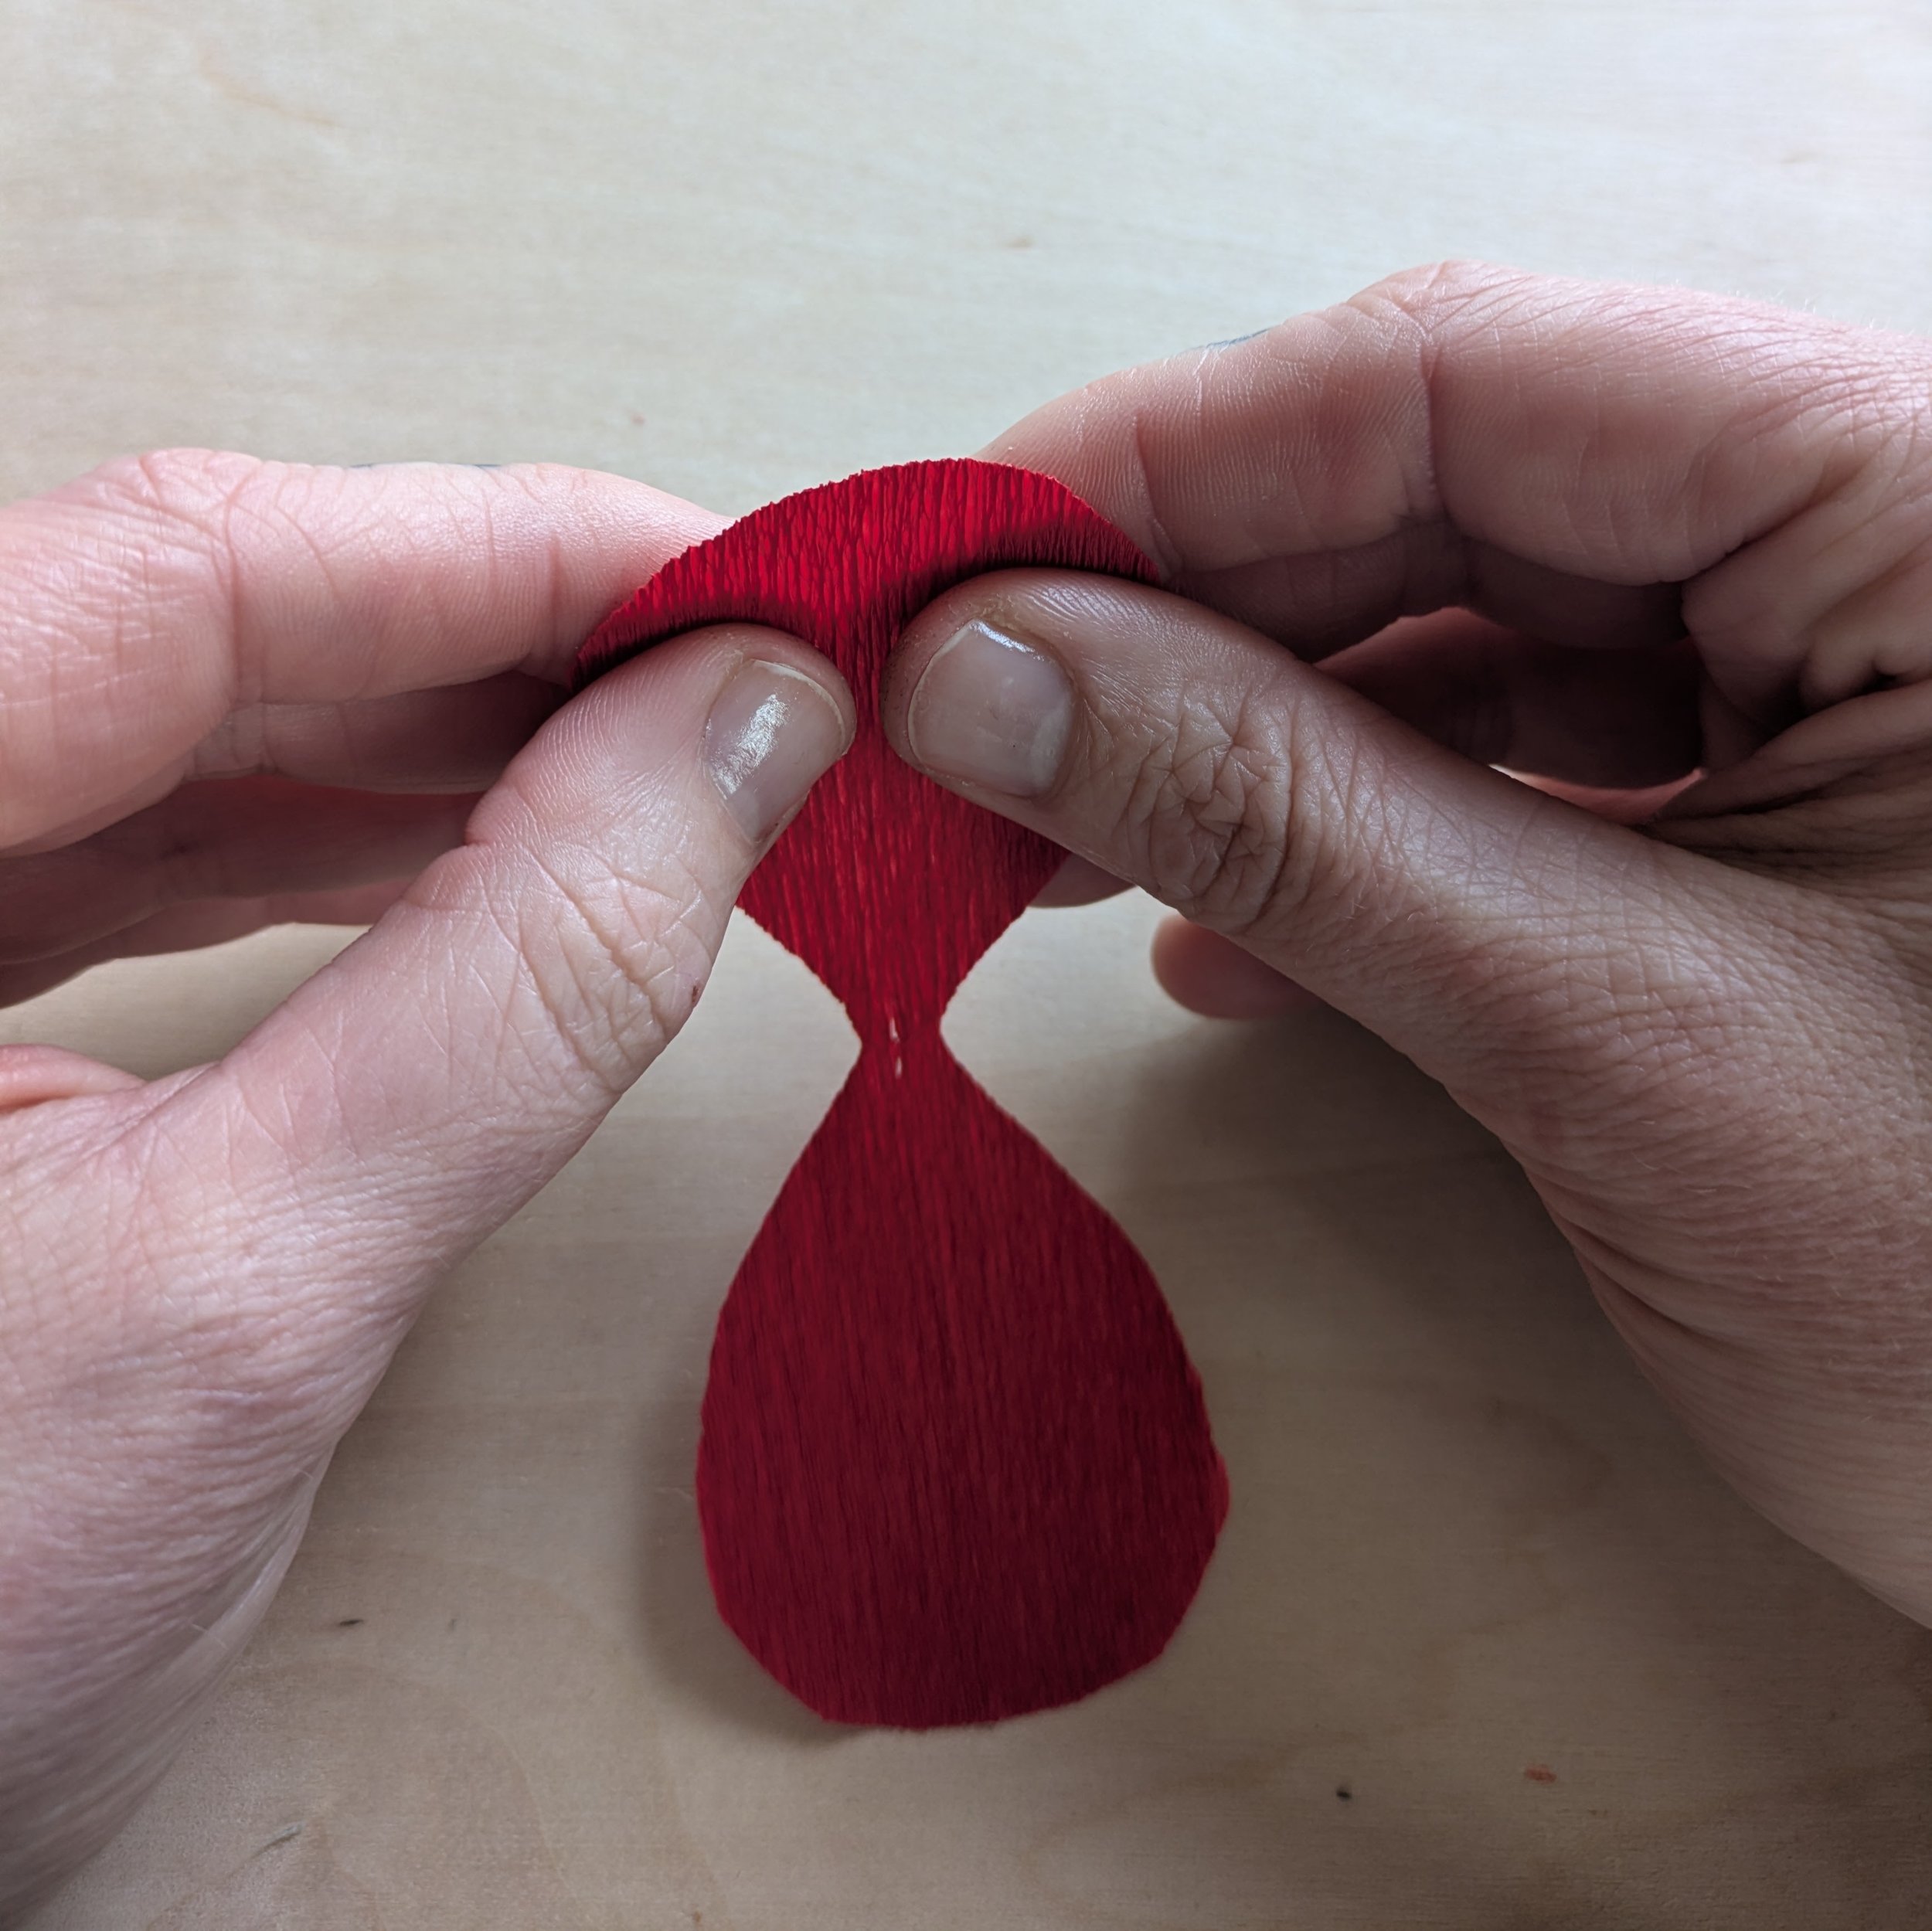
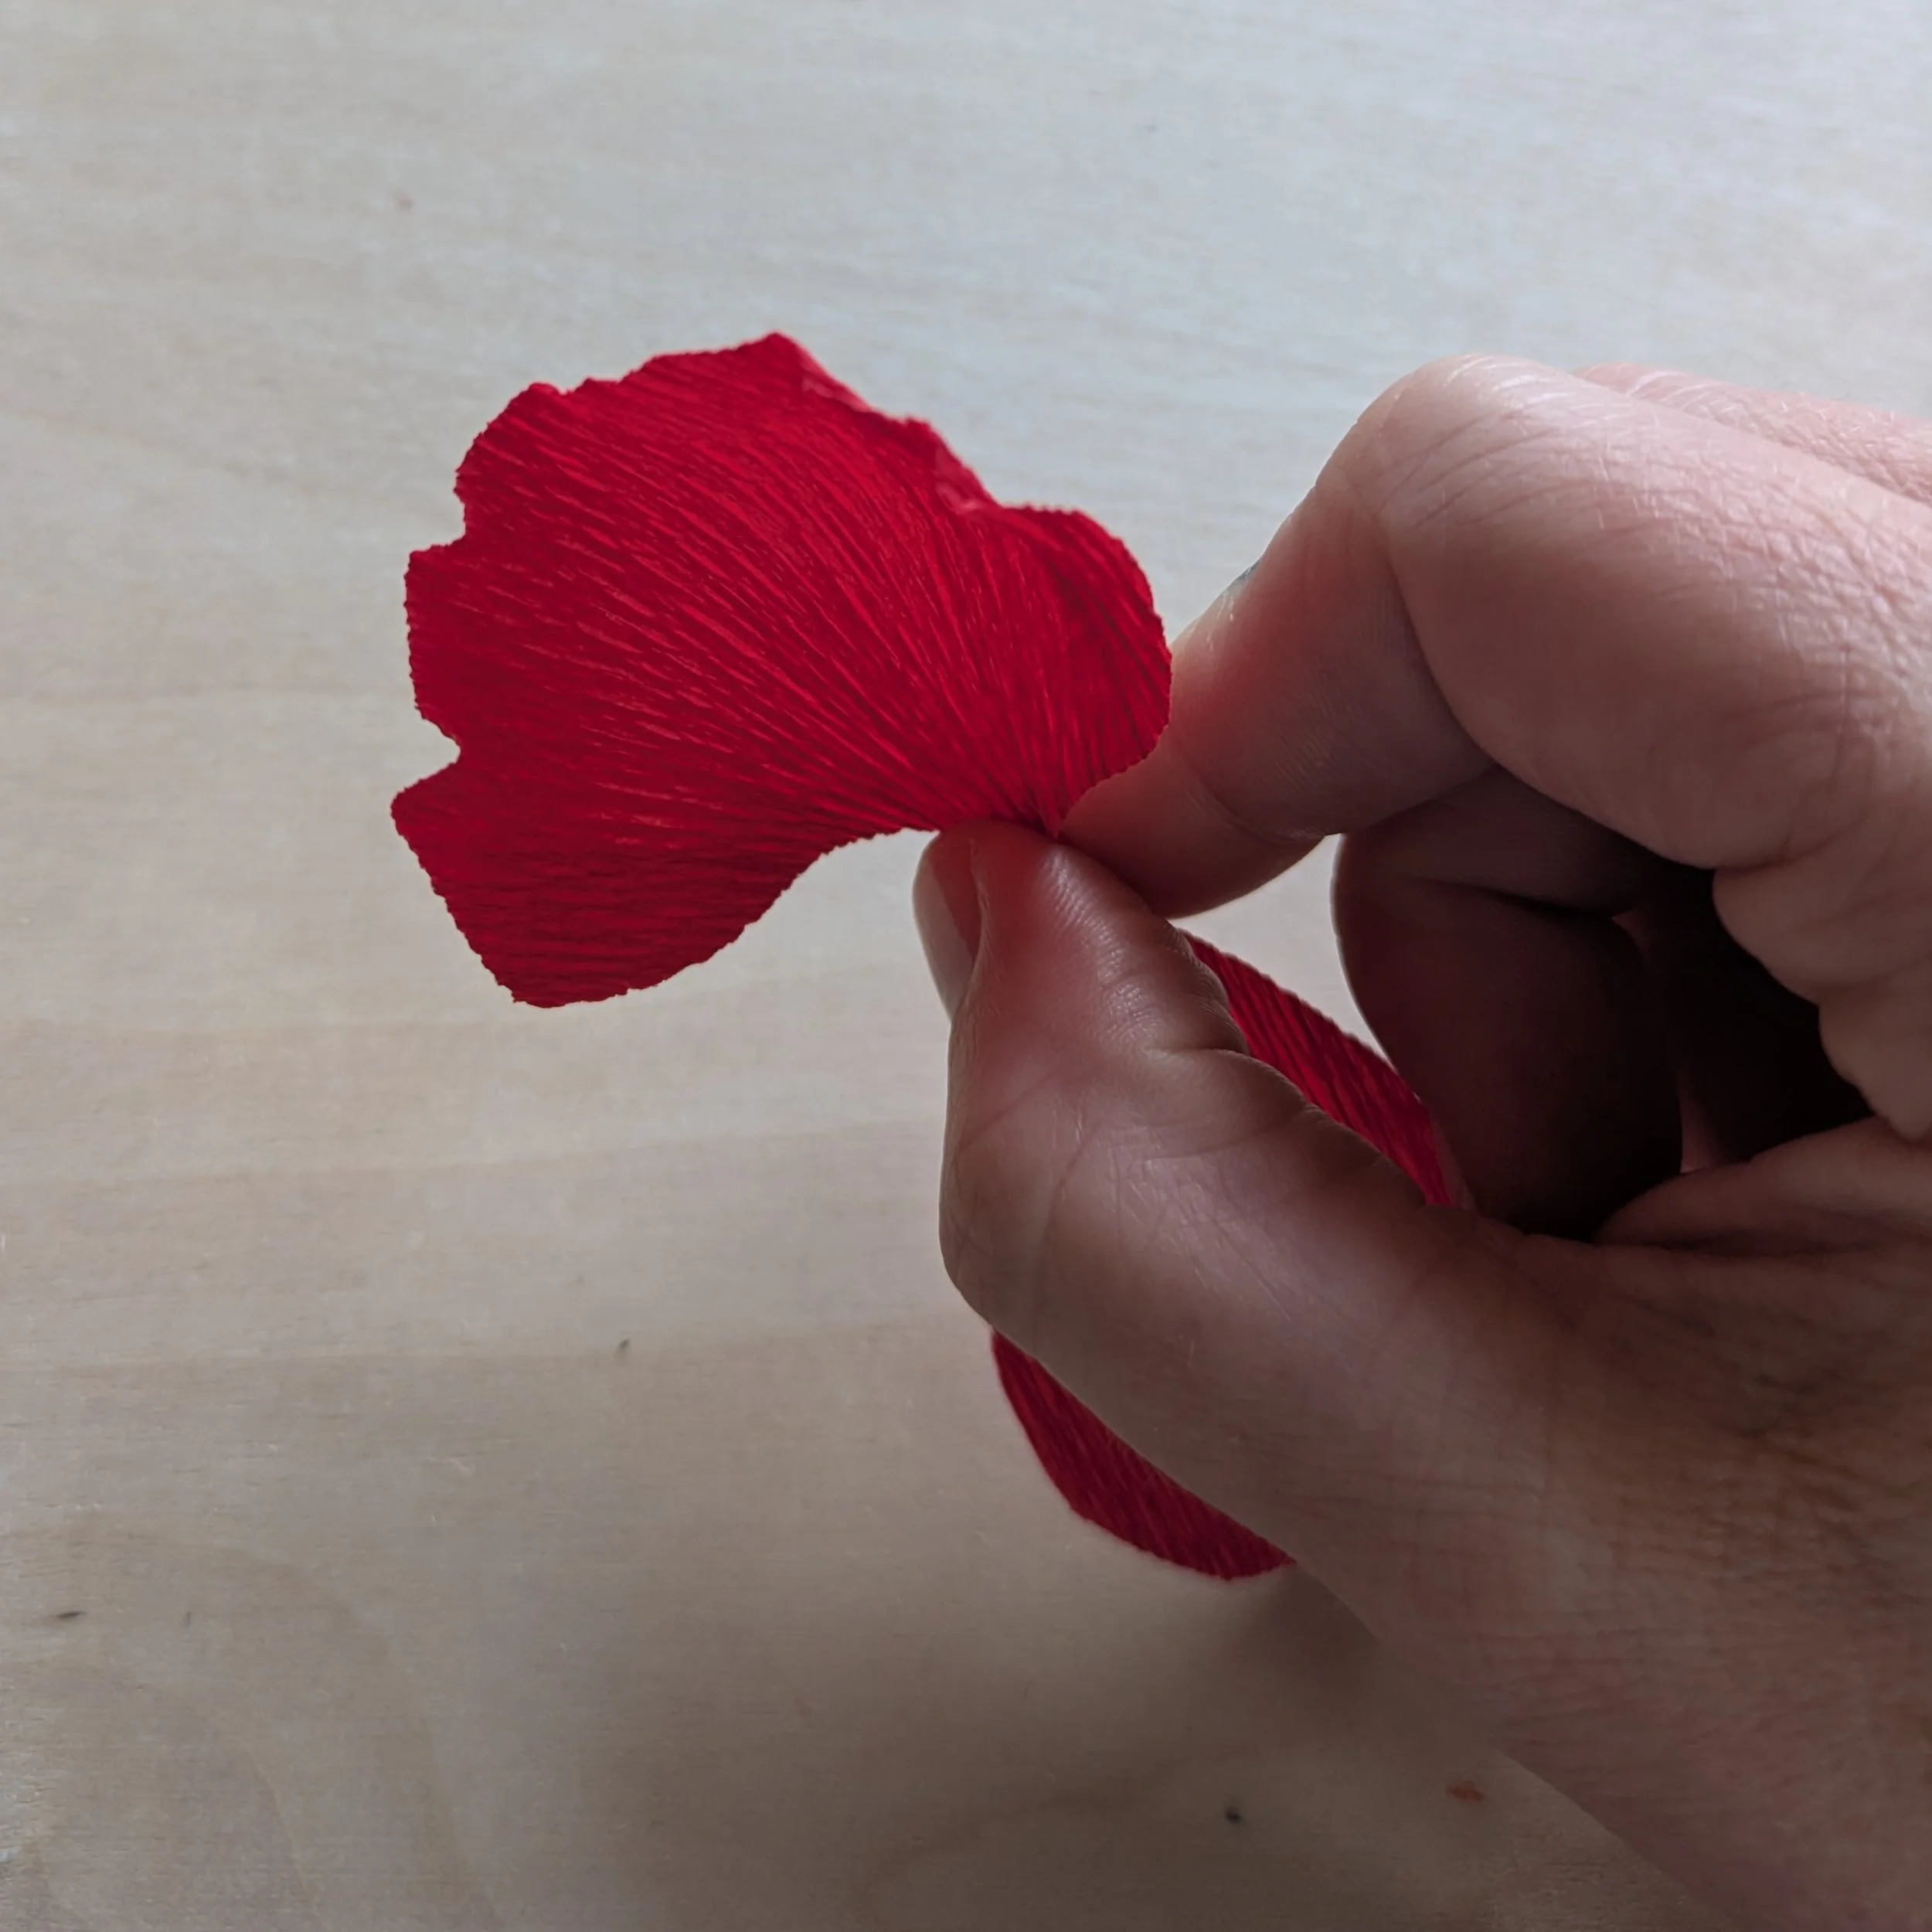
Pinch the top edge of the petal with both hands, gently and slightly moving one hand backward and one forward. This will create a tiny ripple in the edge of the crepe paper. Do this several more times alng the top edge of the petal.

Unfold the crepe paper once more to reveal your two petals. Place your thumbs flat against one of the petals and pull outward just slightly. This will create a rounded shape in the petal.

This is what the petal will look like after you’ve created several ripples. Cute! Repeat this process for each of the six petals.
Attach several pieces of your cut tape strips to the base of each petal. These can be squares, like pictured here, or a single strip that stretches along the entire base.
Step 6: Attach your petals
With the double-sided tape facing up, slide one of the smaller pairs of petals up the stem wire toward the seedpod and stamens.
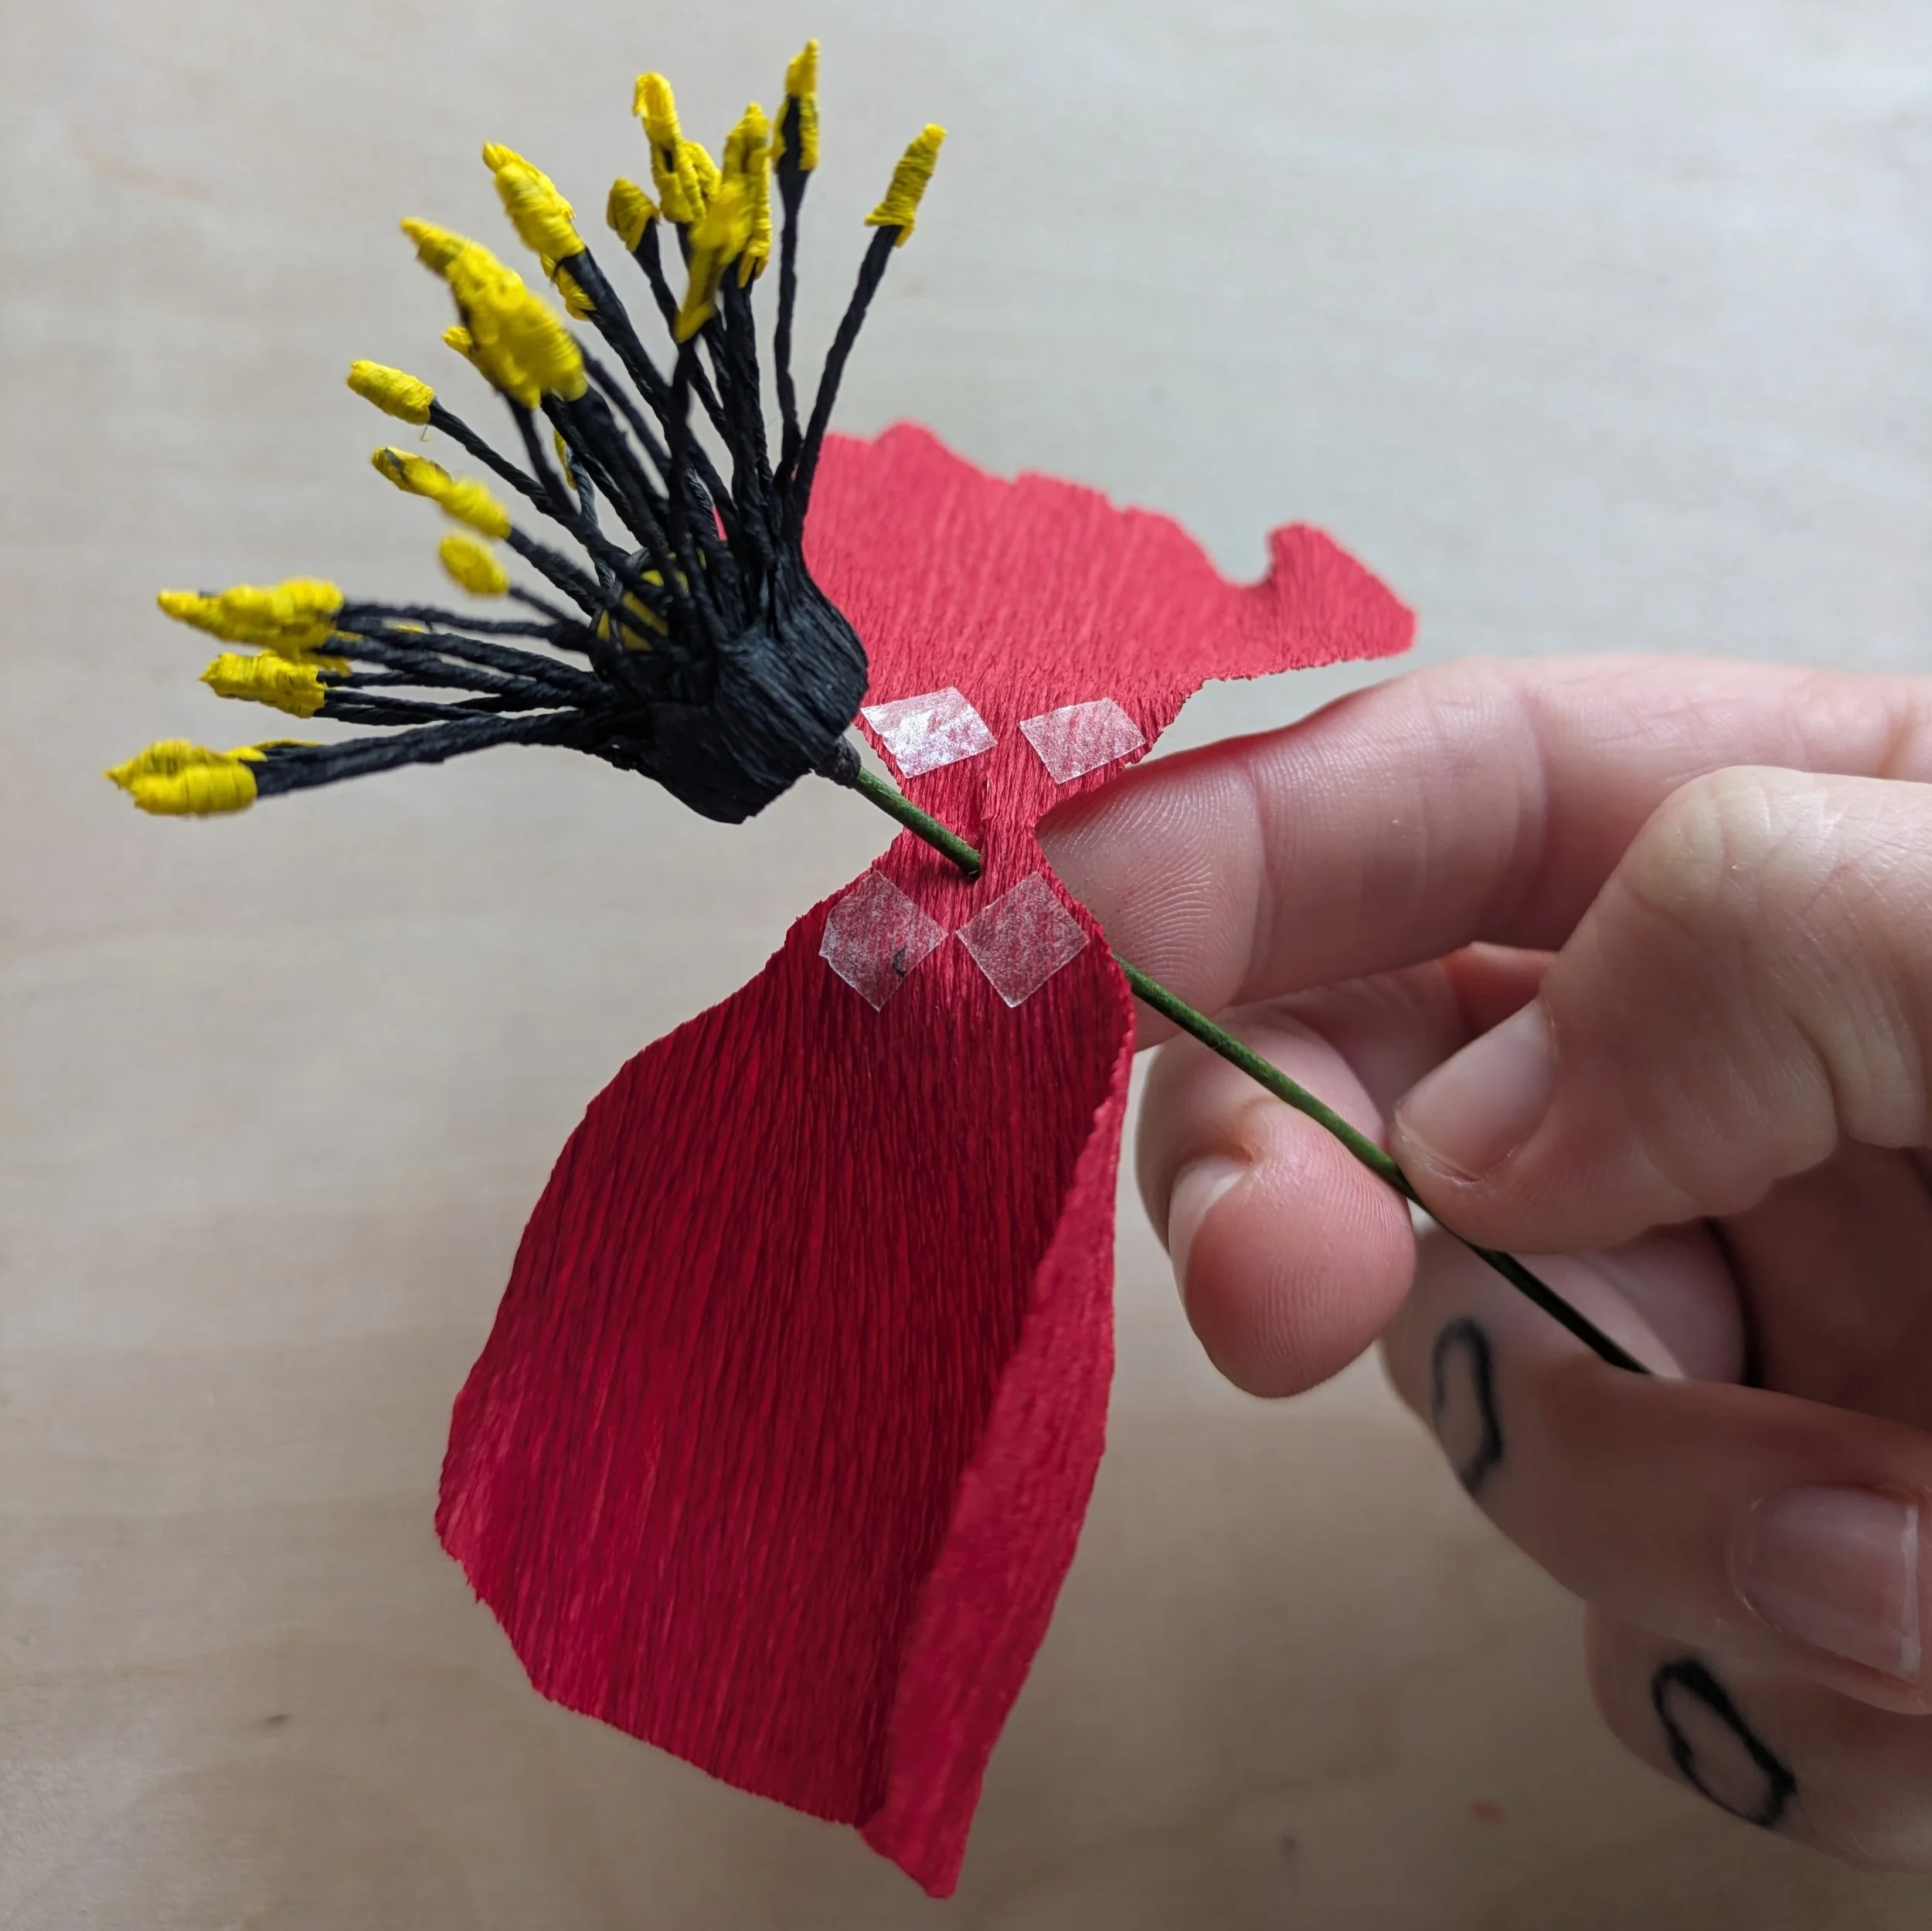
Firmly press the base of the petals onto either side of the black crepe paper.
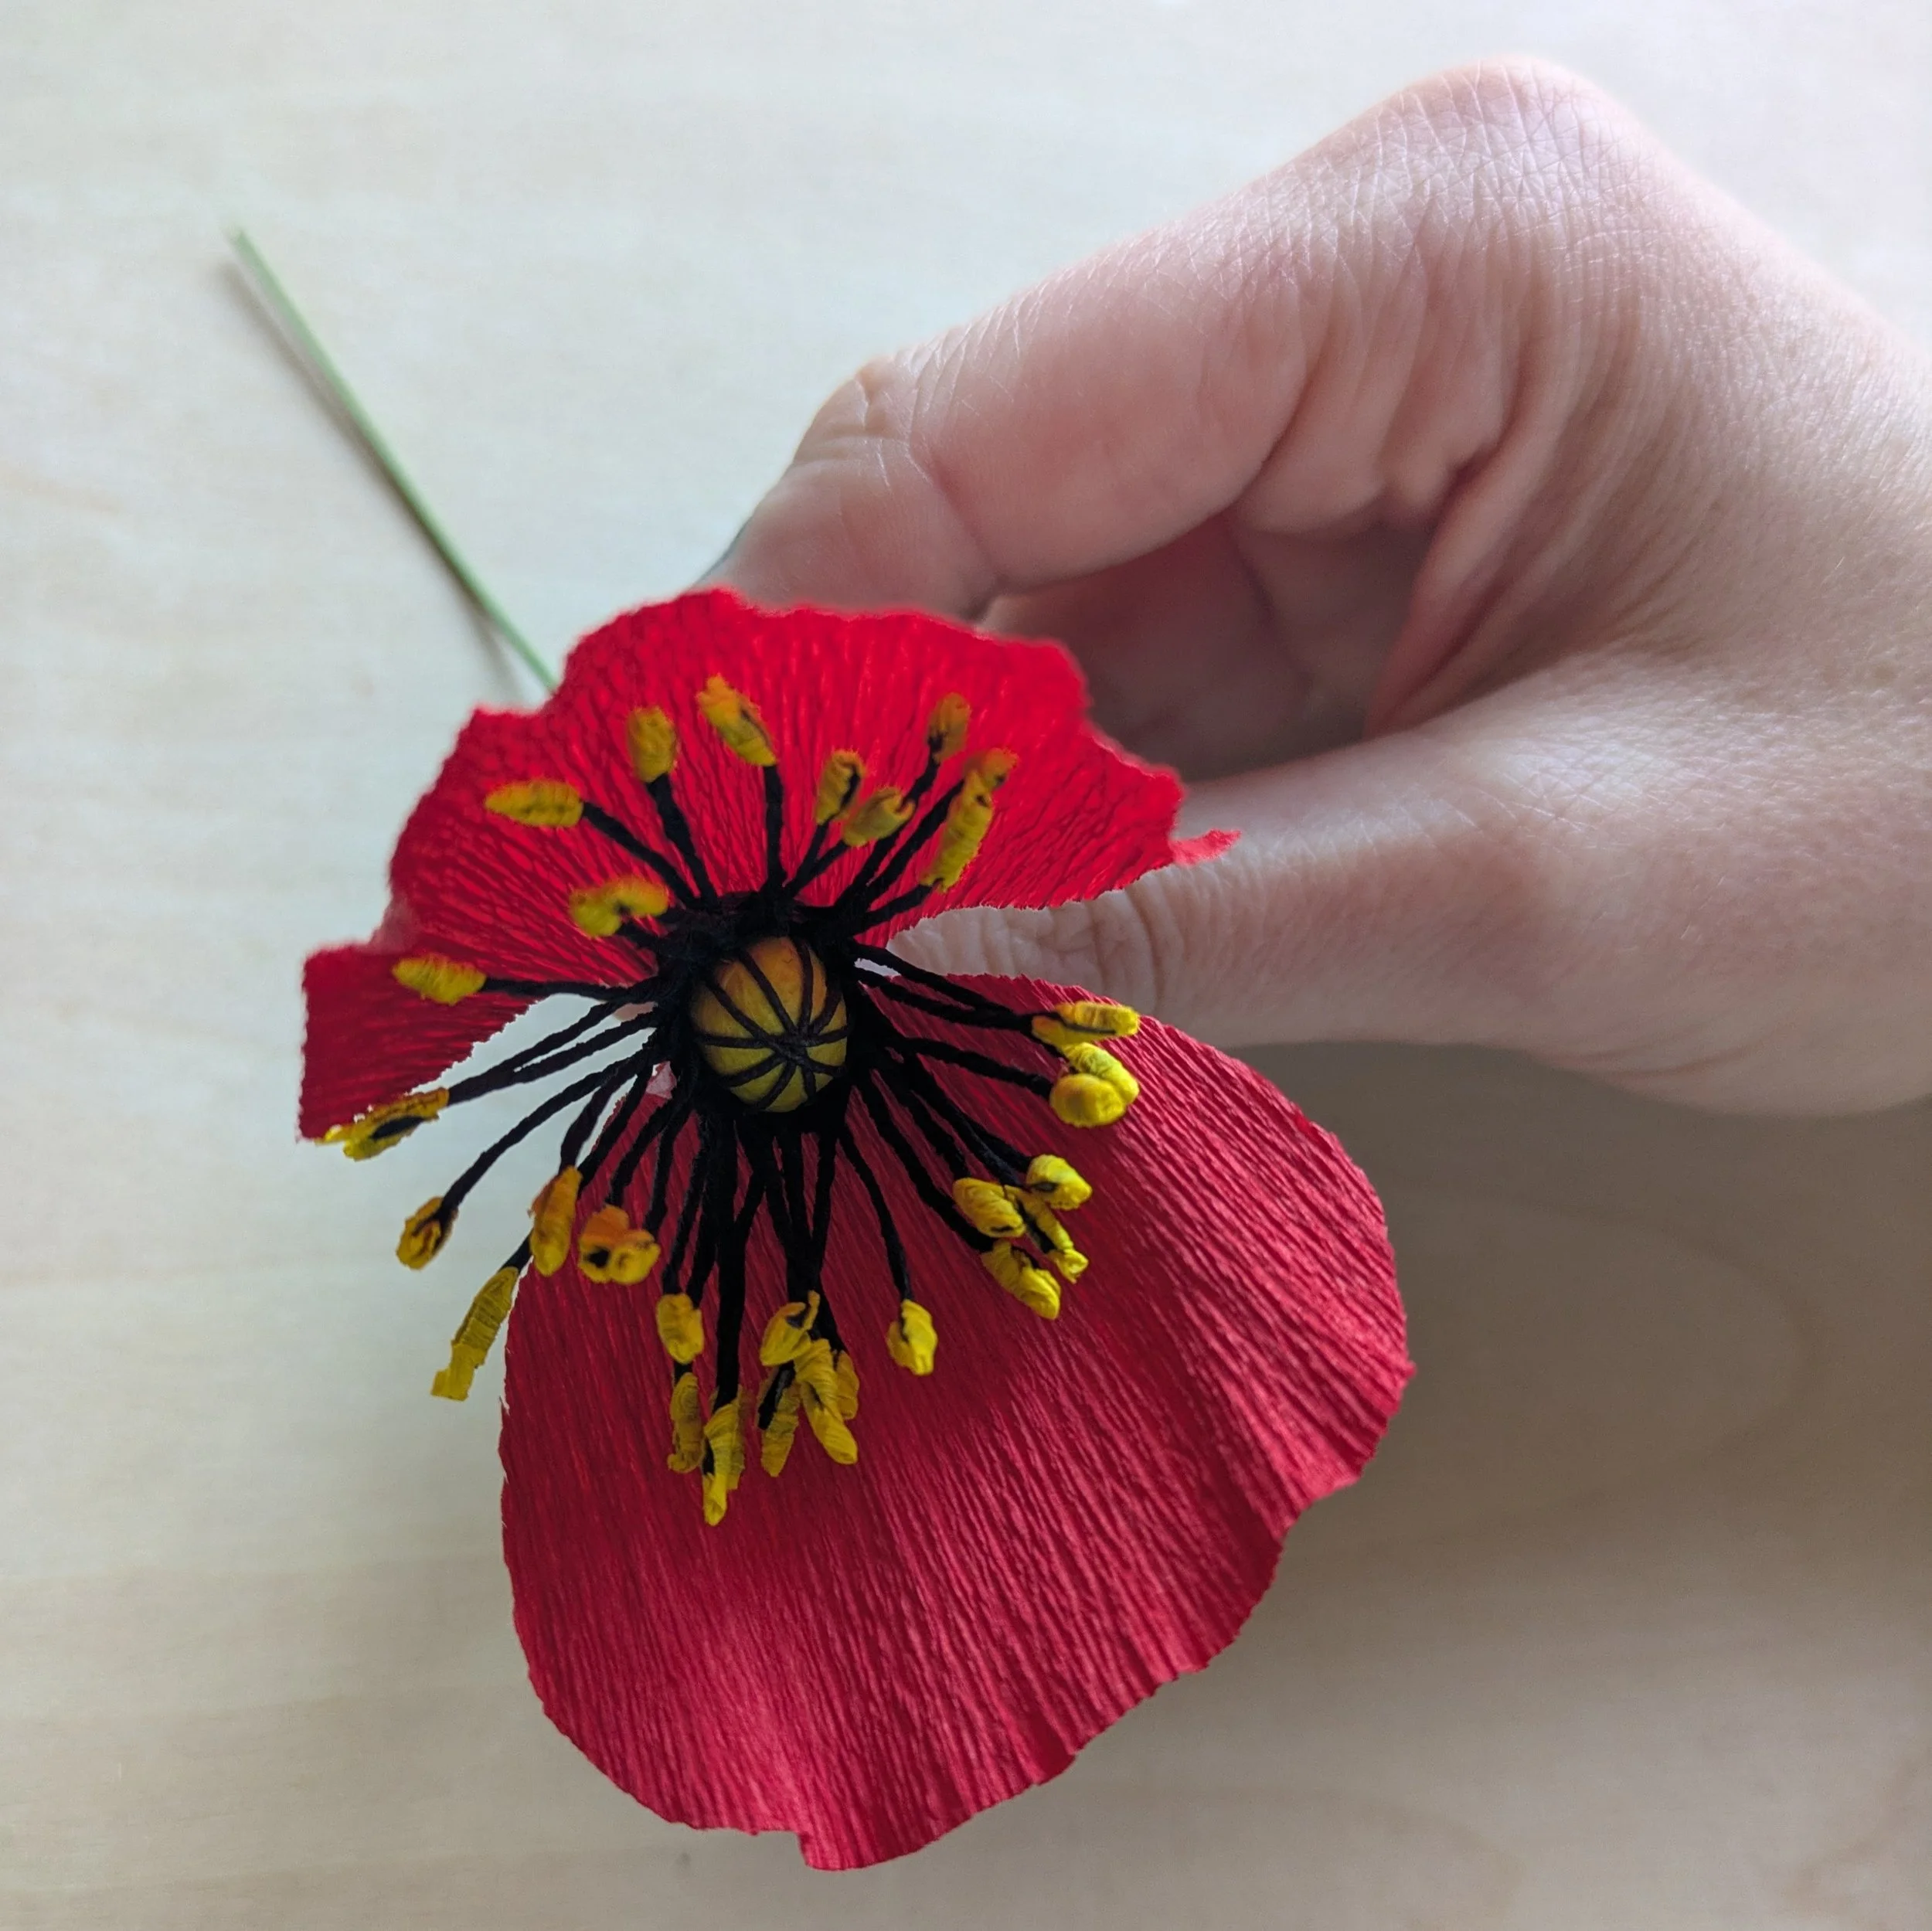
Now attach your larger pair of petals, roughly aligning them with your first pair of smaller petals. Take a moment to admire your work!
Repeat this process with your second pair of smaller petals, this time having the petals face the opposite direction.
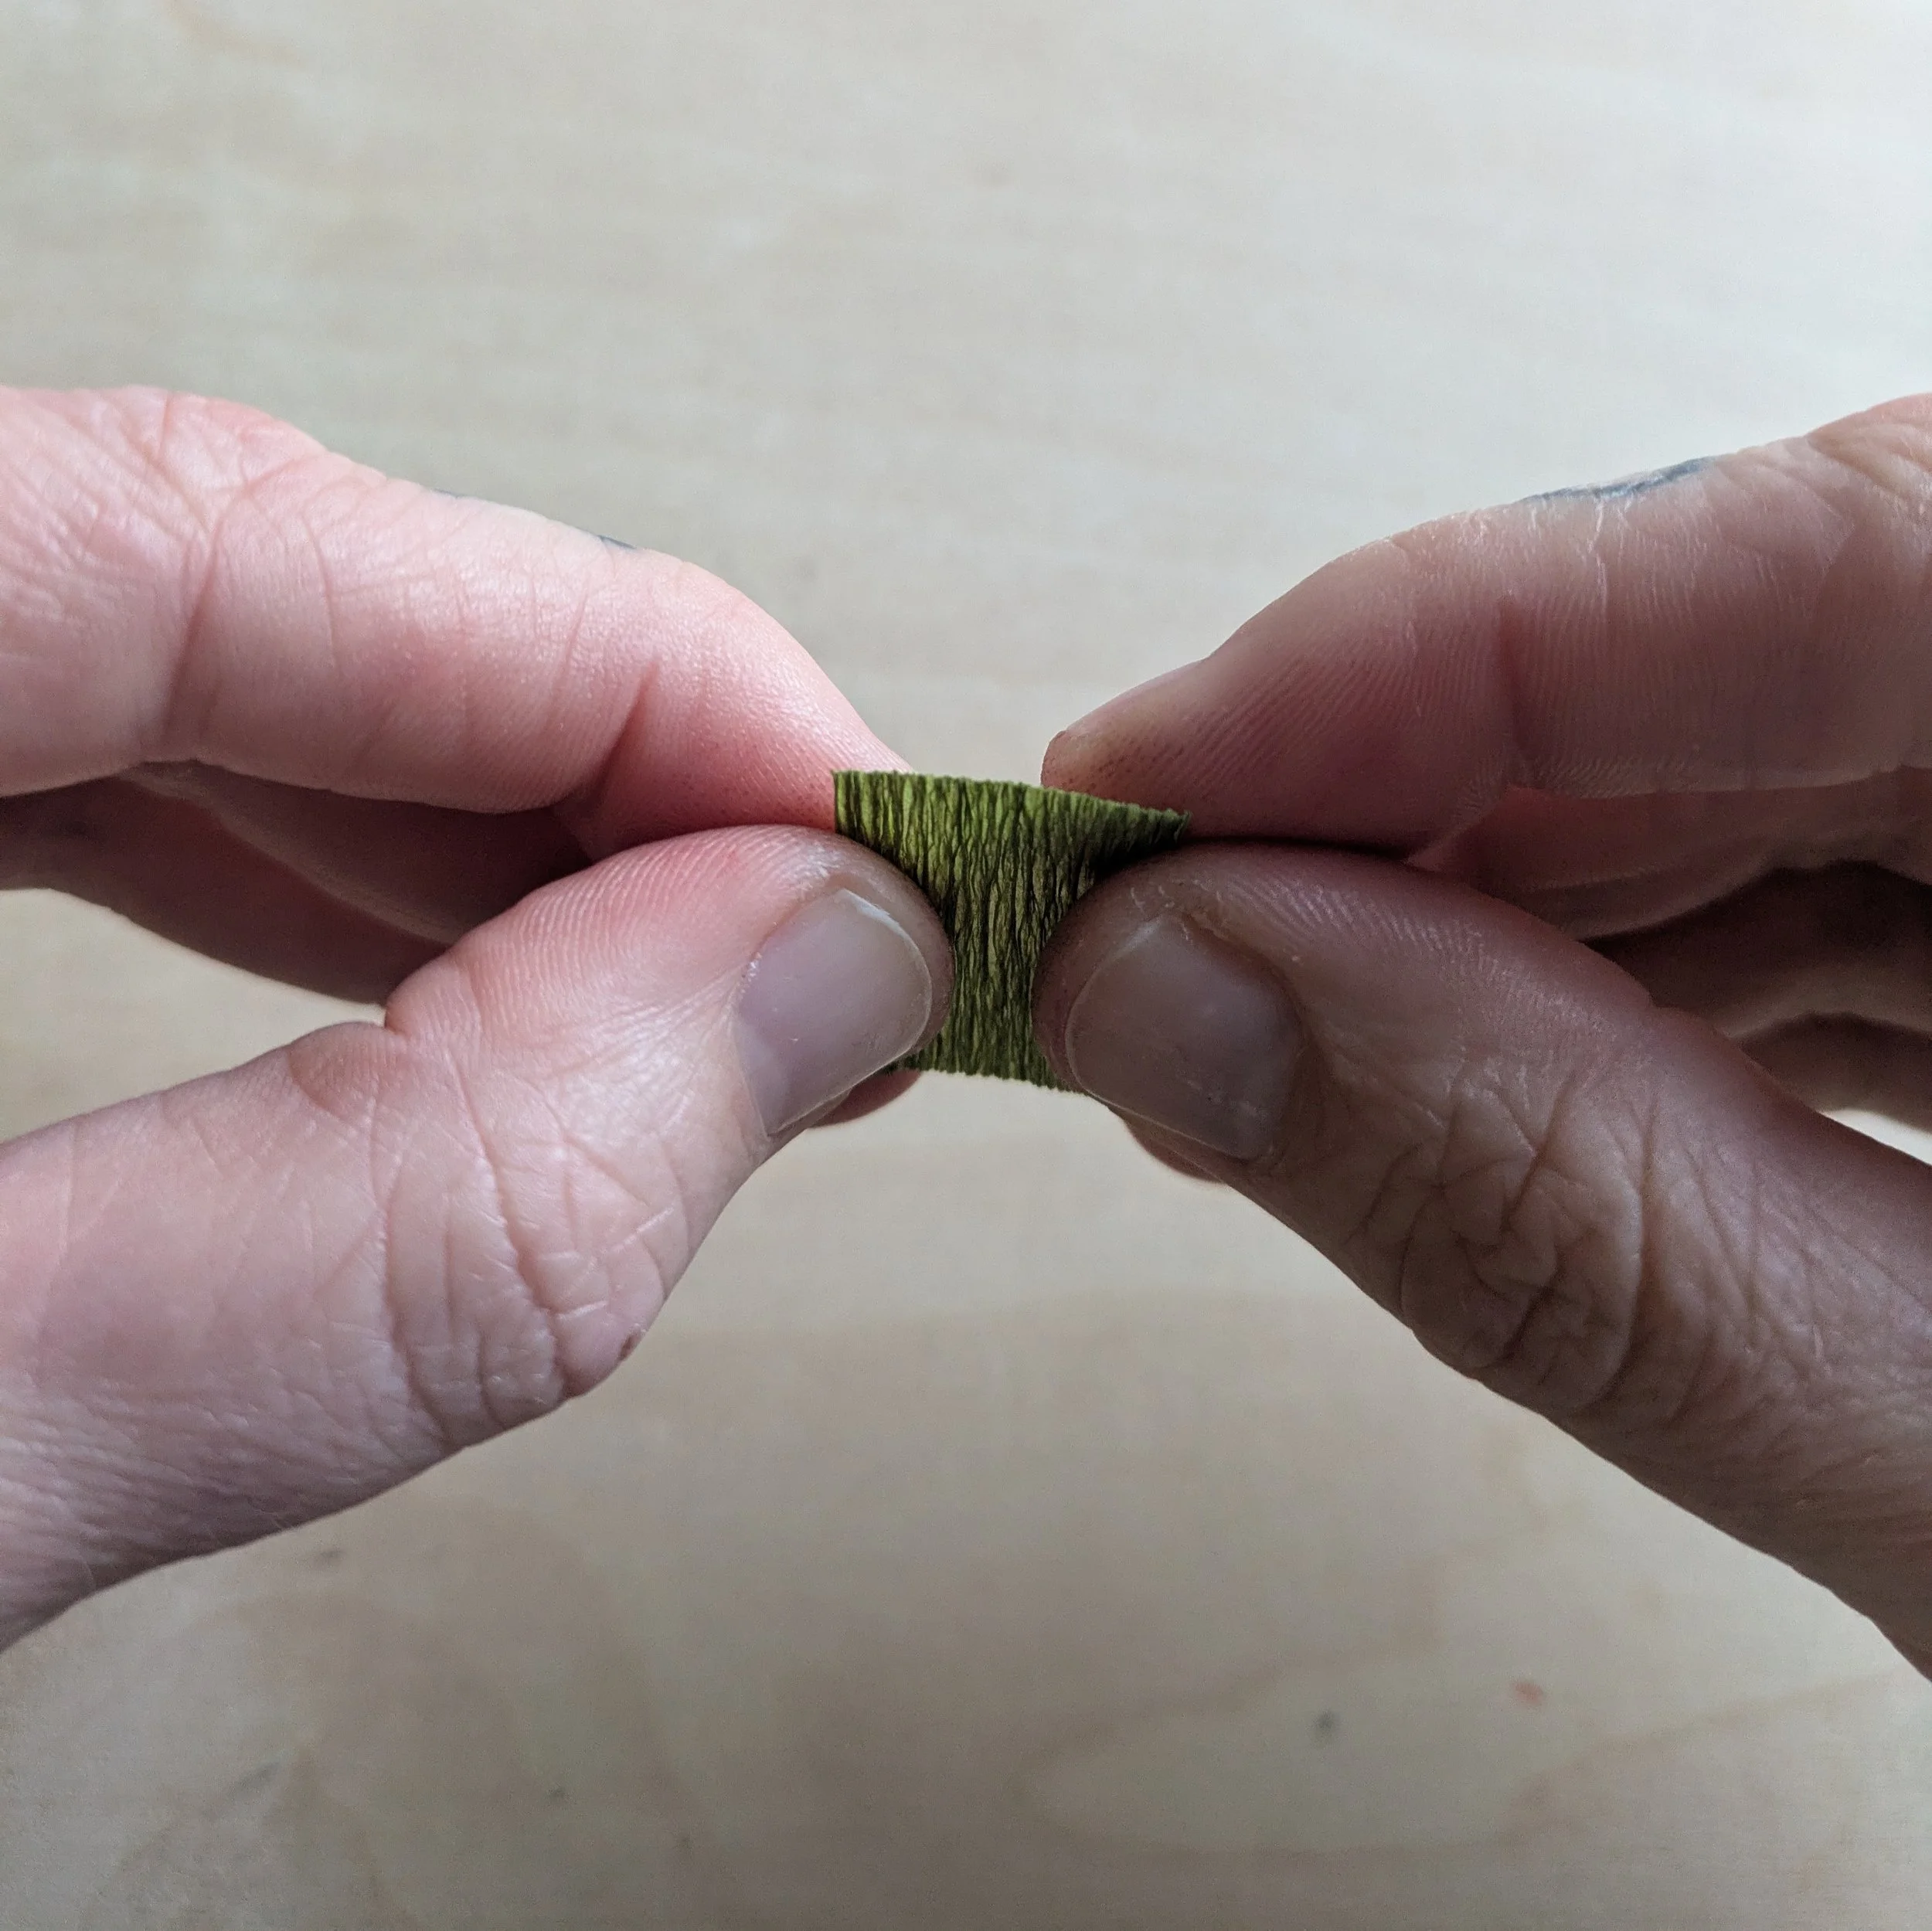
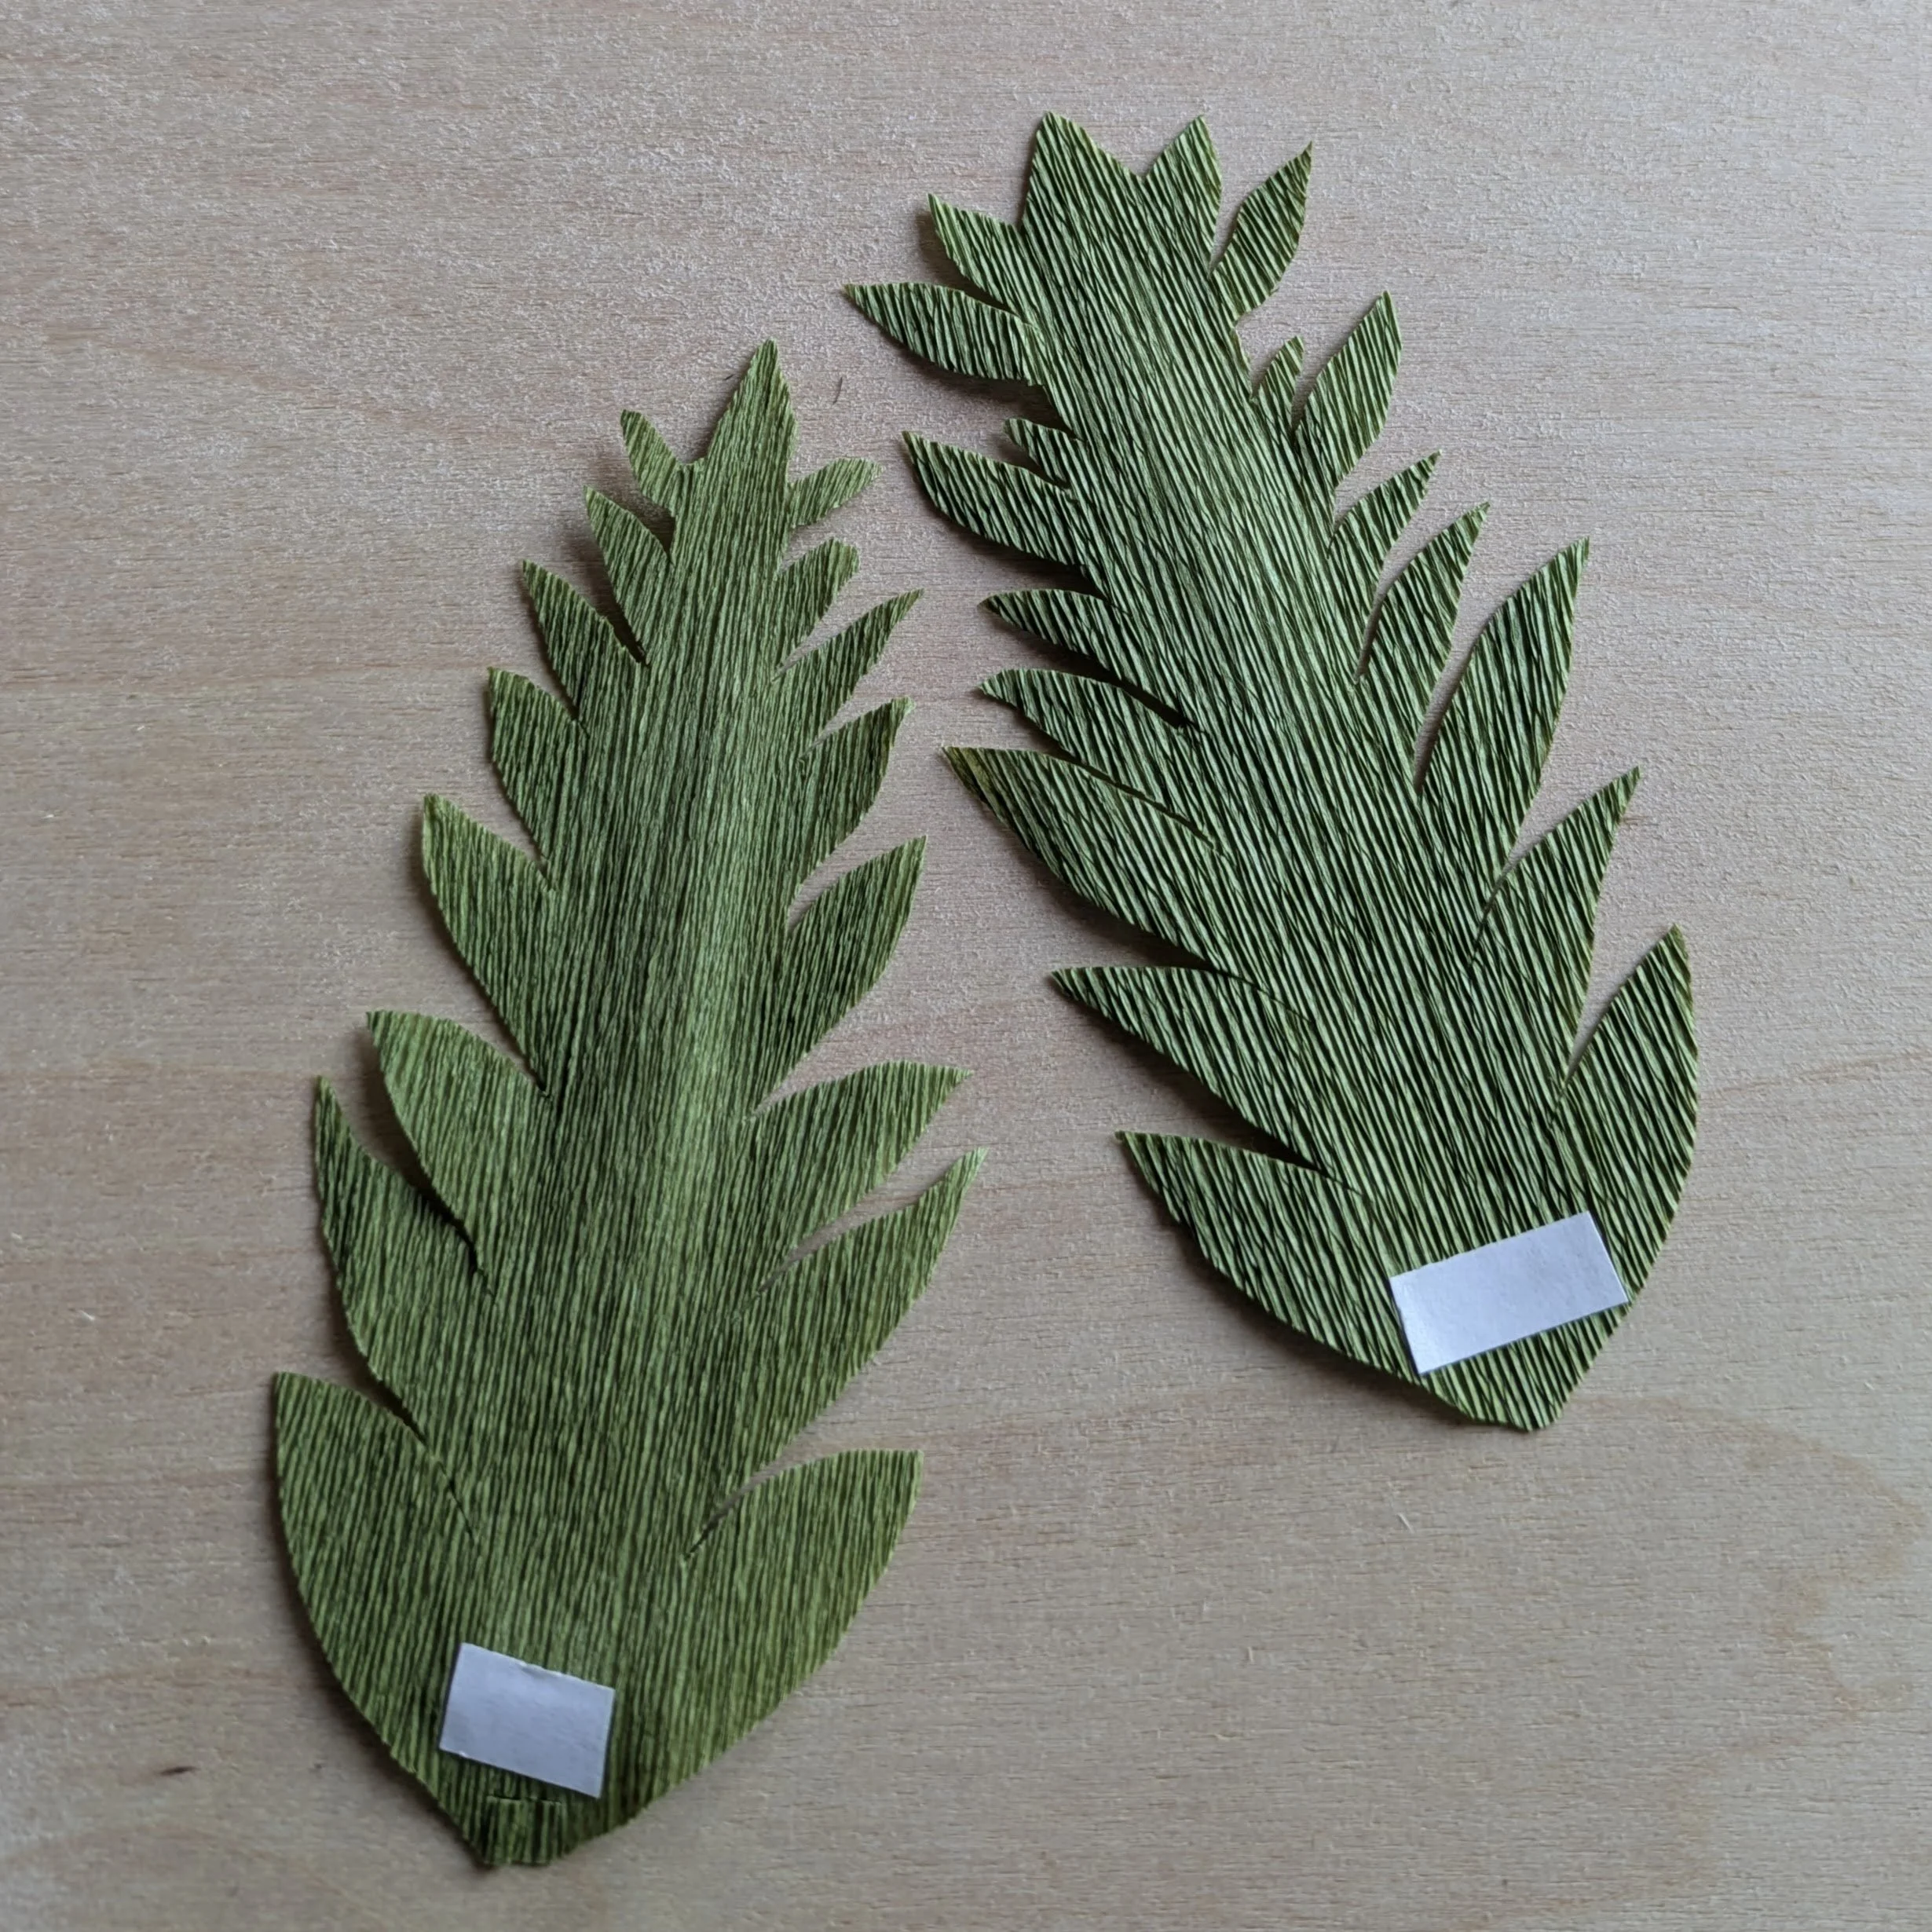
Find your two large pieces of green crepe paper and fold each of them in half lengthwise.
Step 7: Create your leaves
On each piece, make a small cut toward the bottom of one side of the folded side of the paper. This is where you’ll slide the leaves onto the stem wire.

Taking care to not cut off the corner where you made the small cut in the previous step, cut away some of the paper to make a leaf shape.

Cut the corners off the square so that the paper is a circular shape.
Find your small piece of crepe paper. Place your thumbs flat against the paper and pull outward just slightly. Pull just enough so that the paper is a square rather than a rectangle.
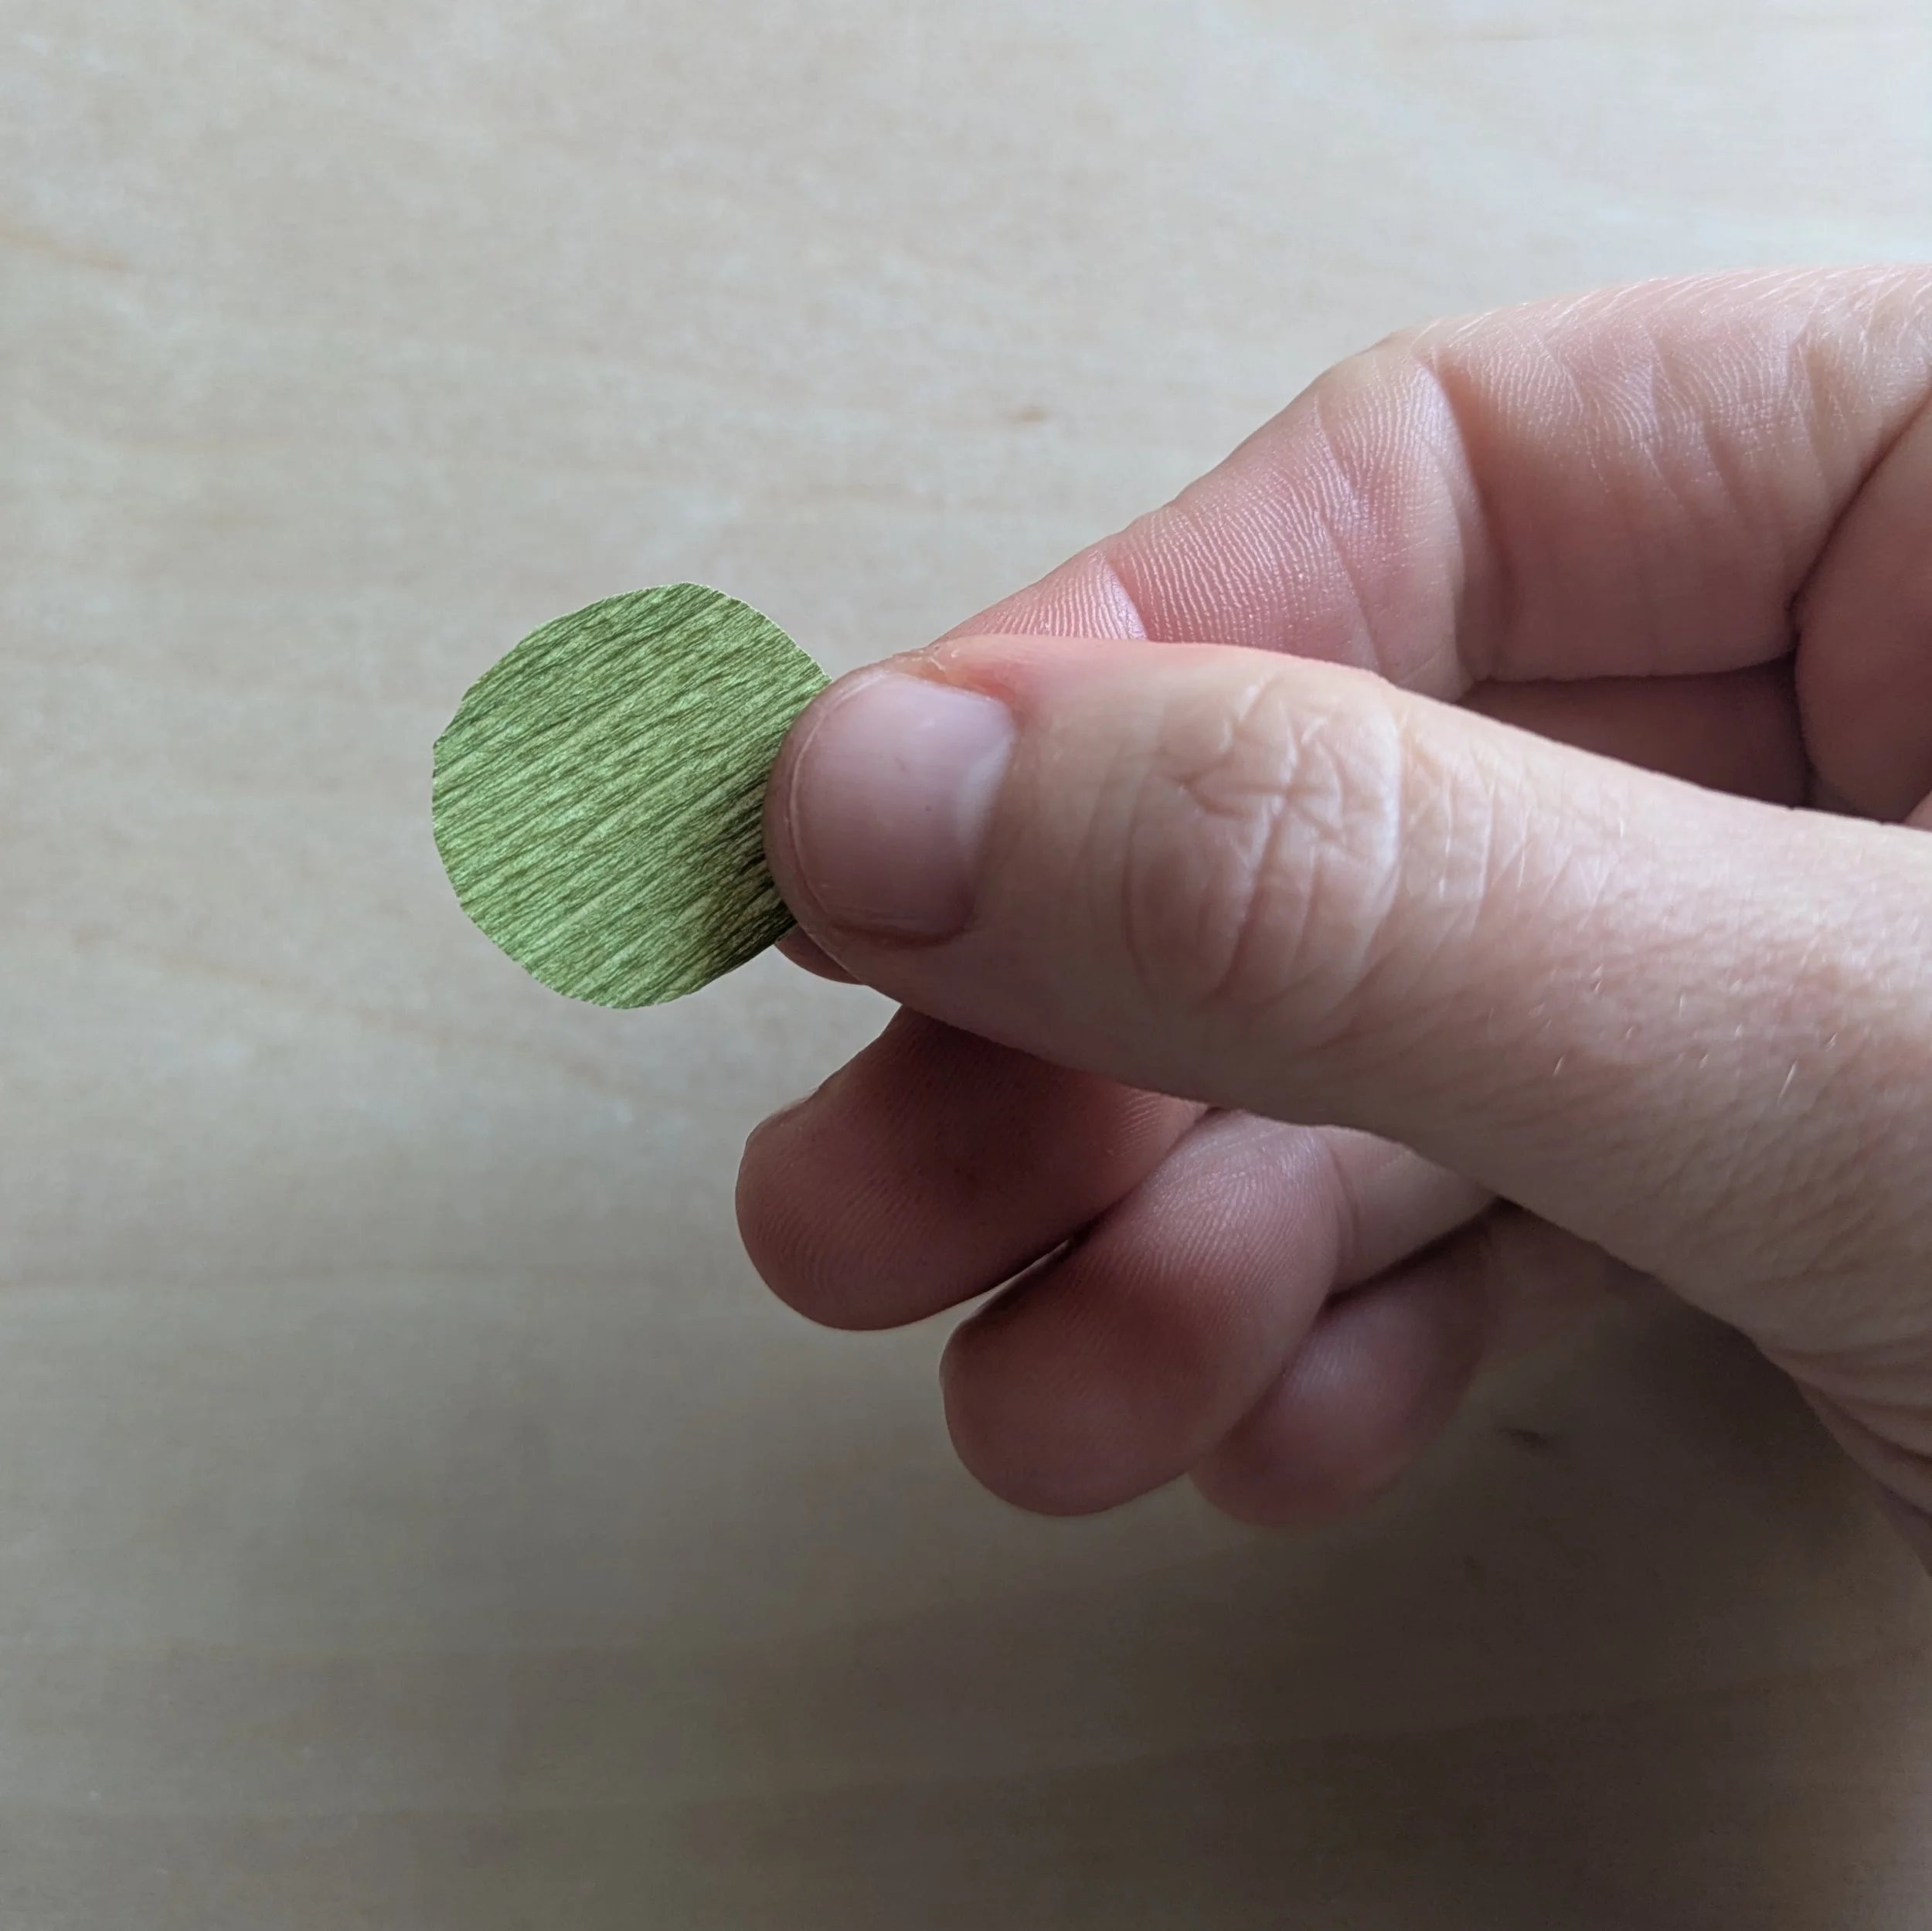
Fold the paper in half and make a very small cut in the center of the folded edge. This is where you’ll slide the paper onto the stem wire.

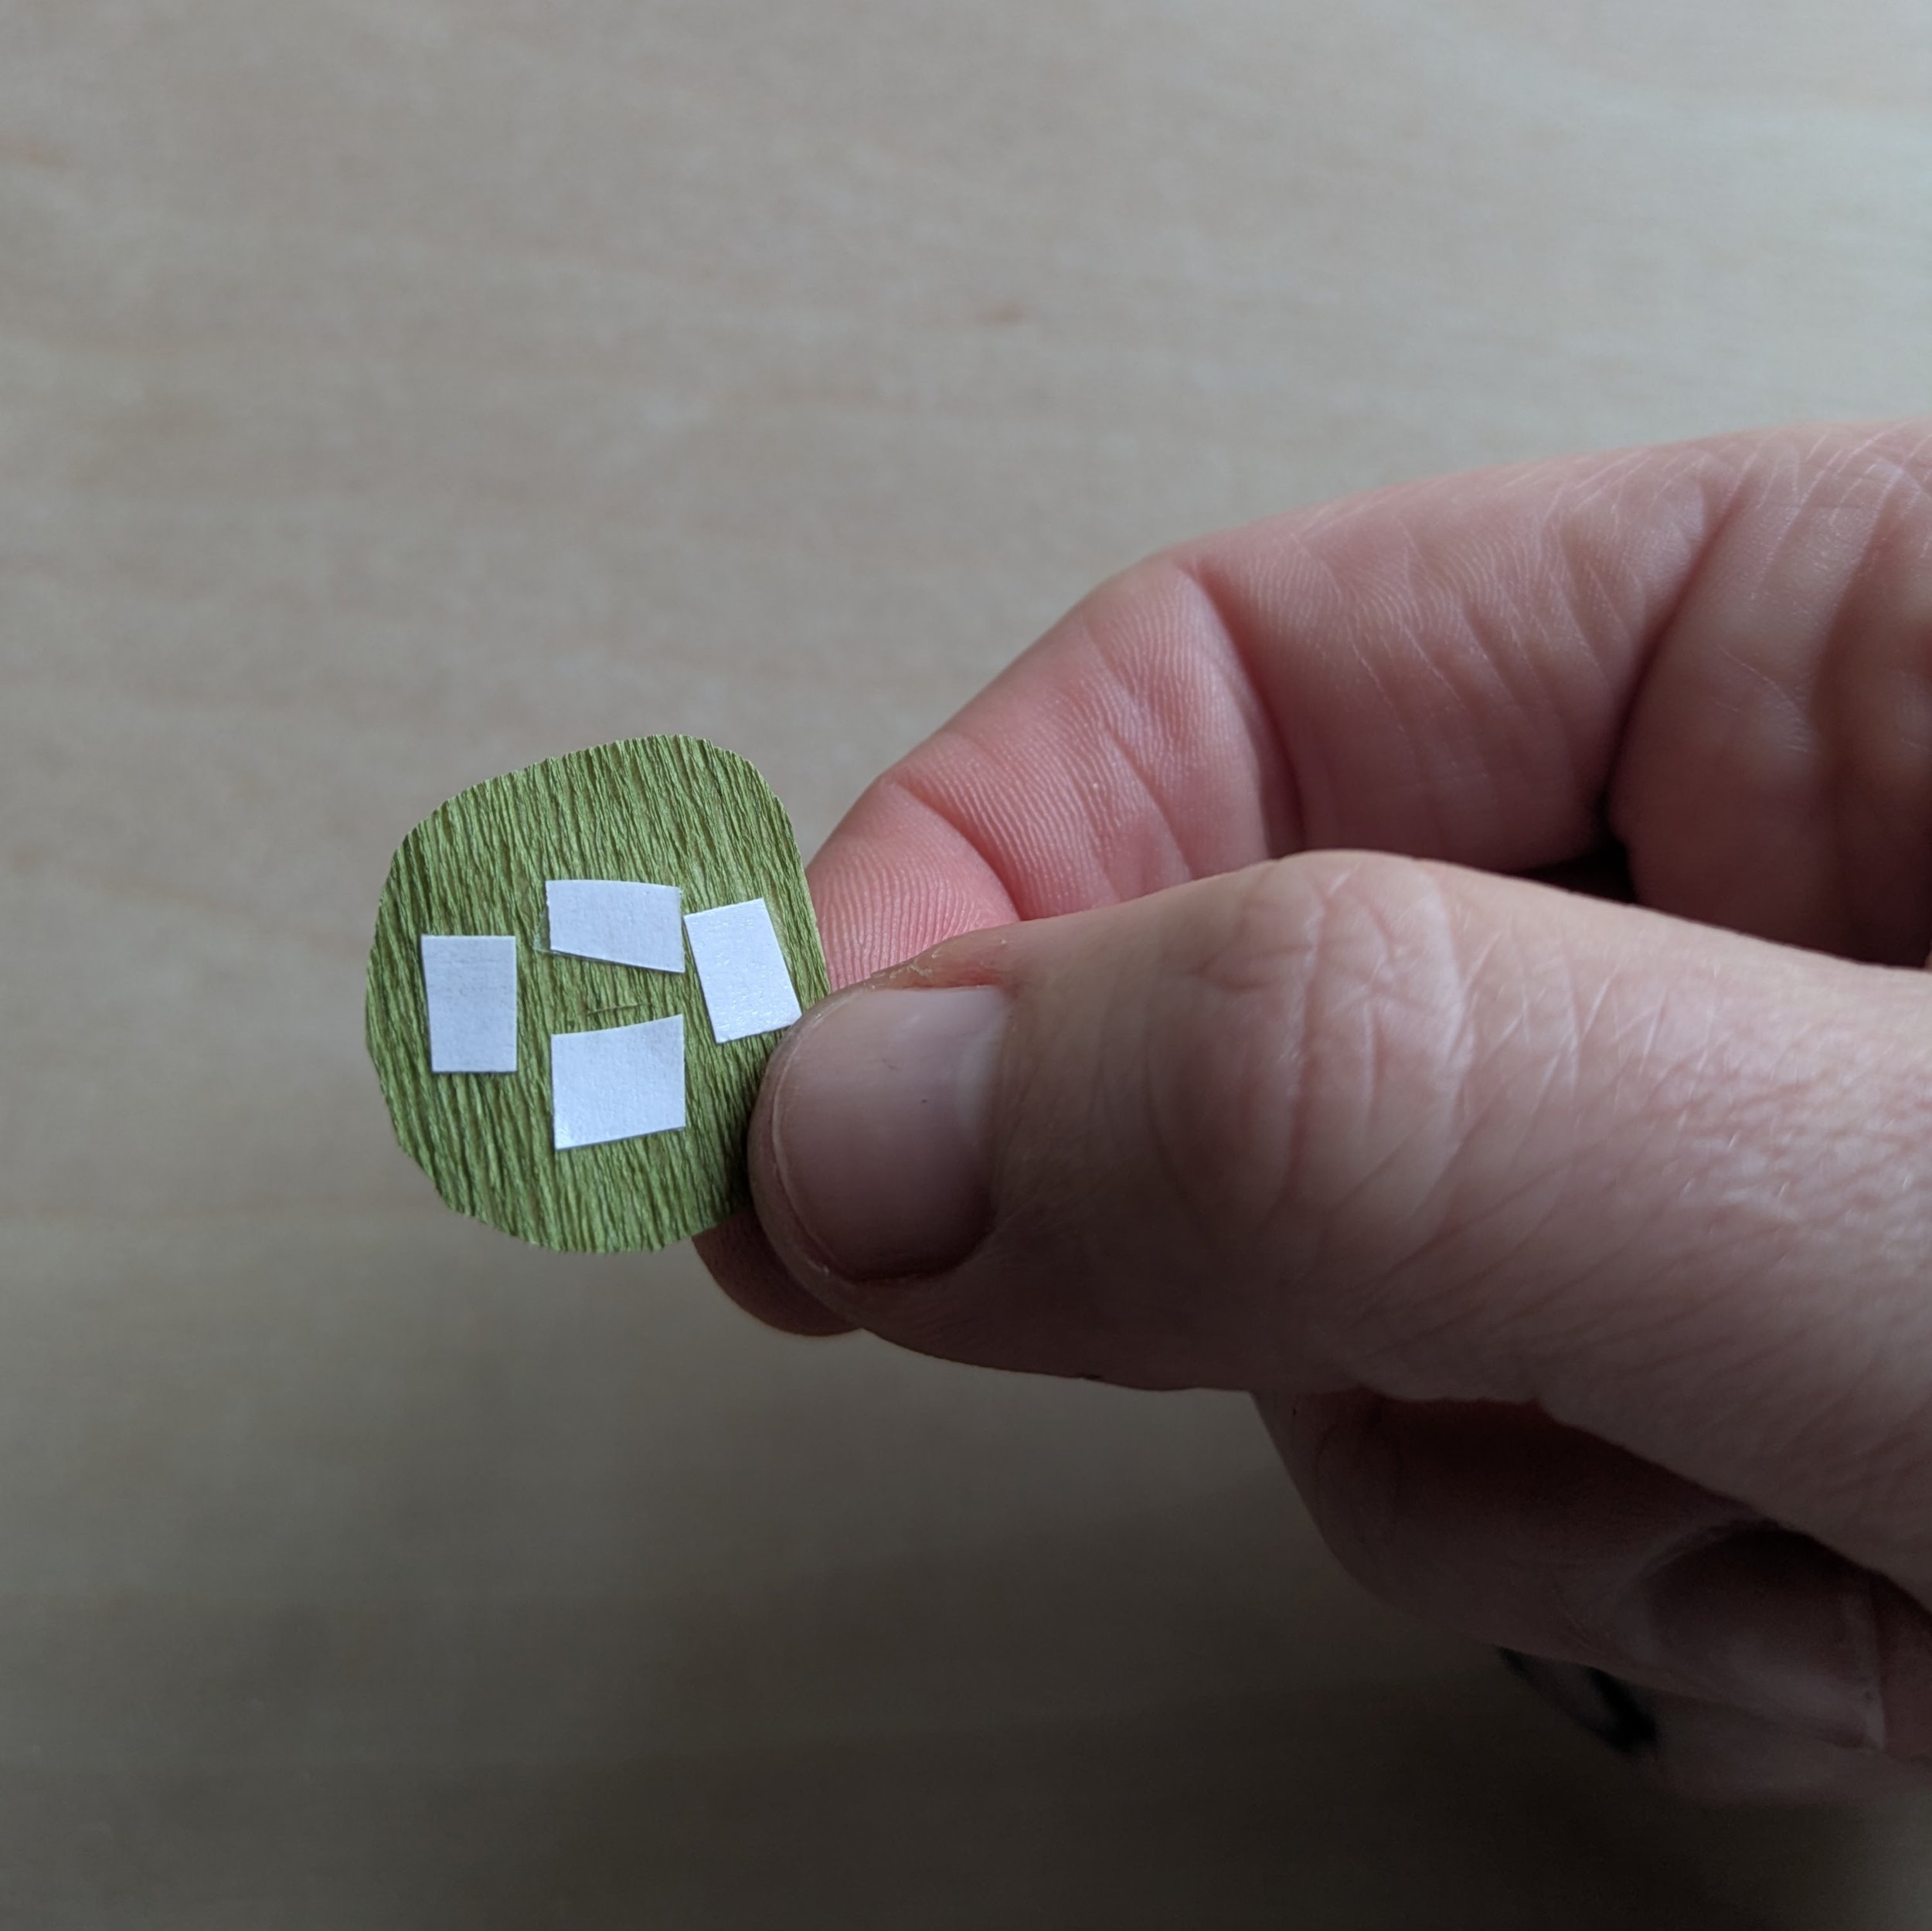
Attach a short piece of tape strip to the base of each leaf.
Attach several pieces of your cut tape strips around the cut you made in the previous step.
Remove the white backing from the tape strip on each leaf and slide them one at a time up the stem wire. With each one, gently press the base of the leaf so that it adheres to the flower.
Step 8: Attach your leaves and bend your stem wire
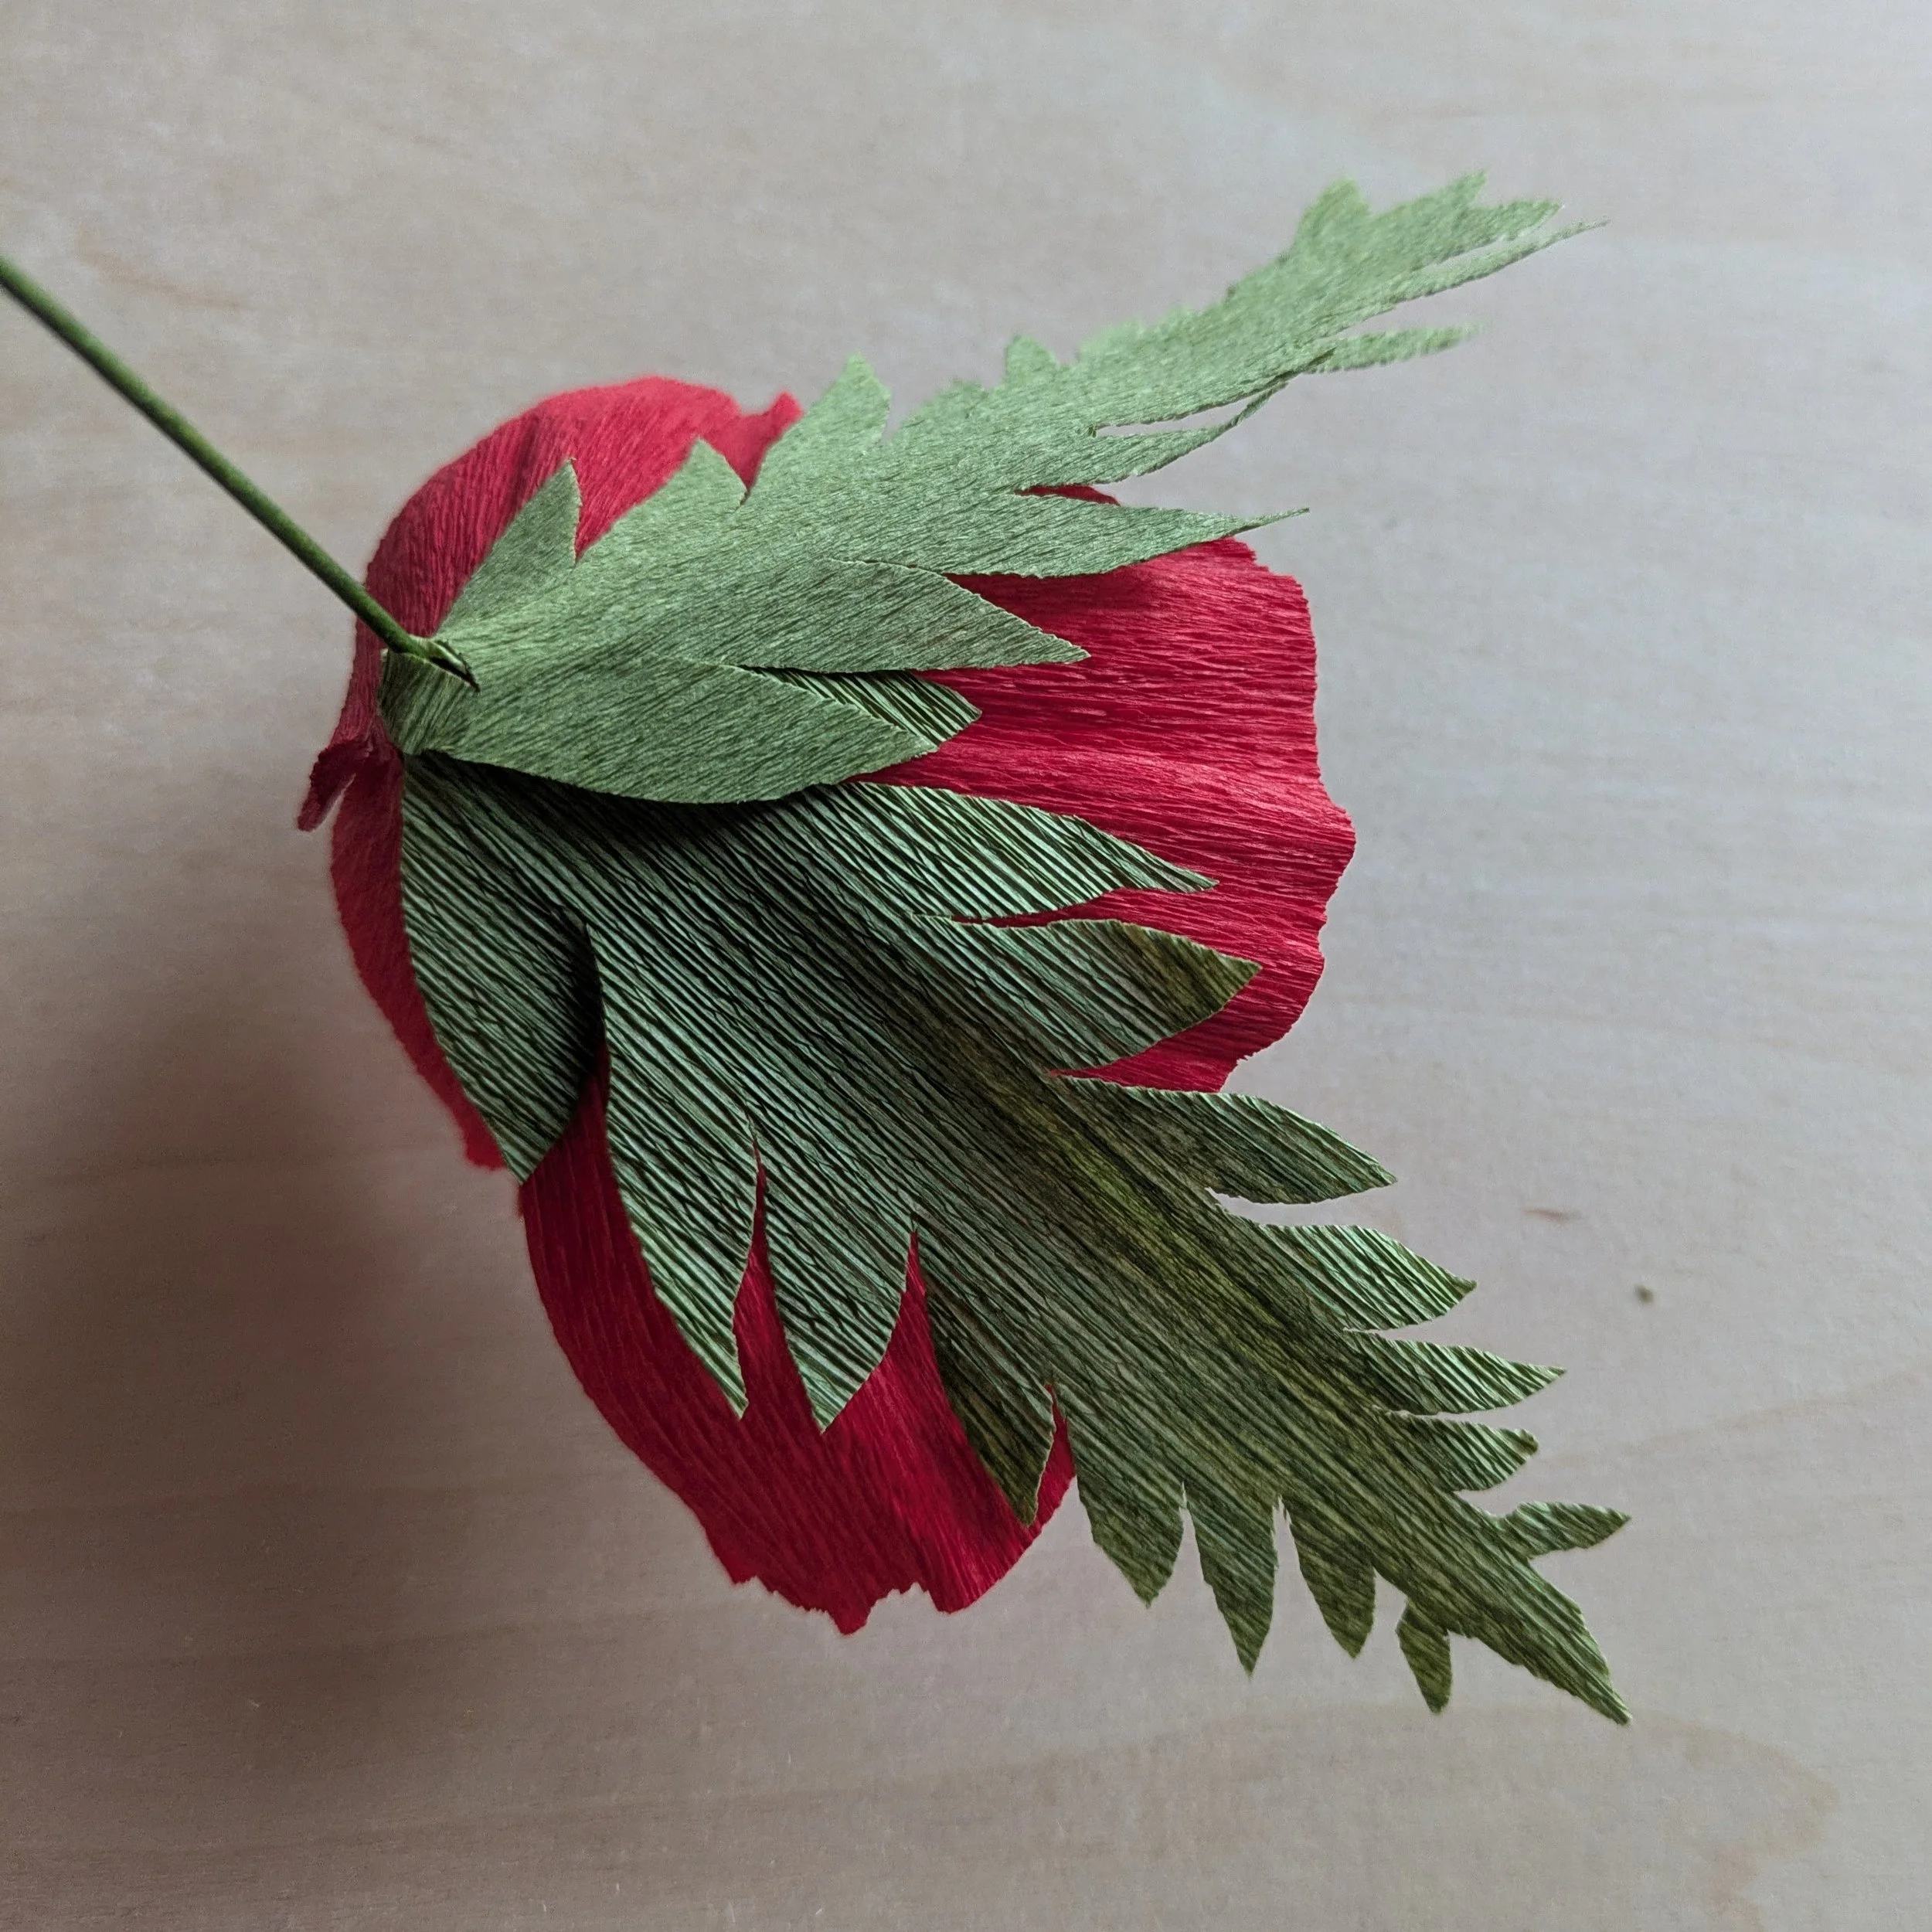
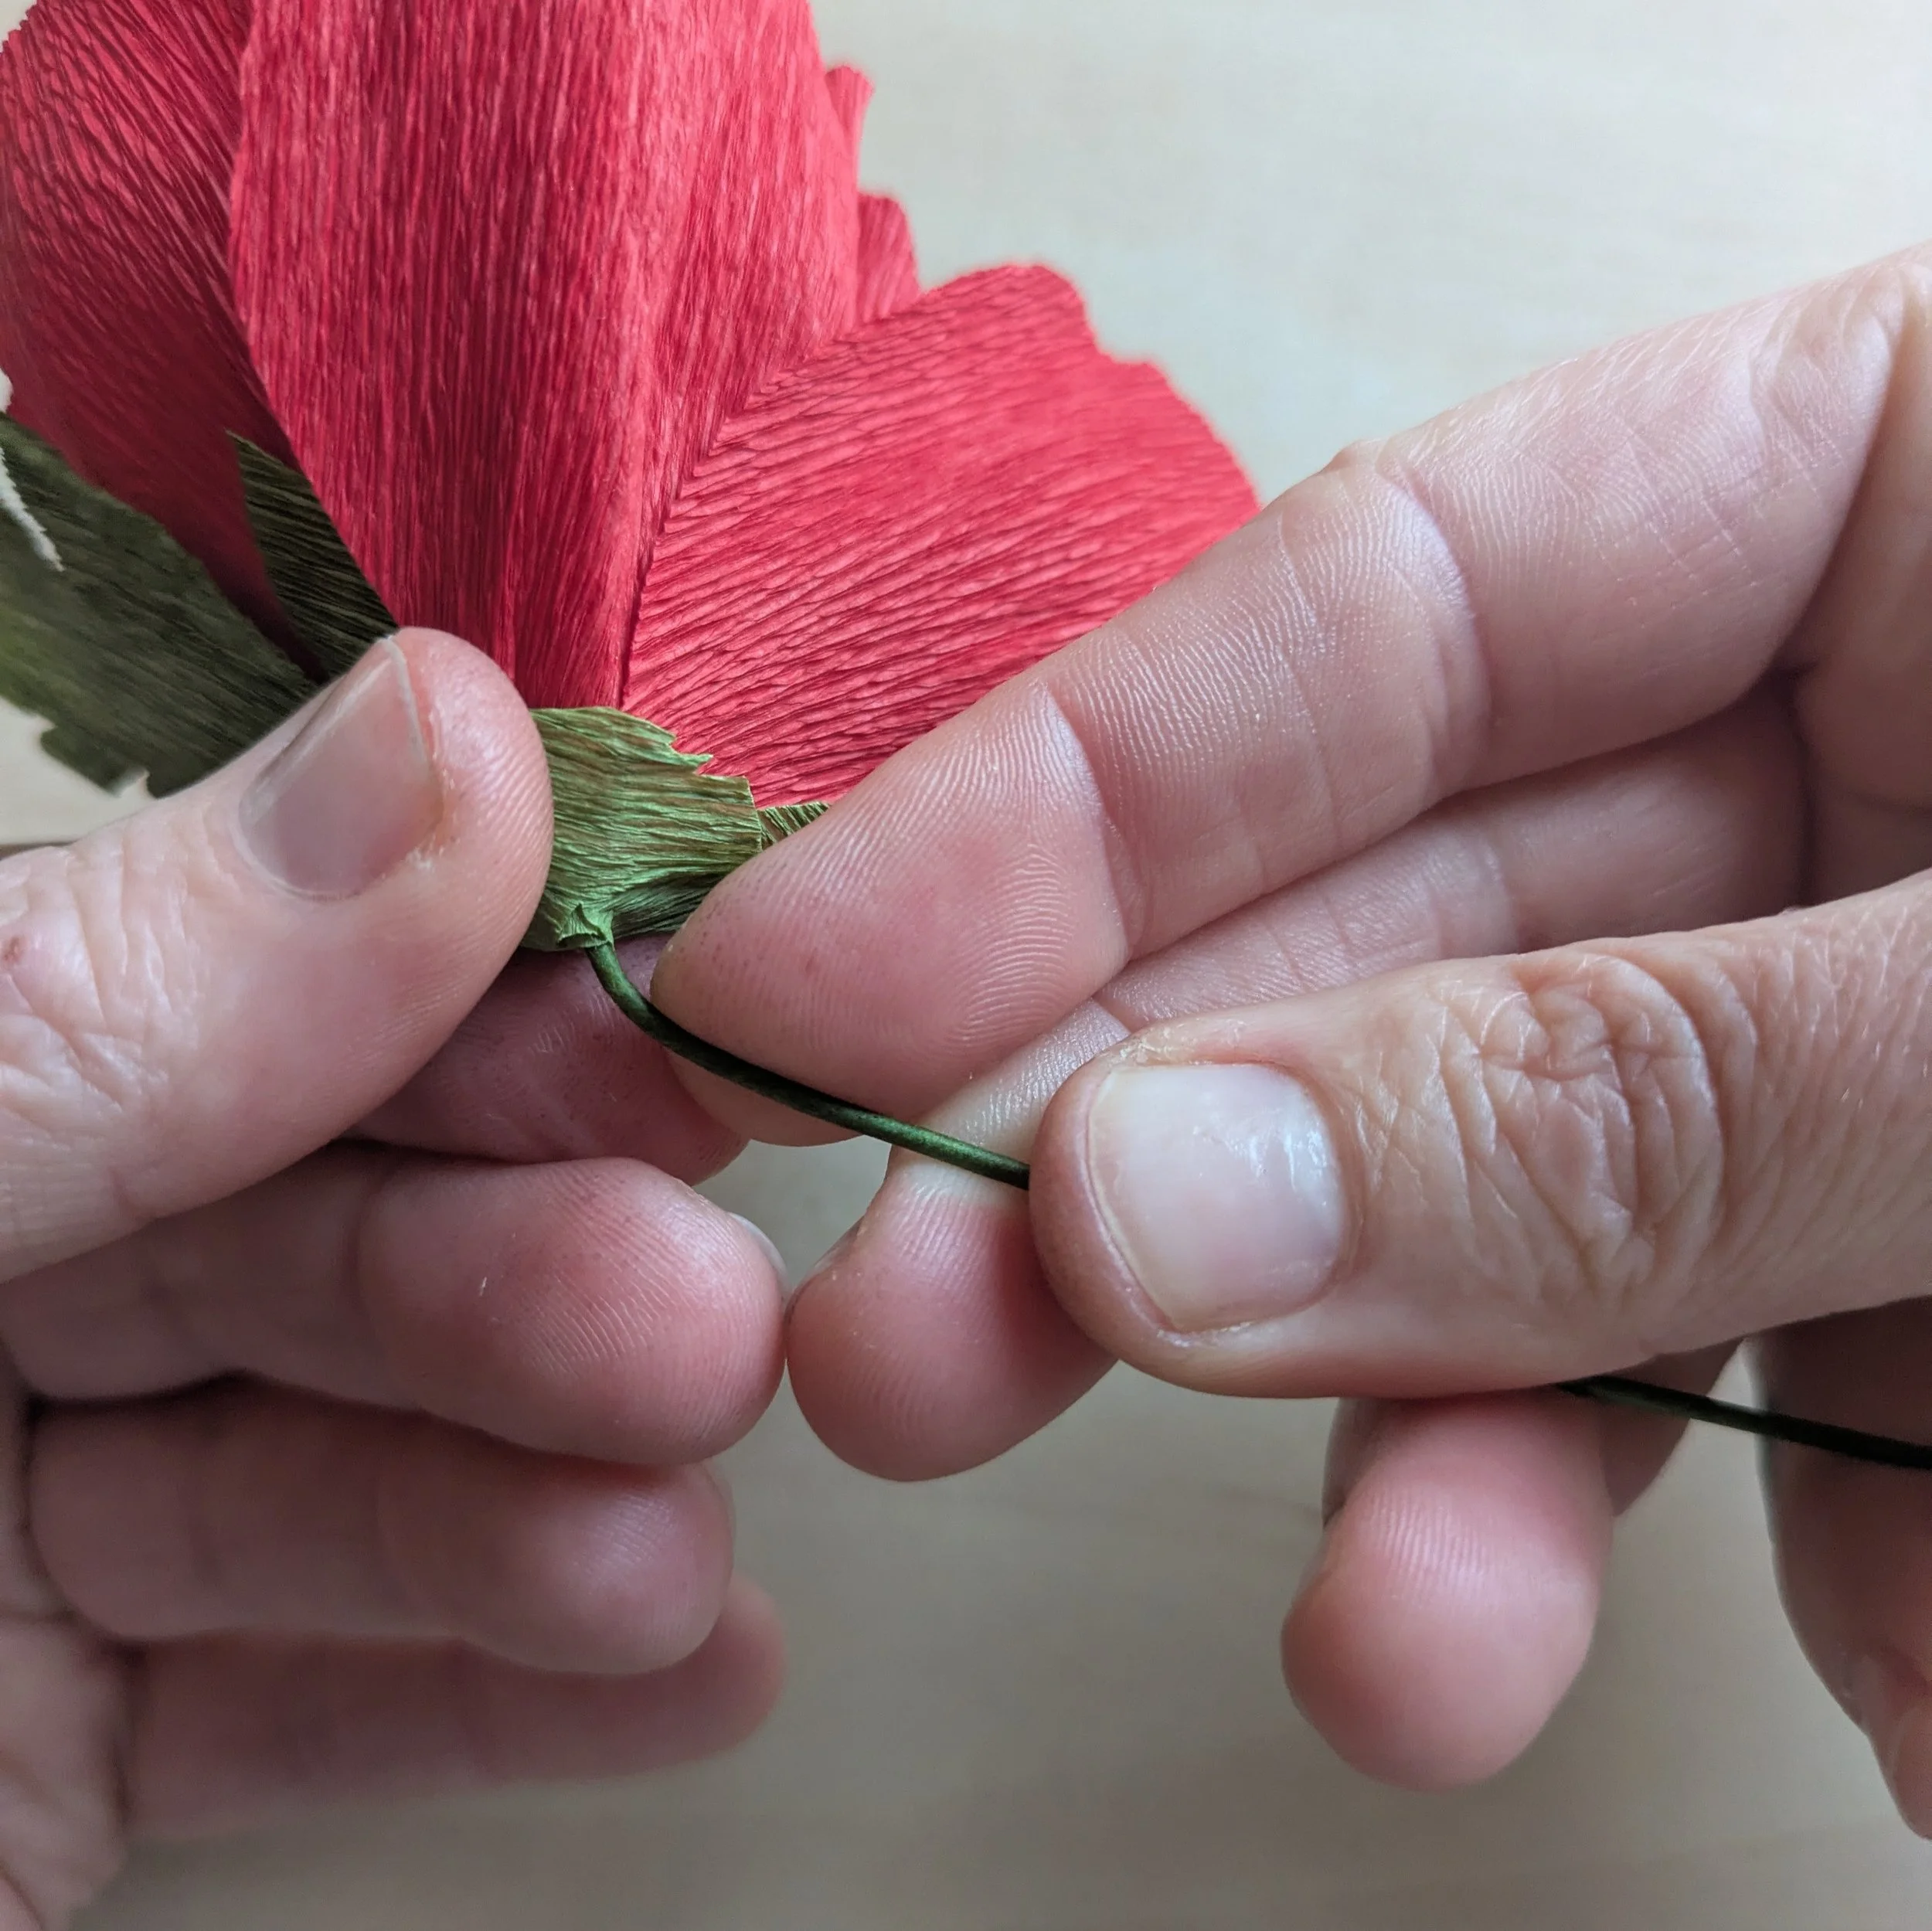
Remove the white backing from the tape strip on the small piece of green crepe paper and slide it up the stem wire. Gently press the base base so that it adheres to the flower.
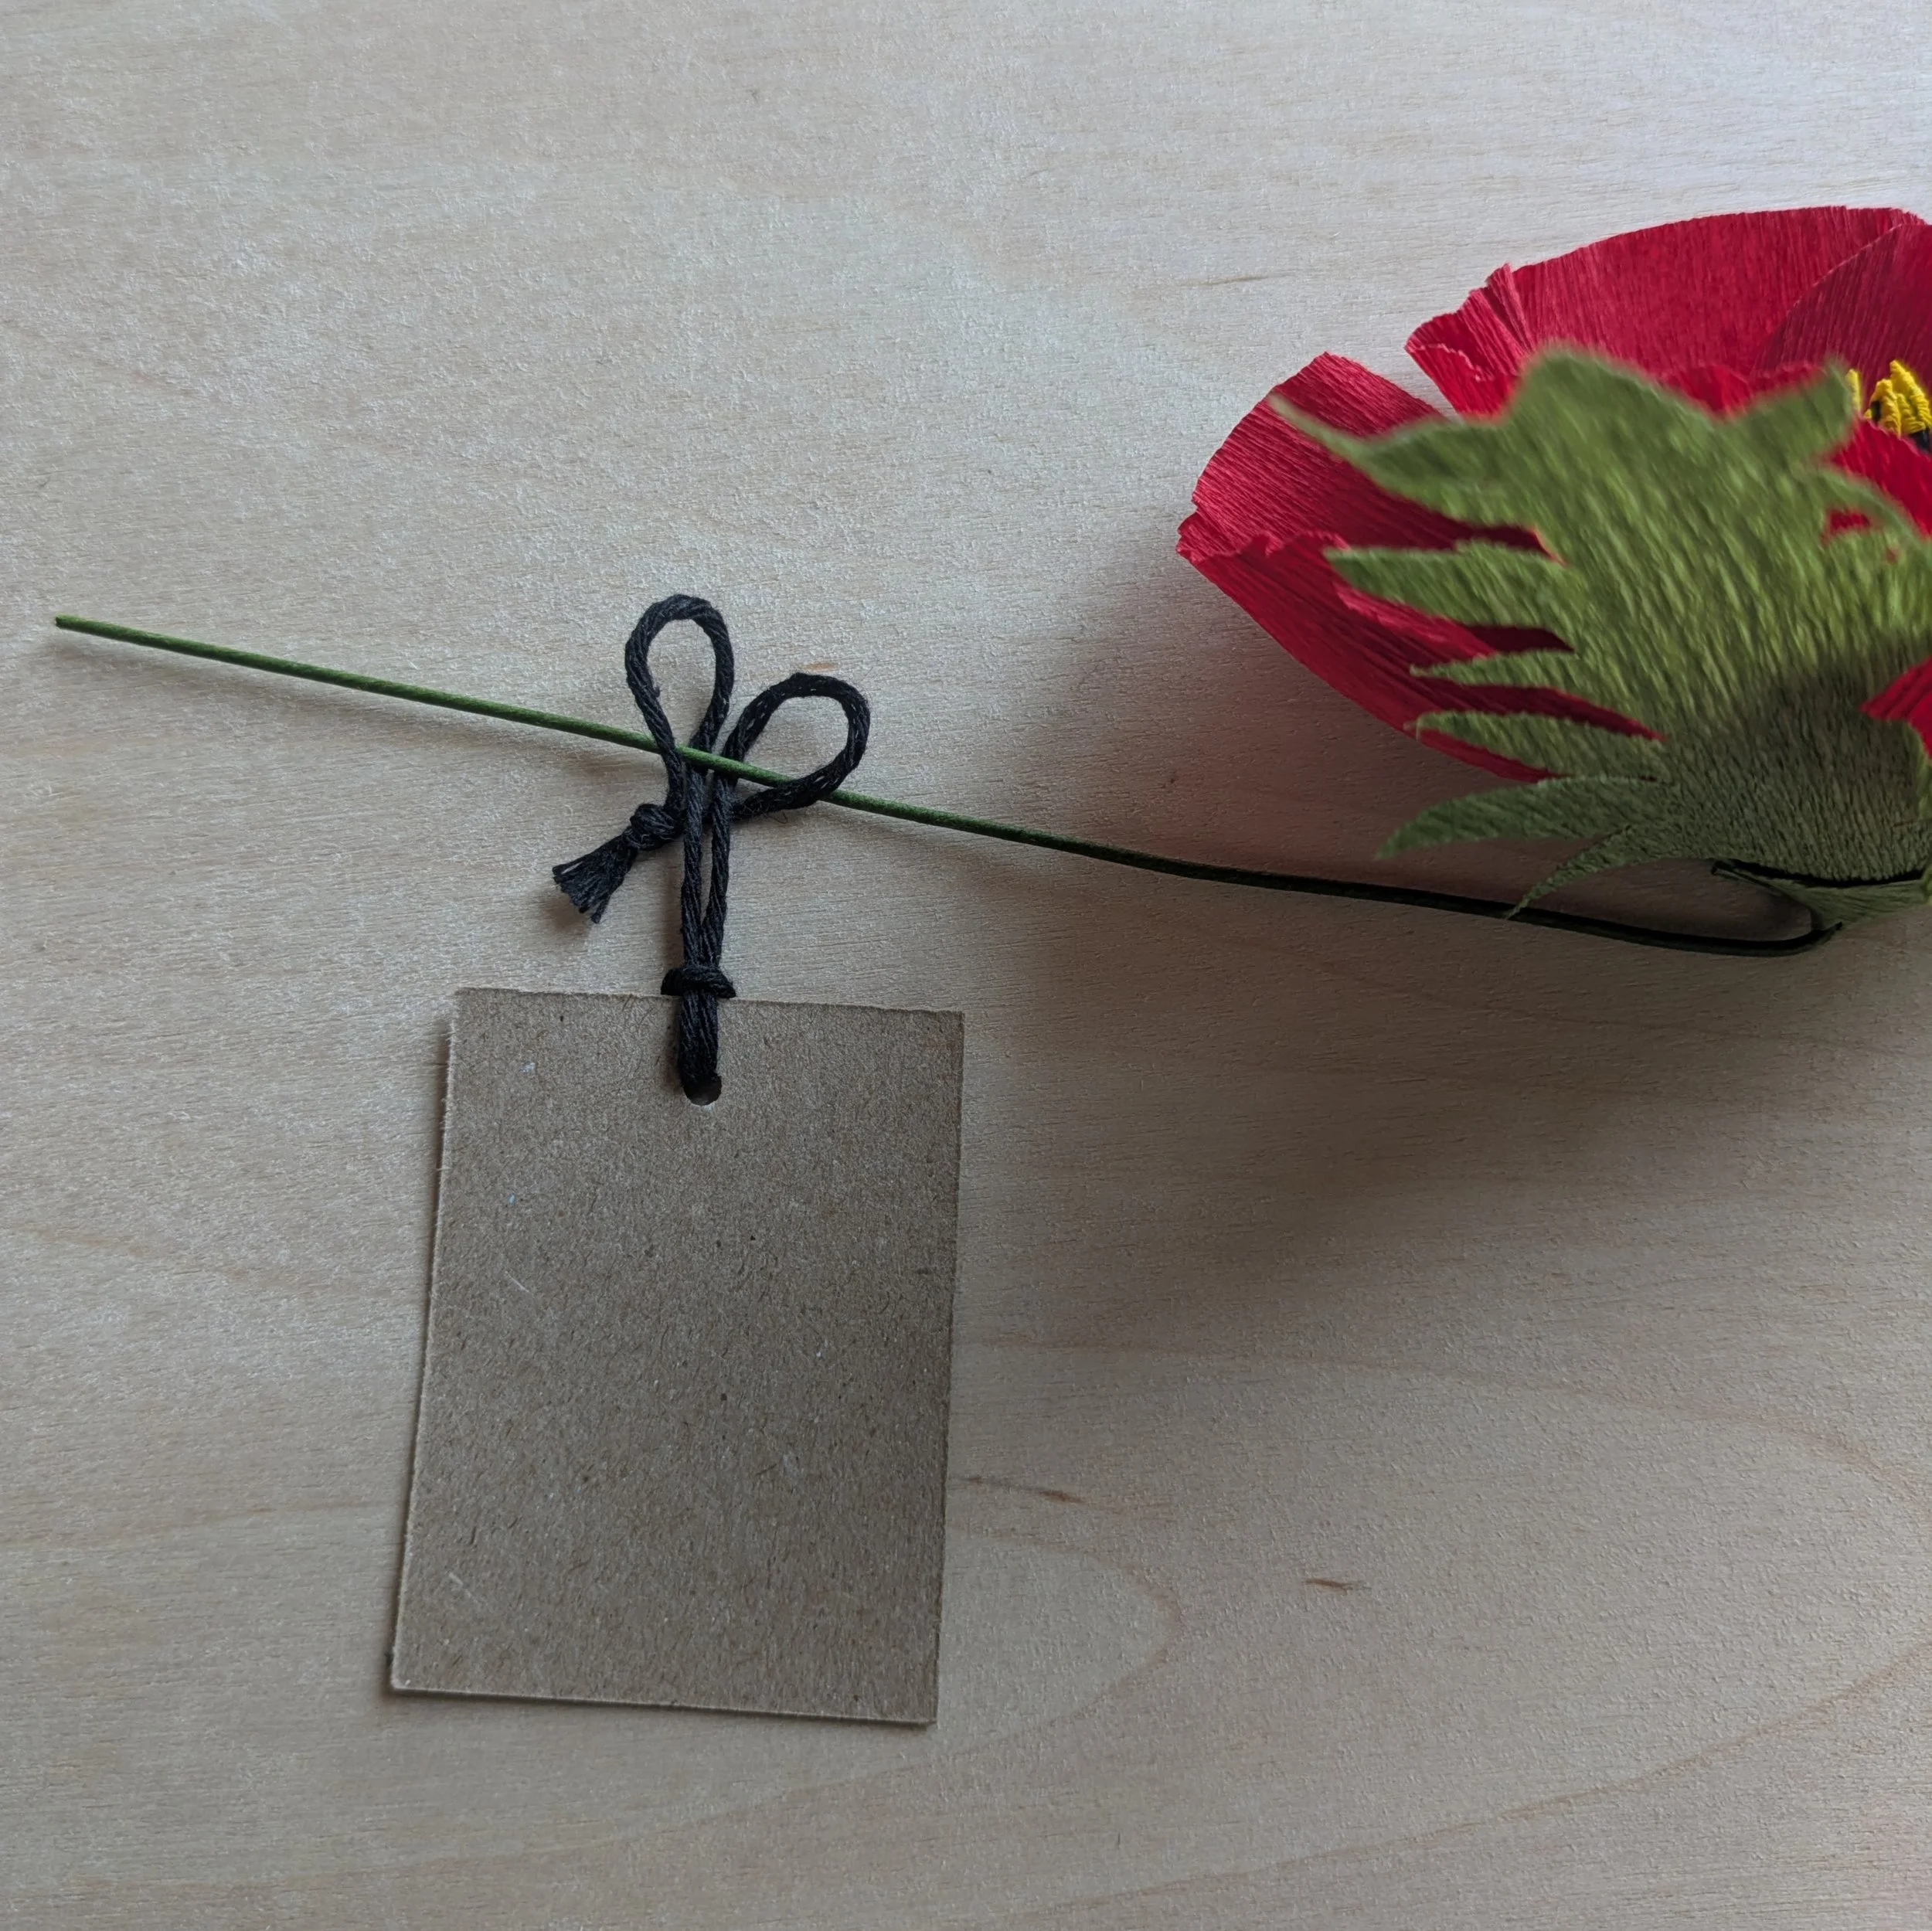
Place your finger or a pair of needle nose pliers just below the base of the flower and bend the wire into a 90-degree angle. This will allow you to easily attach the flower to the top of your gift.
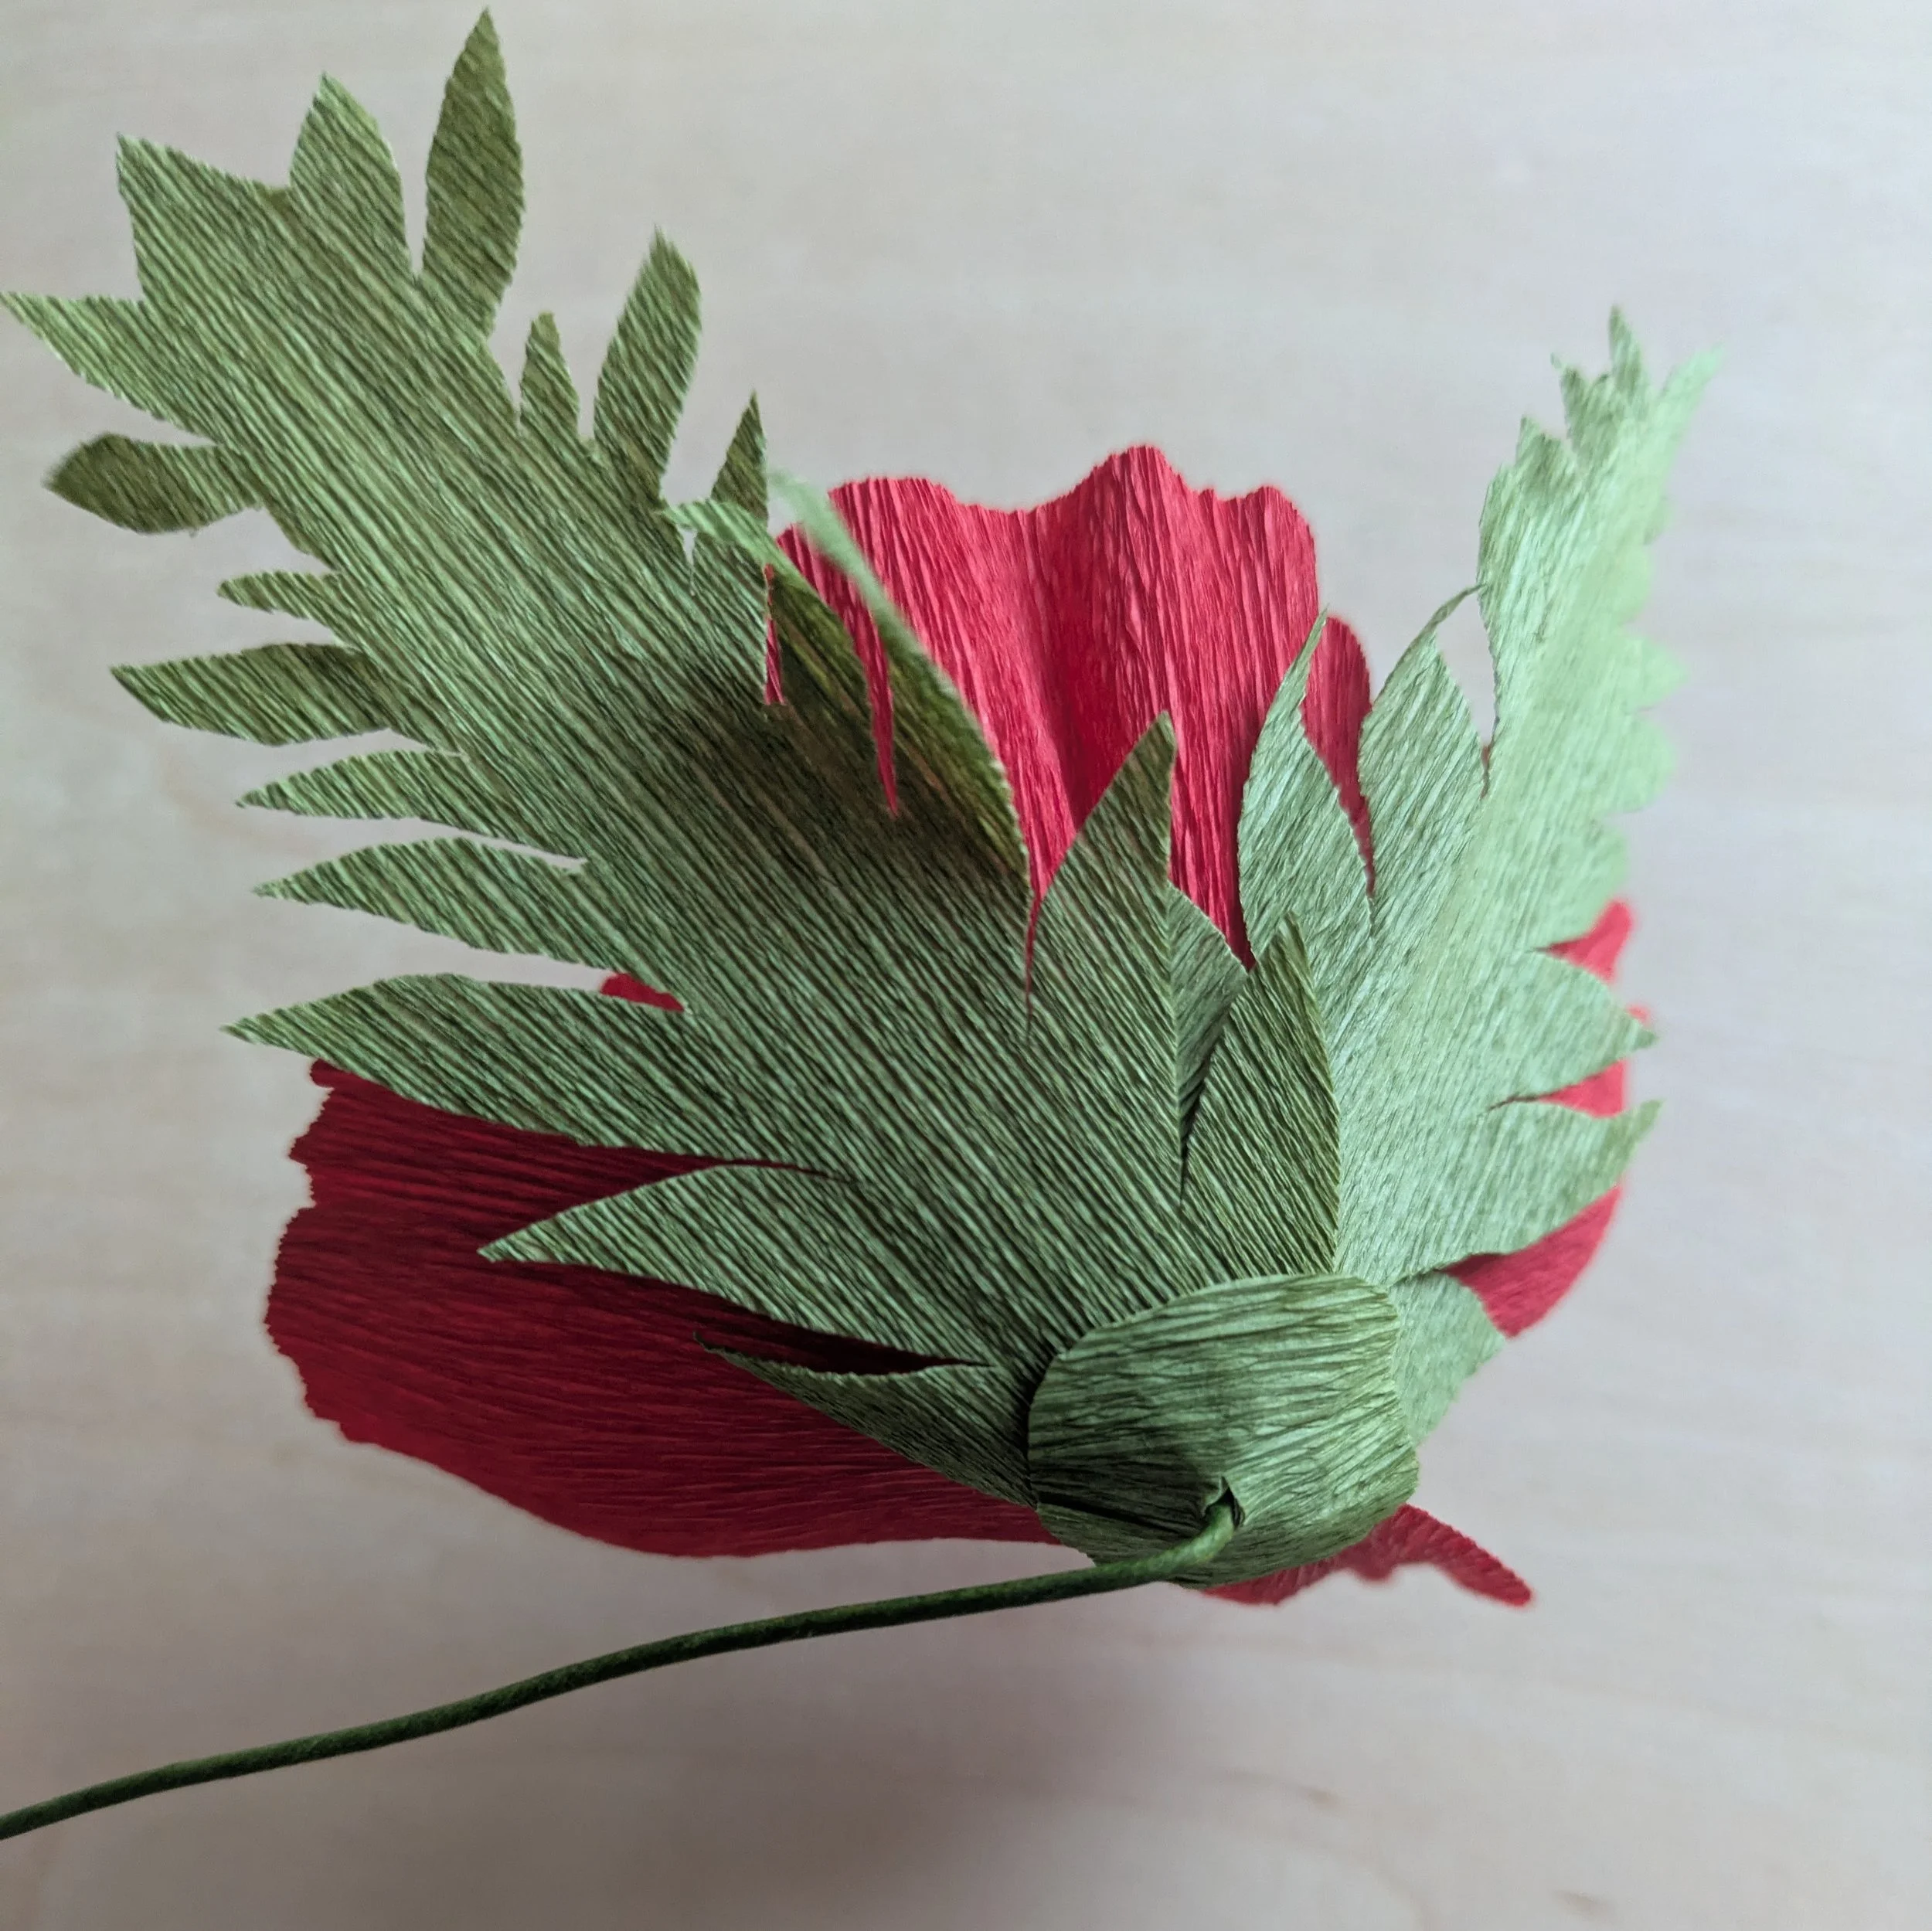
This is what the bottom of your flower will look like. Cute!
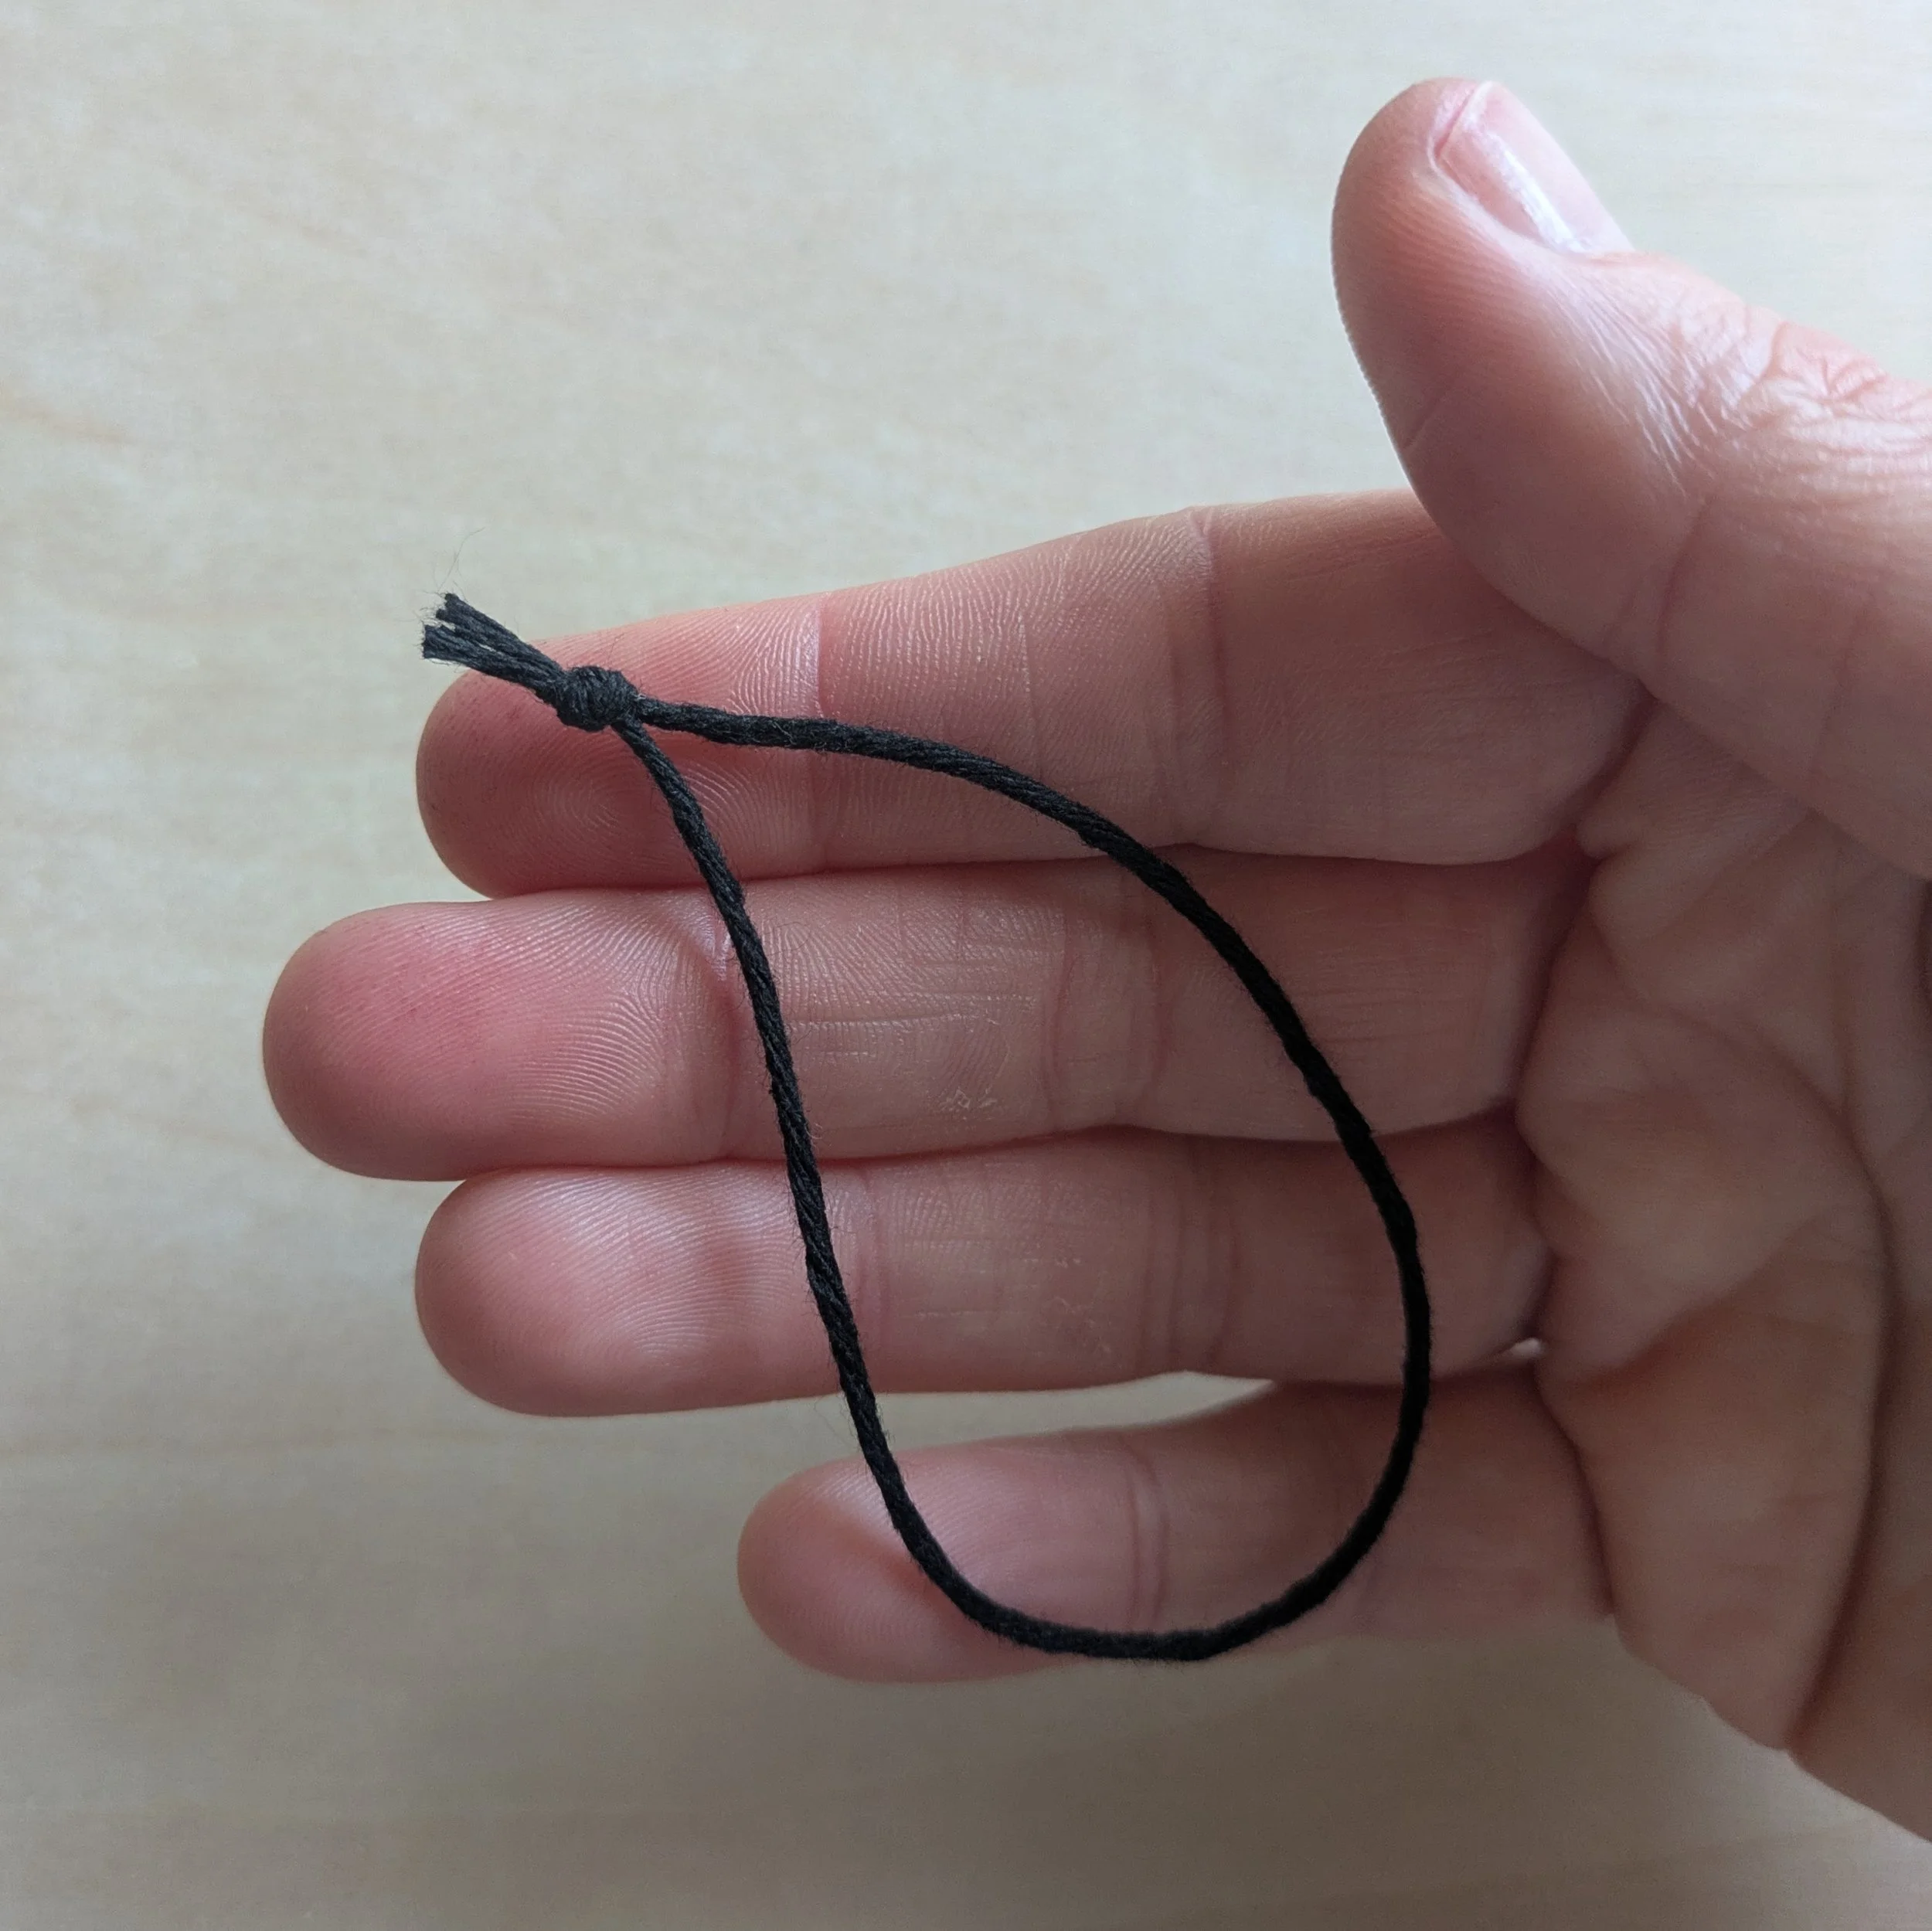
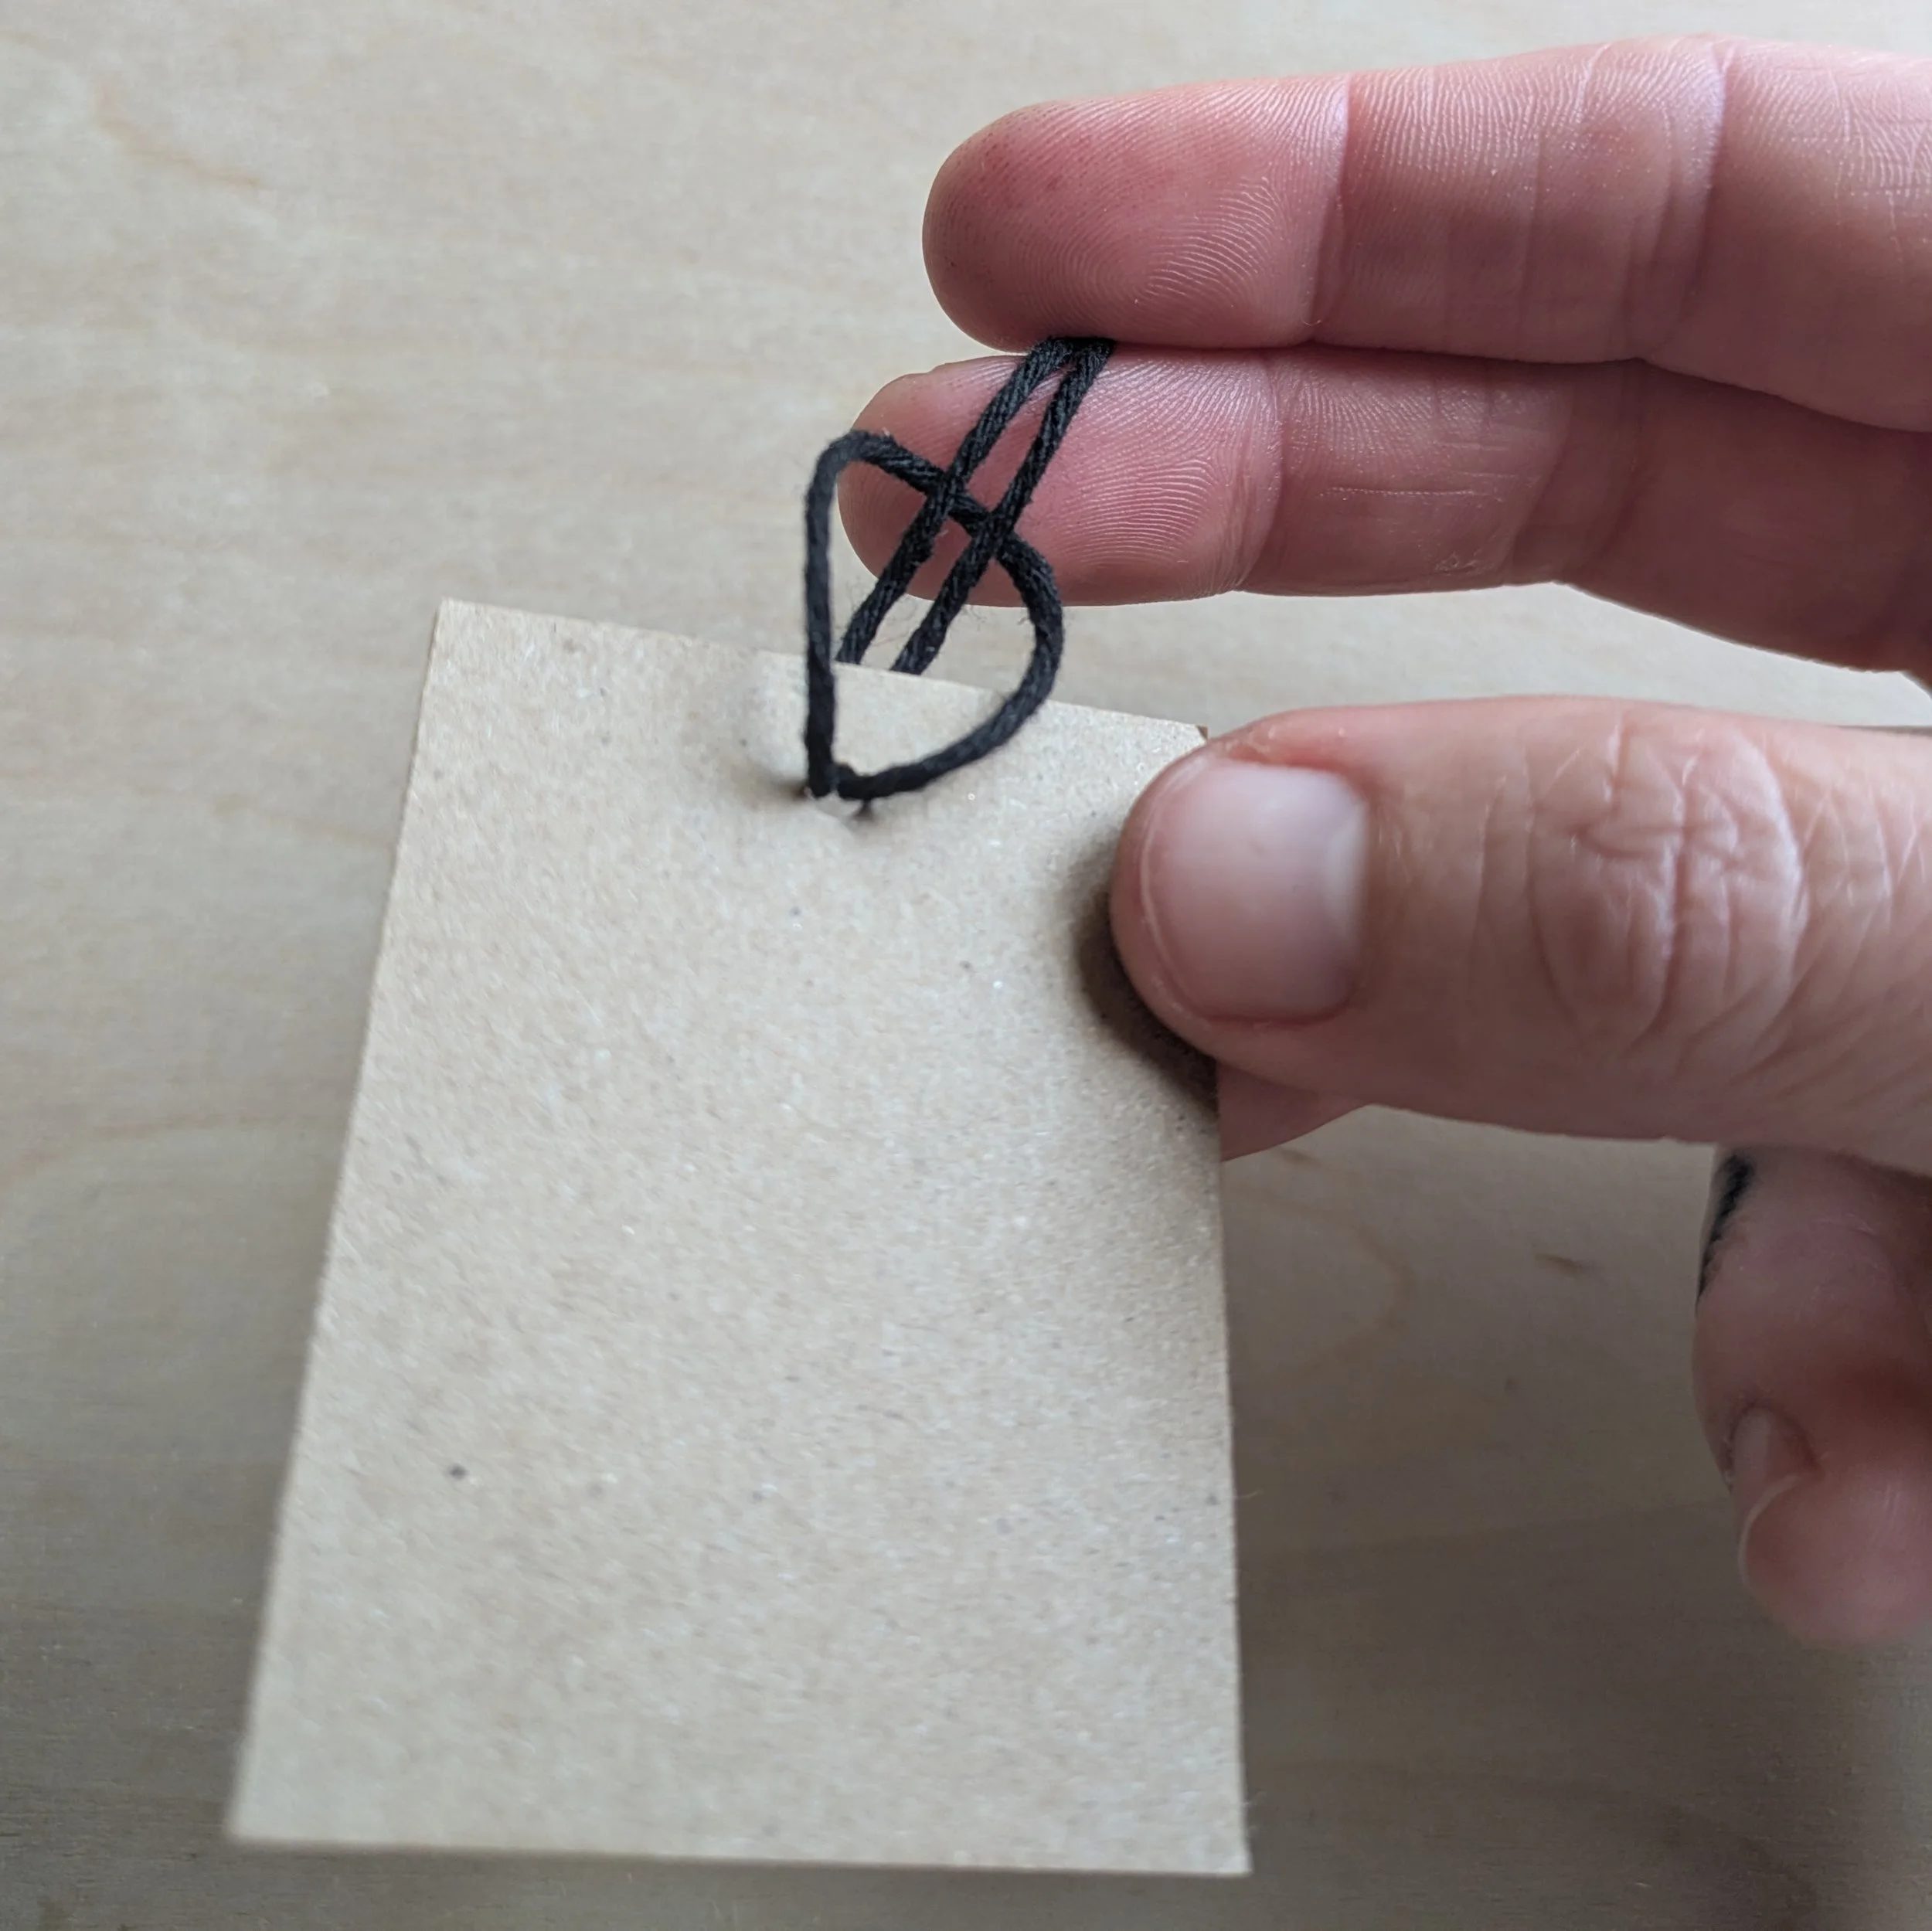
Find your piece of string and make a knot with the two ends so that it is a loop.
Step 9: Create and attach your gift tag
ind your gift tag and slide the unknotted side of the string through the small hole. Then pull the knotted end of the string through the loop you created on the other side of the hole.
Attach the tag to the flower, either by simply putting the stem wire through the looped string, or by making the same type of knot you did in the previous step.
Use stamps or a pen to write a message on your tag.
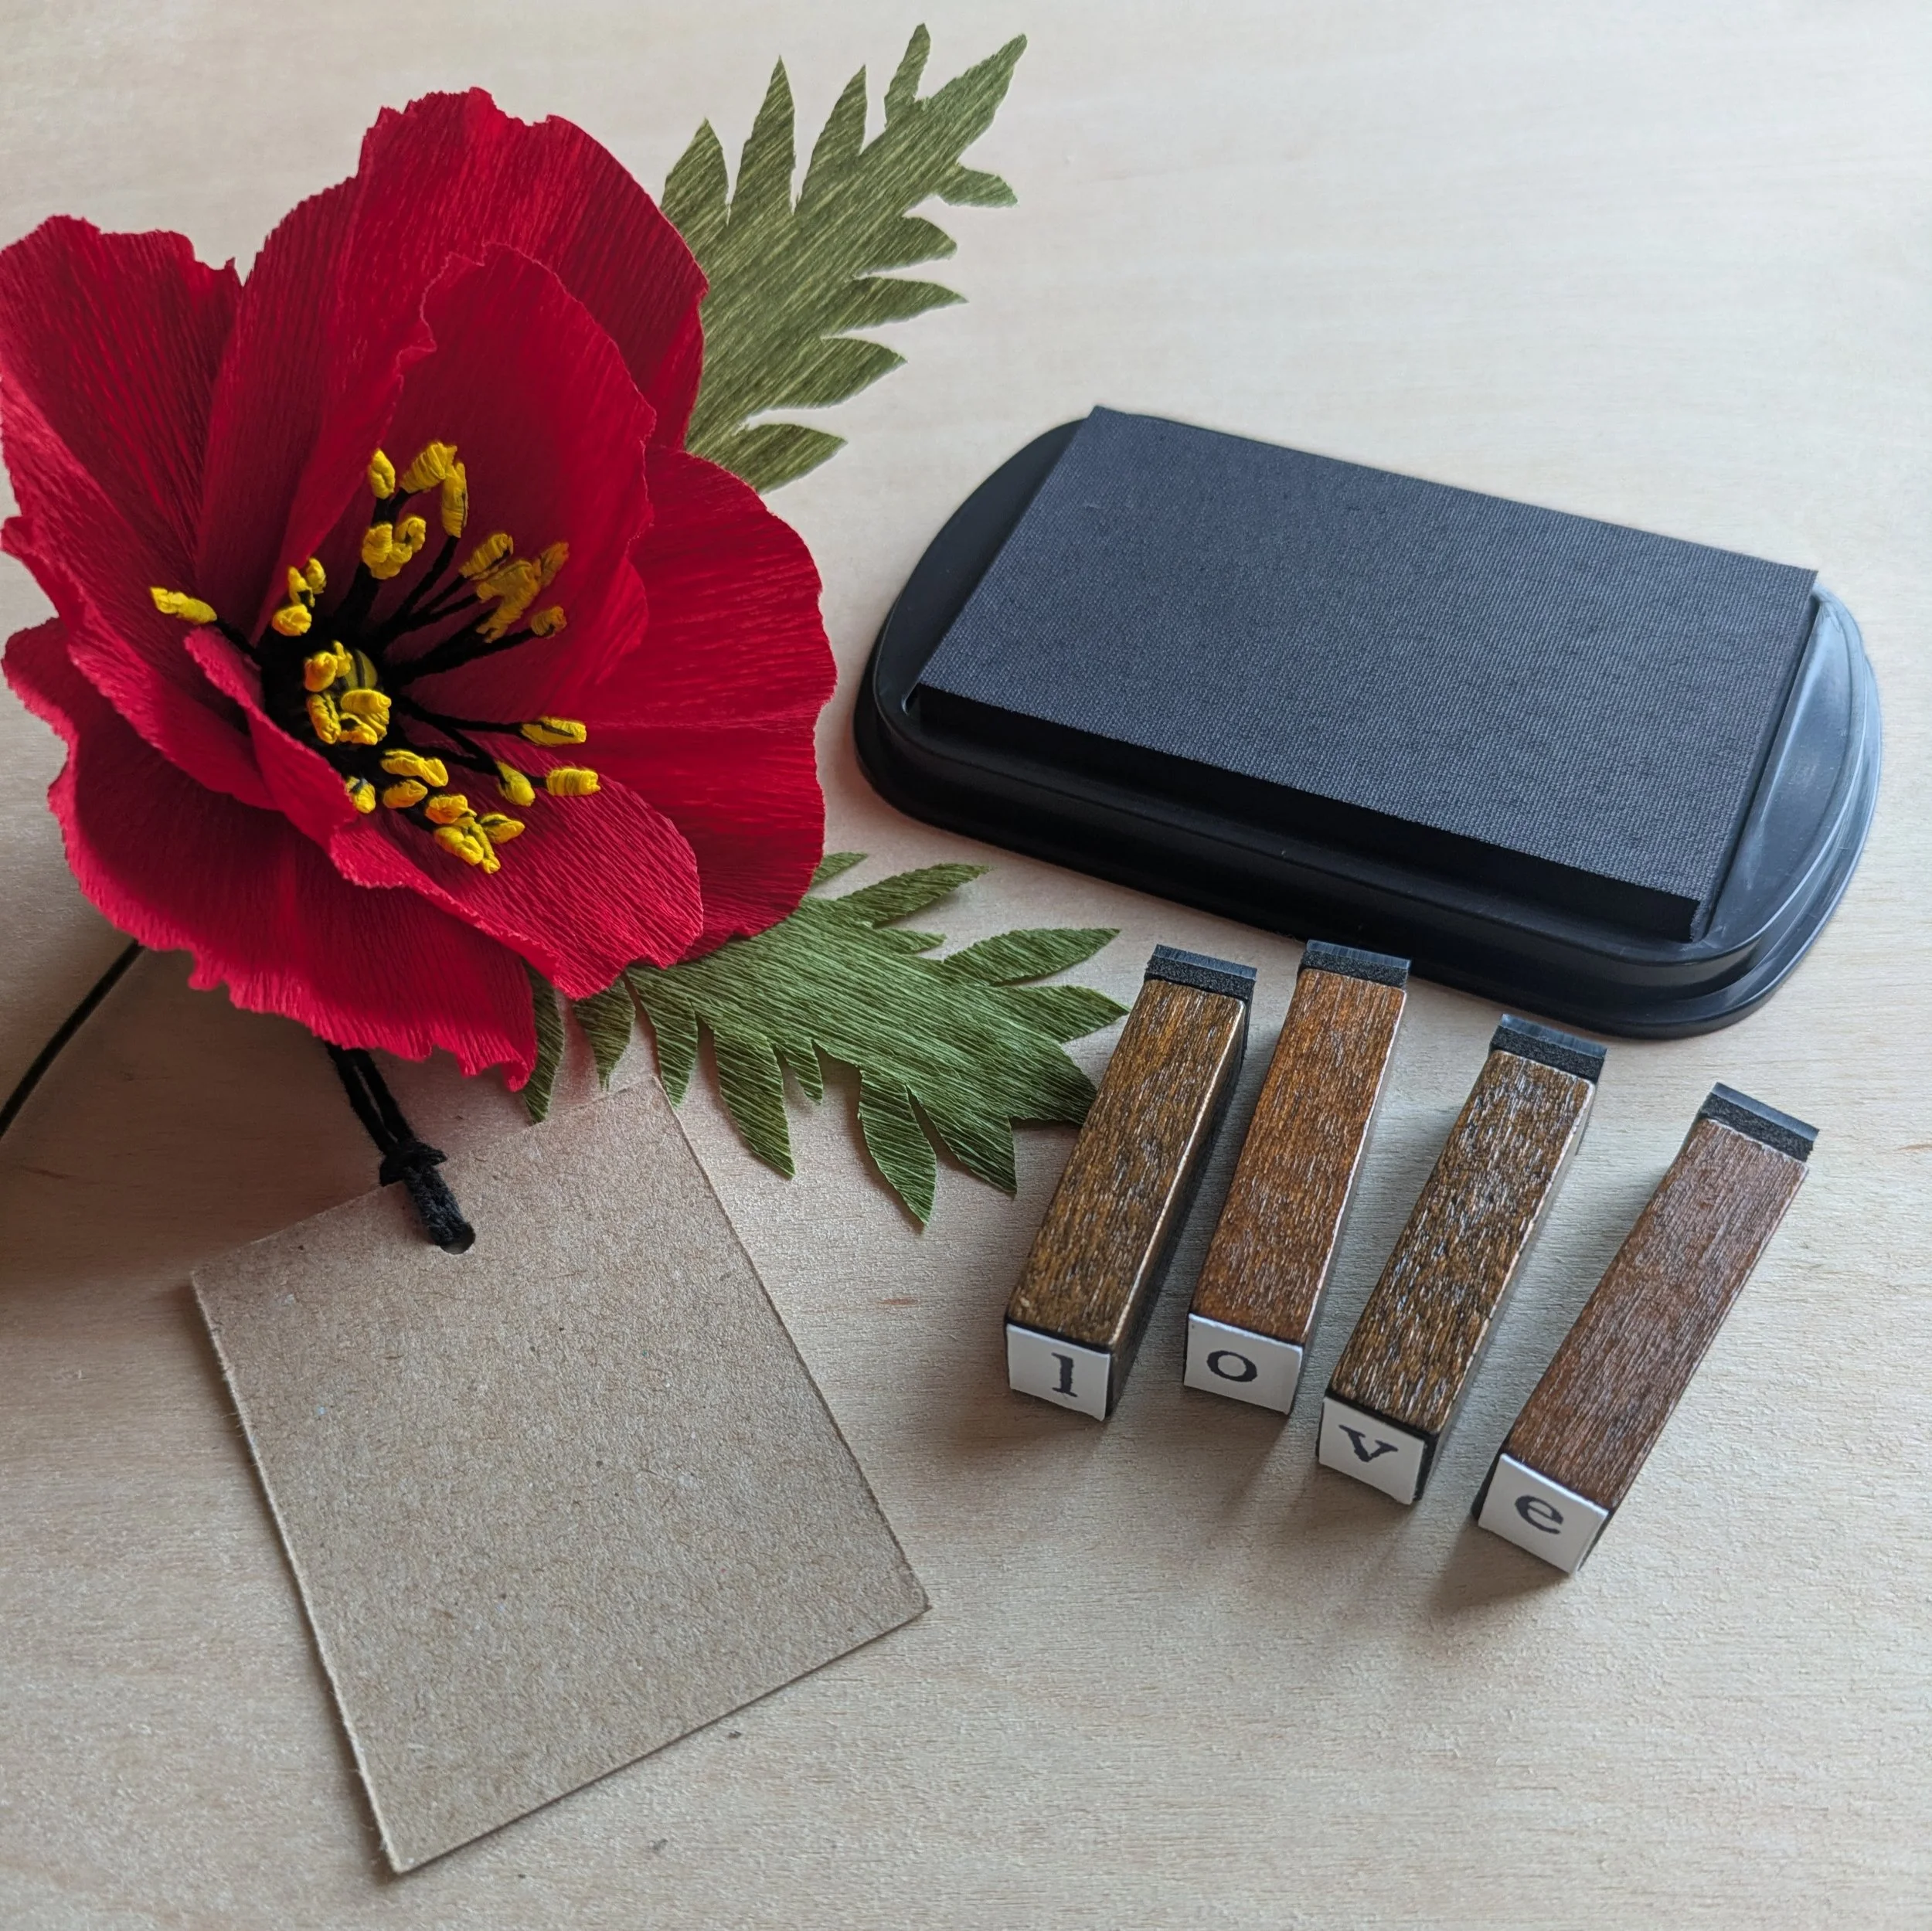
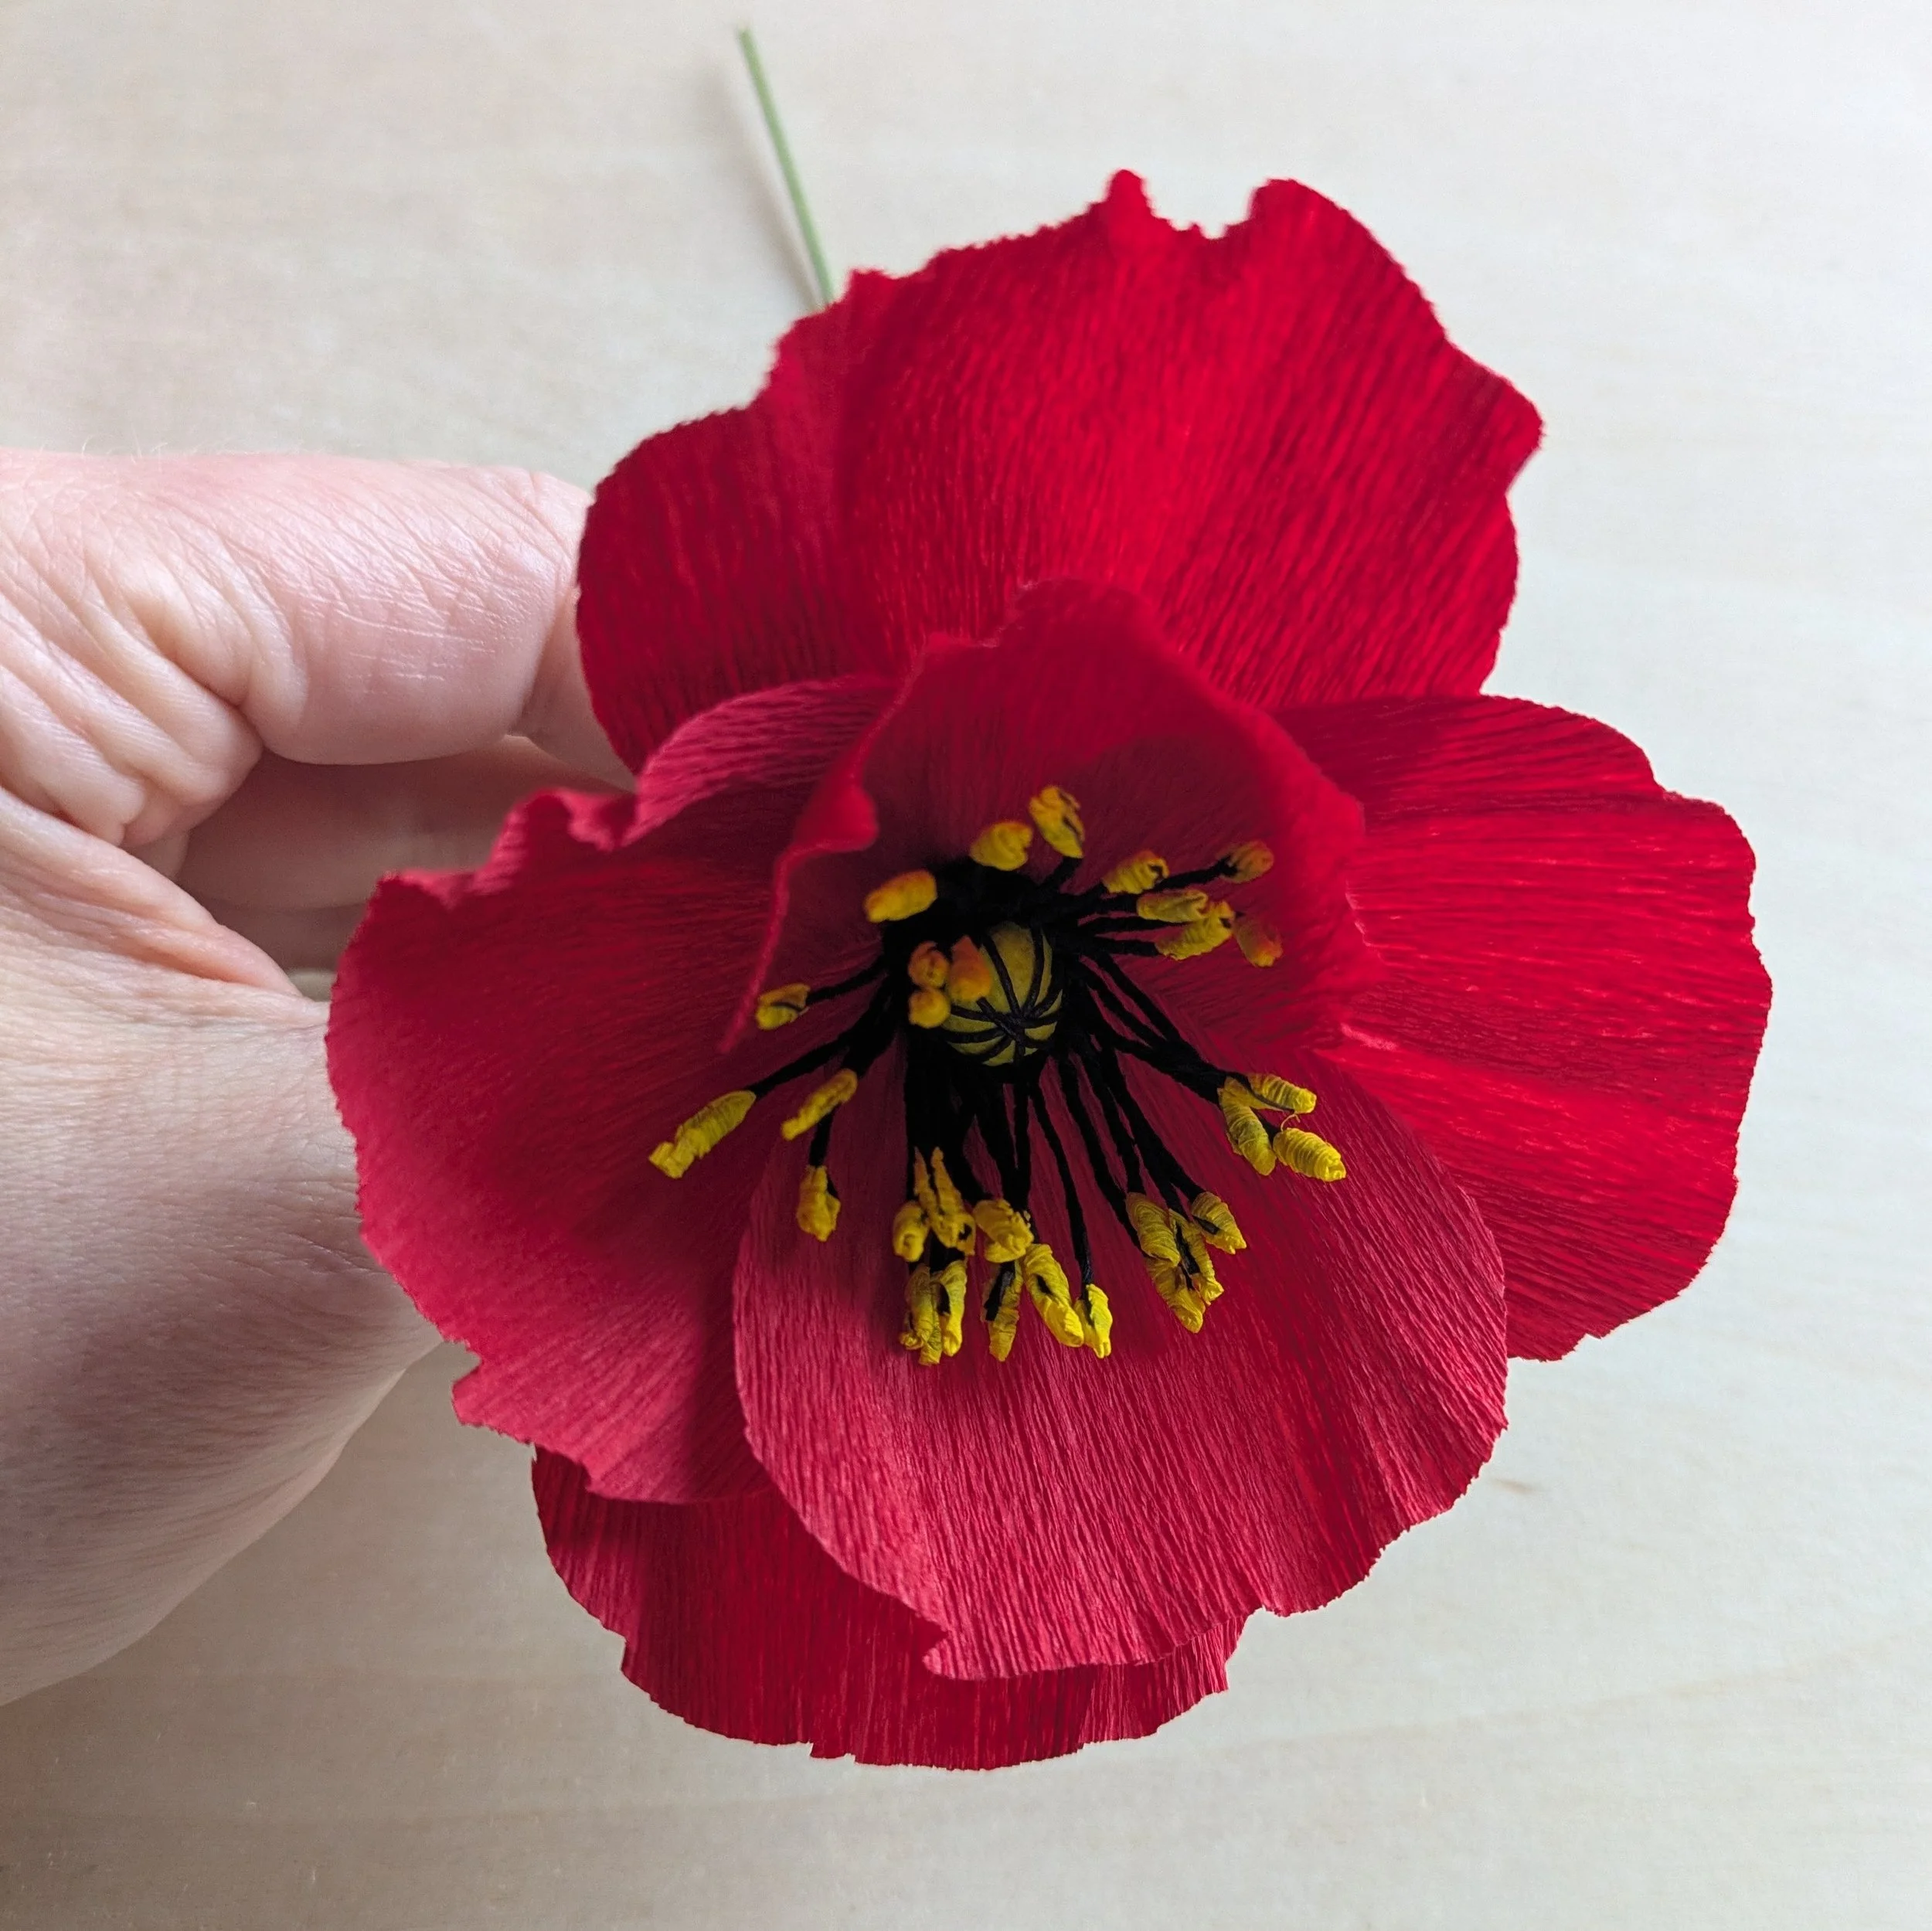
Look at the beautiful object you just constructed!
Attach it to a gift for someone you love!
Brag to your friends about what a creative genius you are!
Step 10: Admire your work!